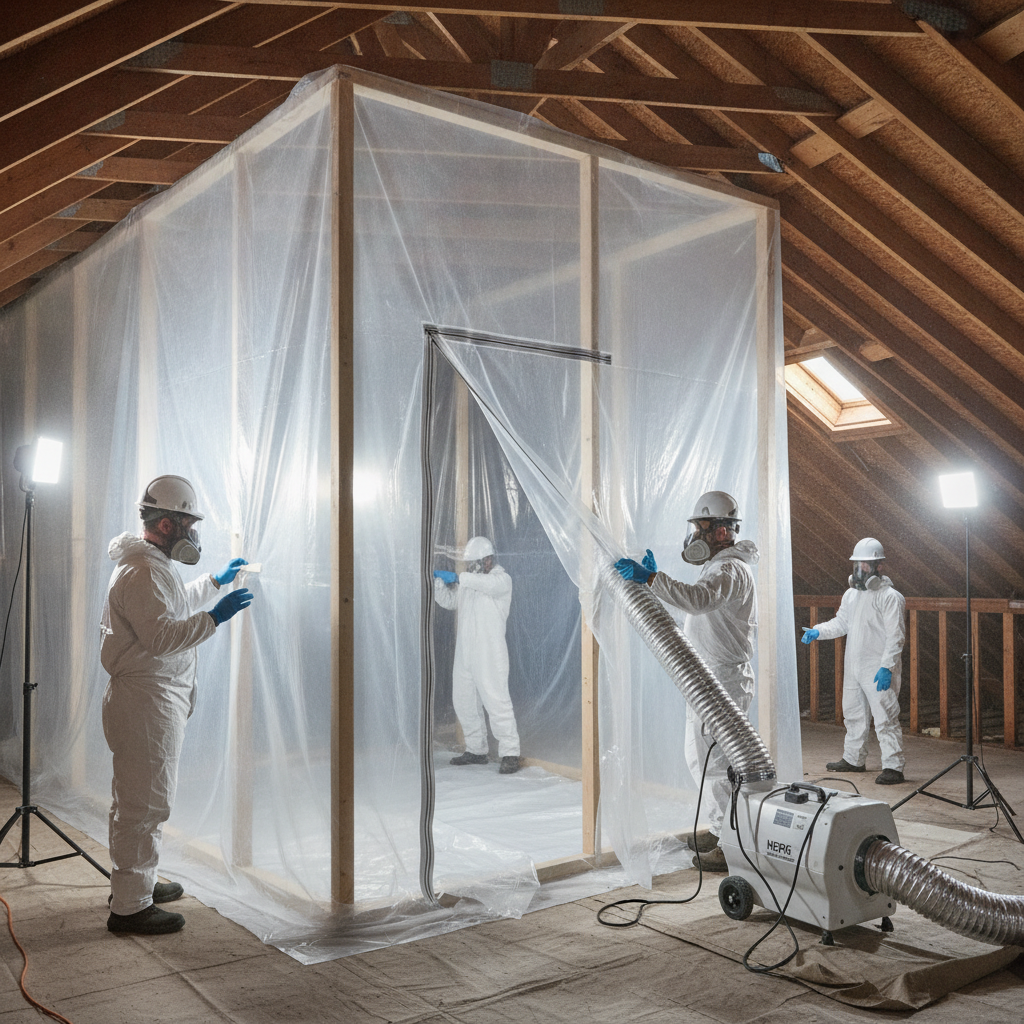
To remove the mold safely, start with a sealed containment, negative air, and HEPA filtration, then physically clean or discard affected materials before applying EPA-approved antimicrobials and verifying dryness. At Asmmoldremoval in Scarborough (1225 Kennedy Rd), we follow this protocol so you can remove the mold quickly without spreading spores.
By Amardeep Mamidi — ASM Mold Removal Inc. | Last updated: 2026-06-09
Quick Summary and Table of Contents
Mold removal is a structured process: assess moisture, contain the area, create negative pressure, capture spores with HEPA, remove or clean contaminated materials, apply EPA-approved treatments, and confirm drying and clearance. Use protective equipment, document each step, and prioritize prevention so mold doesn’t return.
Here’s what you’ll learn and how to use this guide today.
- What mold removal means and how it protects your home’s structure and indoor air
- Why fast action matters and how to spot the real moisture source
- Exact steps professionals use to safely remove the mold without cross-contamination
- Best practices for attics, basements, crawl spaces, HVAC, and black mold
- Tools we rely on: HEPA air scrubbers, moisture meters, thermal imaging, and more
- Real Ontario case snapshots with prevention plans you can apply
- Book a free inspection and moisture assessment through our Ontario same-day service
- Learn about our credentials and process on the About page
- Ready now? Schedule your inspection in minutes
What Is Mold Removal?
Mold removal is the controlled elimination of visible growth and hidden spores from indoor environments. It combines containment, negative air, HEPA filtration, physical removal or cleaning, antimicrobial treatments, and moisture correction to prevent regrowth. The objective is verified dryness and safe air, documented for your records.
Mold removal is not just “wiping stains.” It’s a defined remediation workflow designed to fix the cause and restore healthy indoor conditions. We tie every cleanup to moisture correction. If materials remain wet, mold can rebound even after thorough cleaning.
- Containment first: Poly sheeting and zip doors prevent spore drift.
- Negative pressure: Maintain roughly 5–15 pascals to keep particles inside.
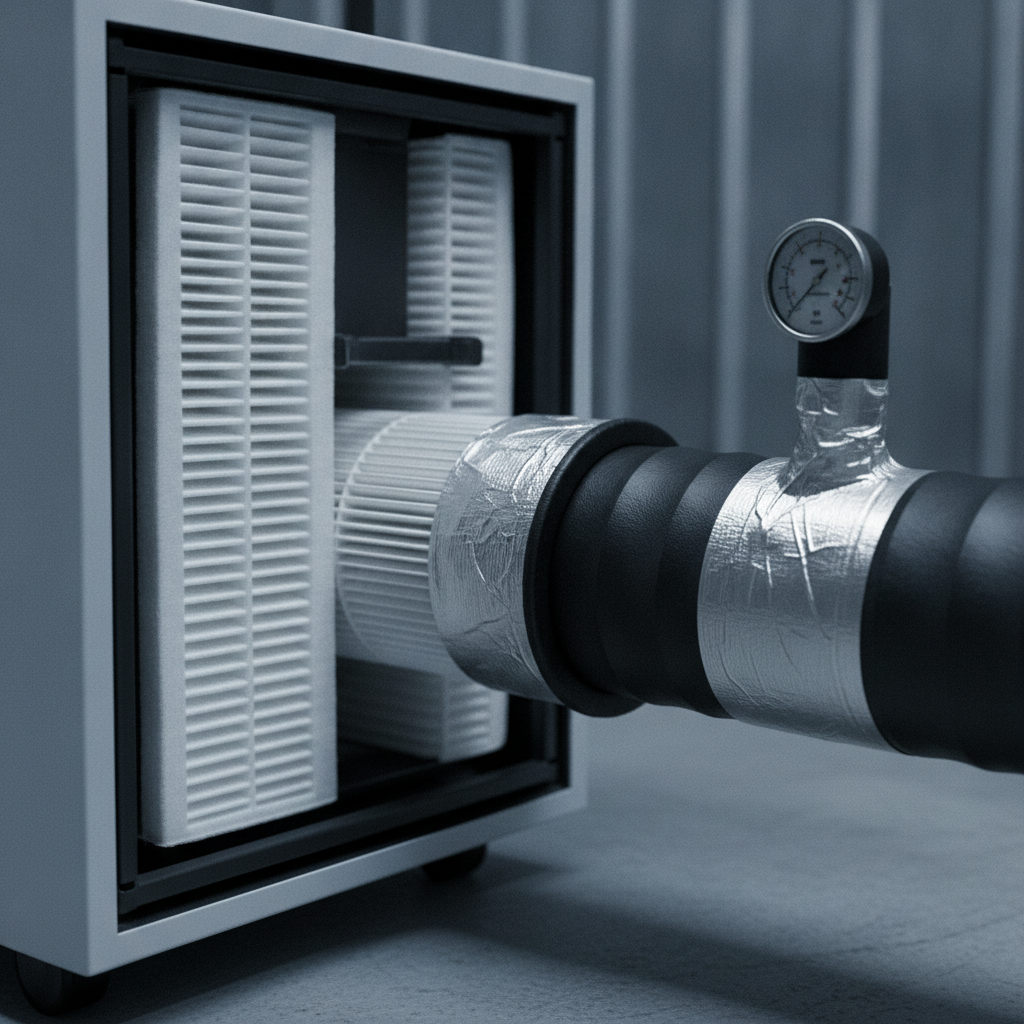
- HEPA filtration: True HEPA captures 99.97% of 0.3-micron particles.
- Source removal: Clean or discard contaminated materials per industry guidance.
- Moisture metrics: Wood near or below ~16% and drywall back to normal EMC before rebuild.
- Verification: Visual, moisture readings, and optional post-remediation air testing.
Because ASM Mold Removal Inc. provides end-to-end service across Ontario, we can pair remediation with repairs—insulation replacement, ventilation upgrades, and leak fixes—so you don’t see the same growth twice.
Why Mold Removal Matters (Health, Structure, and Real Estate)
Mold removal protects respiratory health, preserves building materials, and keeps real estate transactions on track. Left alone, moisture and spores spread, degrading drywall, wood, and insulation. Fast, documented remediation lowers occupant risk and avoids delays during inspections and closings.
Here’s why this matters for homeowners, buyers, sellers, agents, and facility managers.
- Indoor air quality: Elevated spores aggravate allergies and sensitivities. HEPA air cleaning and source removal reduce exposure.
- Structural integrity: Ongoing moisture rots framing, delaminates subfloors, and damages insulation R‑value.
- Transaction confidence: Our Mold Remediation Warranty Certificate and documentation help satisfy buyer requirements and lender conditions.
- Insurance and liability: Water events require timely action to prevent secondary damage and disputes over maintenance.
- Operational uptime: For offices, retail, schools, and healthcare, planned containment allows partial occupancy and quicker reopen.
In our experience across Ontario homes and businesses, the fastest path back to normal is a same‑day assessment, immediate containment, and a clear moisture correction plan. That’s why we offer Ontario‑wide rapid response and free inspections.
How Mold Removal Works: Step-by-Step
Effective mold remediation follows a repeatable sequence: inspect and measure moisture, isolate the area, run negative air and HEPA scrubbing, remove or clean affected materials, treat surfaces, dry to target levels, then confirm clearance. Documentation and prevention upgrades lock in the results.
- Initial inspection and measurements
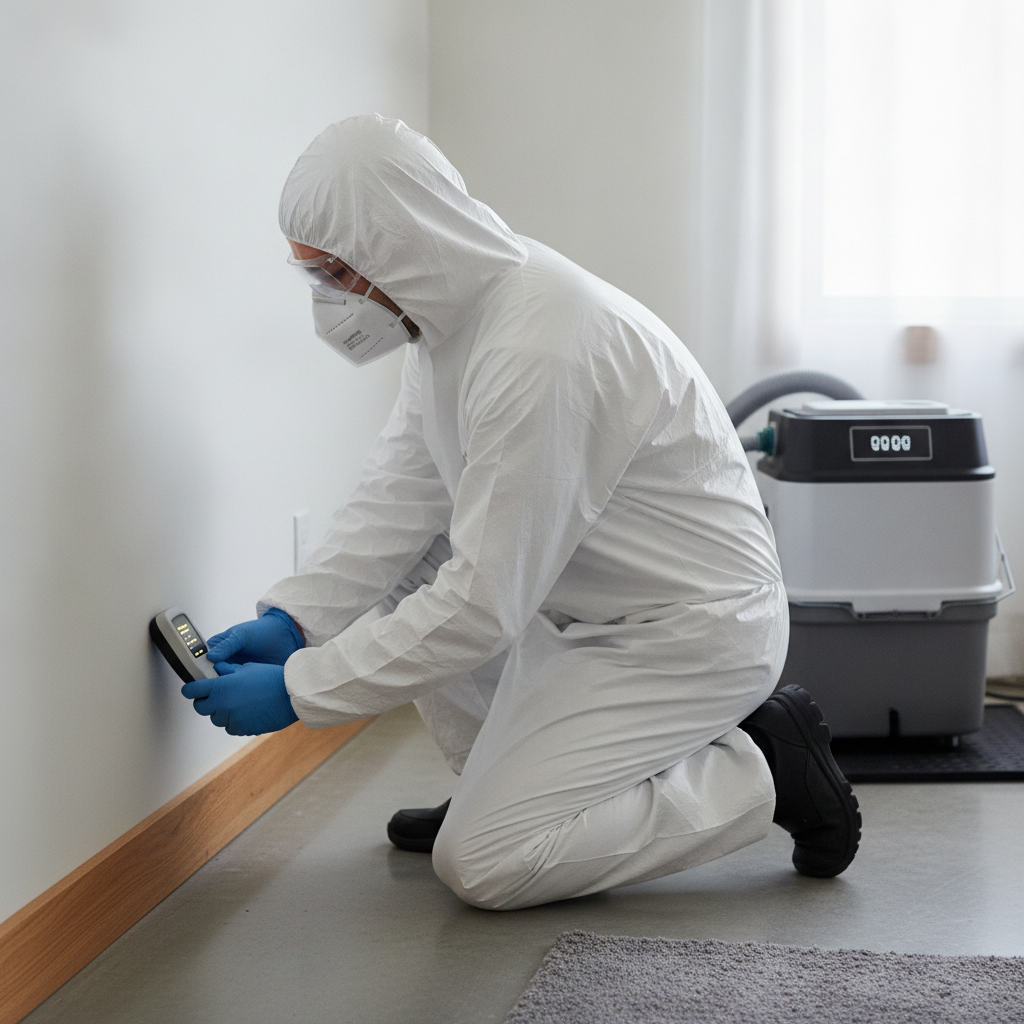
- Moisture mapping with pin/pinless meters and thermal imaging to find hidden wet spots.
- Optional air/surface sampling to establish a baseline and target zones.
- Containment and negative pressure
- Poly barriers with a zip entry; pressure differential at ~5–15 Pa measured by manometer.
- HEPA air scrubbers sized for 4–6 air changes per hour inside containment.
- Source removal and cleaning
- Discard unsalvageable drywall, carpet, and porous insulation with visible growth.
- HEPA vacuum, damp-wipe, and detail-clean all remaining surfaces (framing, sheathing, subfloors).
- Antimicrobial and stain treatment
- Apply EPA-approved products appropriate for material type and exposure.
- Use controlled agitation and dwell times; avoid fogging without source removal.
- Drying and verification
- Dehumidifiers and airflow achieve wood ~12–16% and drywall within normal EMC.
- Optional post-remediation testing and visual checks confirm results before rebuild.
- Prevention and rebuild
- Fix leaks, add ventilation, replace attic insulation as needed, and seal air pathways.
- Provide a prevention plan and documentation package (photos, readings, warranty certificate).
If you prefer a professional to remove the mold end-to-end, our Ontario remediation team can mobilize quickly, contain the area, and keep your family or staff safe while work proceeds.
Mold Removal in Scarborough, ON: Local Climate and Building Factors
Scarborough, ON homes often see attic and basement mold from humid summers, freeze–thaw roof stress, and tight building envelopes. Prioritize attic ventilation and basement dehumidification. For nearby properties, a same‑day inspection prevents spread and documents moisture corrections for long‑term protection.
Neighborhood-level factors influence how you remove the mold and keep it gone.
- Seasonal humidity swings: Summer dew points and winter stack effect push moisture into attics and lower levels.
- Ventilation imbalances: Blocked soffits, undersized ridge vents, or bath fans venting into attics are frequent culprits.
- Basement moisture: Cold walls, limited airflow, and slab edges concentrate condensation without consistent dehumidification.
We tune each remediation to the property: attic baffle upgrades, new bath fan ducting to exterior, sump and drainage checks, or crawl space encapsulation. These fixes are what stop reoccurrence.
Local considerations for Scarborough
- Schedule attic inspections after major thaws or heavy summer storms; small roof leaks often surface as attic staining weeks later.
- Run a dedicated dehumidifier May–September to hold basement RH near 45–50% during peak humidity.
- When renovating, ventilate work zones and stage sealed debris removal to avoid spreading dust and spores through shared hallways.
Types, Rooms, and Surfaces: Where Mold Thrives and How We Treat It
Mold favors damp, stagnant areas like attics, basements, crawl spaces, bathrooms, and HVAC systems. Treatment pairs source removal with surface-specific cleaning and drying: discard porous items with growth, scrub/seal structural wood, and correct ventilation and drainage so moisture levels stabilize.
Attics
- Typical causes: Roof leaks, missing baffles, and bath fans venting into the attic.
- Approach: Contain, scrub/sheath clean, treat framing, replace contaminated insulation, and add baffles and proper venting.
- Prevention: Seal attic bypasses, verify 1:300–1:150 net free venting ratios, and re-route fans outdoors.
Basements
- Typical causes: High RH, seepage, poor airflow, and organic dust on surfaces.
- Approach: Dehumidify to ~45–50% RH, detail clean, treat framing/subfloor, and manage drainage.
- Prevention: Continuous dehumidification in humid months and improved supply/return air balance.
Crawl spaces
- Typical causes: Ground moisture and vented spaces pulling humid air.
- Approach: Encapsulation, sealed vapor barrier, dehumidification or conditioned air, and wood treatment.
- Prevention: Keep vapor barrier sealed at piers and walls; maintain dry soil interface.
Bathrooms and kitchens
- Typical causes: Steam without exhaust, plumbing leaks, and recurring condensation.
- Approach: Source repair, detail clean, antimicrobial treatment, and proper exhaust ducting.
- Prevention: Exhaust fans rated ~1 cfm per sq. ft. (or per manufacturer guidance) and 20–30 minutes of post-shower run time.
HVAC systems
- Typical causes: Dirty coils, wet pans, and dust-laden ducts.
- Approach: Coil and pan cleaning, duct cleaning where appropriate, filter upgrades, and humidity control.
- Prevention: MERV 11–13 filtration if compatible and routine filter changes.
Black mold (Stachybotrys) signals chronic moisture on cellulose like drywall and paper-faced goods. We remove damaged materials, dry framing, and prevent recurrence by eliminating leaks and stabilizing humidity. The principle is the same regardless of species: dry it, clean it, and stop the moisture pathway.
Best Practices that Keep Mold from Coming Back
The best way to keep mold away is to pair thorough source removal with stable indoor humidity and verified ventilation. Hold basements near 45–50% RH, keep attics ventilated, and seal air bypasses. Combine HEPA cleaning, antimicrobial treatment, and moisture correction for durable results.
- Target humidity: 45–50% RH in basements and living spaces during humid months.
- Attic airflow: Confirm clear soffits and balanced intake/exhaust; add baffles where insulation blocks vents.
- Air sealing: Seal can lights, top plates, and chases that vent warm, moist air into attics.
- Drying metrics: Document wood moisture near/under ~16% before closing walls.
- Clearance mindset: Visual pass plus normal moisture levels; consider post-testing for added assurance.
- Documentation: Photos, readings, and a written prevention plan aid resale and future maintenance.
We embed prevention into every project and back completed work with a Mold Remediation Warranty Certificate after inspection—part of why Ontario buyers and agents rely on our reports when timelines are tight.
Tools and Resources We Use (and Why)
Professional mold removal relies on measurement, containment, and air cleaning tools: moisture meters, thermal imaging, HEPA air scrubbers, negative-air ducting, dehumidifiers, and PPE. These tools quantify the problem, prevent spread, and accelerate safe drying for a verifiable finish.
Precision tools keep projects on schedule and outcomes predictable.
- Moisture meters: Pin for depth, pinless for coverage; both inform drying targets and material salvageability.
- Thermal imaging: Finds cold, damp anomalies behind walls and ceilings without demolition.
- HEPA air scrubbers: Sized for 4–6 ACH within containment to continually reduce airborne load.
- Negative air setups: Duct exhaust outside to maintain inward airflow and prevent spread.
- Dehumidifiers and air movers: Control evaporation and achieve target EMC before rebuild.
- PPE and safety: Respirators, gloves, and protective suits protect occupants and crews.
When renovations overlap remediation, coordinate demolition sequencing and ventilation so dust and spores don’t circulate into clean zones. For context on renovation planning, this practical old bathroom renovation guide shows how planning details reduce surprises mid‑project.
DIY vs Professional: When to Call ASM Mold Removal
Tackle only very small, isolated areas if you’re trained and equipped. Call a professional when growth is widespread, hidden moisture persists, or sensitive occupants are present. Professionals control pressure, capture spores, and provide documentation that protects health, structure, and transactions.
| Scenario | DIY Suitable? | Professional Advantage |
|---|---|---|
| Small surface stain on non-porous tile or metal | Possibly, with PPE | Guidance on safe cleaners; confirm no hidden moisture |
| Attic sheathing discoloration across several bays | No | Containment, ventilation fixes, insulation replacement |
| Basement musty odor with high RH | Limited | Dehumidification plan, drainage checks, cleaning protocol |
| Black mold on drywall | No | Selective demolition, HEPA cleaning, safe disposal |
| After a water event (leak or flood) | Risky | Rapid drying, antimicrobial treatment, documentation |
If you’re in Brampton or elsewhere in the GTA and need rapid help, our same‑day response mobilizes technicians with HEPA and containment so you can remove the mold without disrupting daily life.
Process and Timeline: What to Expect
Most residential projects follow three phases: assessment and setup, source removal and treatment, and drying and verification. With clear access and decisions, many jobs complete in days. Documentation, readings, and a prevention plan wrap the project for a confident handoff.
| Phase | Purpose | Key Tools | Notes |
|---|---|---|---|
| Assessment & Setup | Find moisture and plan containment | Moisture meters, thermal camera, poly sheeting | Document baseline; protect clean zones |
| Removal & Treatment | Eliminate growth and clean surfaces | HEPA vacuums, scrubbers, antimicrobial | Discard porous items with active growth |
| Drying & Verification | Stabilize humidity; confirm results | Dehumidifiers, manometer, moisture meter | Target wood ~12–16% before rebuild |
Renovation sequencing affects containment and cleanup. A remodel that exposes bathrooms or basements can reveal hidden moisture; planning ahead reduces disruption. This basement renovation overview offers helpful context when projects overlap.
Case Snapshots from Ontario (Attic, Basement, Commercial)
Across Ontario, we’ve removed attic mold from roof leaks, basement growth from high humidity, and commercial contamination requiring discreet containment. Each project pairs moisture correction with source removal and ends with documentation and prevention steps to ensure mold doesn’t return.
Scarborough attic, winter leak
- Issue: Sheathing discoloration after ice-dam leak; blocked soffits under old insulation.
- Action: Containment, HEPA scrubbing, framing treatment, insulation removal/reinstall with baffles, bath fan re‑ducted outdoors.
- Result: Wood readings stabilized, warranty certificate issued, and a prevention checklist left with the homeowner.
Brampton basement, summer humidity
- Issue: Musty odor, elevated humidity, light growth on joists and cold corners.
- Action: Dehumidification plan, detail cleaning, antimicrobial, supply/return balance, and drain check.
- Result: RH held near 45–50%; odor resolved; homeowner adopted seasonal settings to keep it stable.
Retail stockroom, Greater Toronto area
- Issue: Slow leak behind shelving; merchandise risk and need for open hours.
- Action: After-hours containment, negative air, selective demolition, treatment, and discrete disposal.
- Result: No cross-contamination; store reopened next day with staging; documentation provided for facilities and insurance.
Coordinating remediation with remodeling, move-ins, or closings is our daily routine. We stage work to protect occupants and keep timelines intact.
Common Mistakes to Avoid When You Remove the Mold
Avoid cleaning without containment, skipping negative pressure, or using fog-only methods. Don’t repaint over damp materials or close walls before moisture is normal. Fix the moisture source first, then remove or clean materials, then treat and dry to target levels.
- No containment: Cleaning without isolation spreads spores into clean rooms.
- Skipping moisture correction: Treating surfaces while leaks or high RH persist invites fast regrowth.
- Mistaking stains for success: A light stain may remain even after full remediation; focus on dryness and cleanliness.
- Covering up: Paint or encapsulants on wet material trap moisture and fail.
- Improper disposal: Bag and stage debris for sealed removal; don’t carry unbagged materials through living areas.
If you’re planning a larger clean-up as part of home improvements, this general mould cleaning overview illustrates why source control beats fragrance or fog-only approaches.
Prevention Checklist You Can Start Today
Hold indoor RH near 45–50%, vent showers and dryers outdoors, run dehumidifiers in humid months, and fix leaks fast. In attics, clear soffits and add baffles. In basements, move items off cold walls and increase airflow. Document readings so you can prove conditions are stable.
- Use a hygrometer and keep RH ~45–50% in summer; 35–45% in colder months to reduce condensation.
- Ventilate baths and kitchens outdoors; confirm fans actually exhaust outside.
- Dehumidify basements and crawl spaces; set continuous mode during peak humidity.
- Maintain gutters and downspouts; extend leaders to move water away.
- Insulate cold water lines to stop sweating; add pipe insulation near cold zones.
- Space storage 2–4 inches from foundation walls for airflow; use wire shelving.
- Check attic after storms or thaws; look for damp insulation or darkened sheathing.
Free Inspection and Same‑Day Help
If you see staining, smell mustiness, or had a recent leak, book a free inspection. We’ll identify moisture sources, outline a safe plan to remove the mold, and provide a clear prevention roadmap. Ontario‑wide same‑day response is available for urgent situations.
We keep it simple and documented from the first call to the final walkthrough. Our team handles containment, cleaning, moisture correction, and optional restoration so you see one plan, one timeline, and one accountable partner.
Request your inspection or learn more about our process and certifications. We back completed work with a Mold Remediation Warranty Certificate.
Frequently Asked Questions
Homeowners ask about safety, timelines, and what to do first. Start by isolating the area and reducing humidity. Then schedule a professional inspection to confirm moisture sources, scope the work, and plan a safe, documented cleanup that prevents recurrence.
How do I know if I should remove the mold myself or hire a pro?
If growth is larger than a tiny patch on a non-porous surface—or if you suspect hidden moisture—bring in a professional. Pros use containment, negative air, and HEPA to prevent spread and document dryness. That documentation is valuable for buyers, lenders, and future maintenance.
What’s the first step if I discover mold after a leak?
Stop the water, reduce humidity with dehumidifiers, and avoid disturbing the area. Close doors to limit airflow. Then schedule a same-day inspection so we can measure moisture, set containment, and begin safe removal. Fast action reduces damage and gets drying started quickly.
Do you offer documentation for real estate transactions?
Yes. We provide photos, moisture readings, and a Mold Remediation Warranty Certificate after completion and inspection. Buyers, sellers, and agents use this package to show treated areas are dry, clean, and free from active mold at the time of inspection.
How do you prevent mold from coming back?
We pair source removal with moisture correction: fix leaks, stabilize humidity, and improve ventilation. We verify materials are dry before rebuild and provide a written prevention plan—often including dehumidifier settings, attic ventilation checks, and seasonal maintenance tips.
Key Takeaways and Next Steps
Contain first, then clean and dry. Remove porous items with growth, treat remaining surfaces, and verify dryness. Lock in results with ventilation, humidity control, and documentation. For urgent help in Ontario, book a free inspection and same-day response to stabilize conditions fast.
- Main points: Control moisture, isolate the area, use HEPA, and verify dry materials before rebuild.
- Action today: Measure indoor RH, check attic ventilation, and schedule a professional moisture assessment.
- Ready to proceed: Book your inspection and we’ll map the safest, fastest plan to remove the mold.