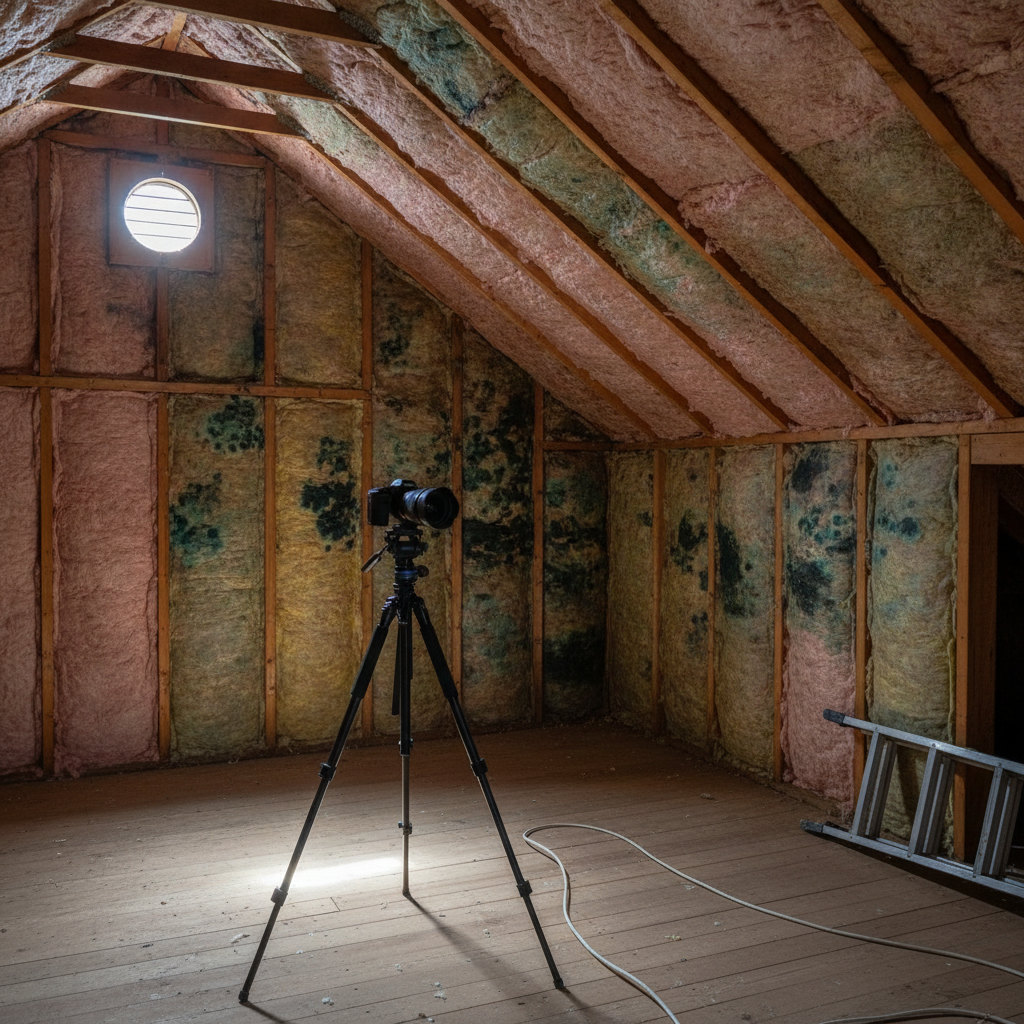
Mould on insulation is mold growth on attic, wall, or crawl space insulation caused by excess moisture and poor ventilation. It weakens energy performance, can reduce indoor air quality, and often signals hidden leaks. At our Scarborough location (1225 Kennedy Rd), ASM Mold Removal Inc. provides Ontario-wide, same-day inspections and remediation for this exact issue.
By ASM Mold Removal Inc. • Last updated: 2026-06-20
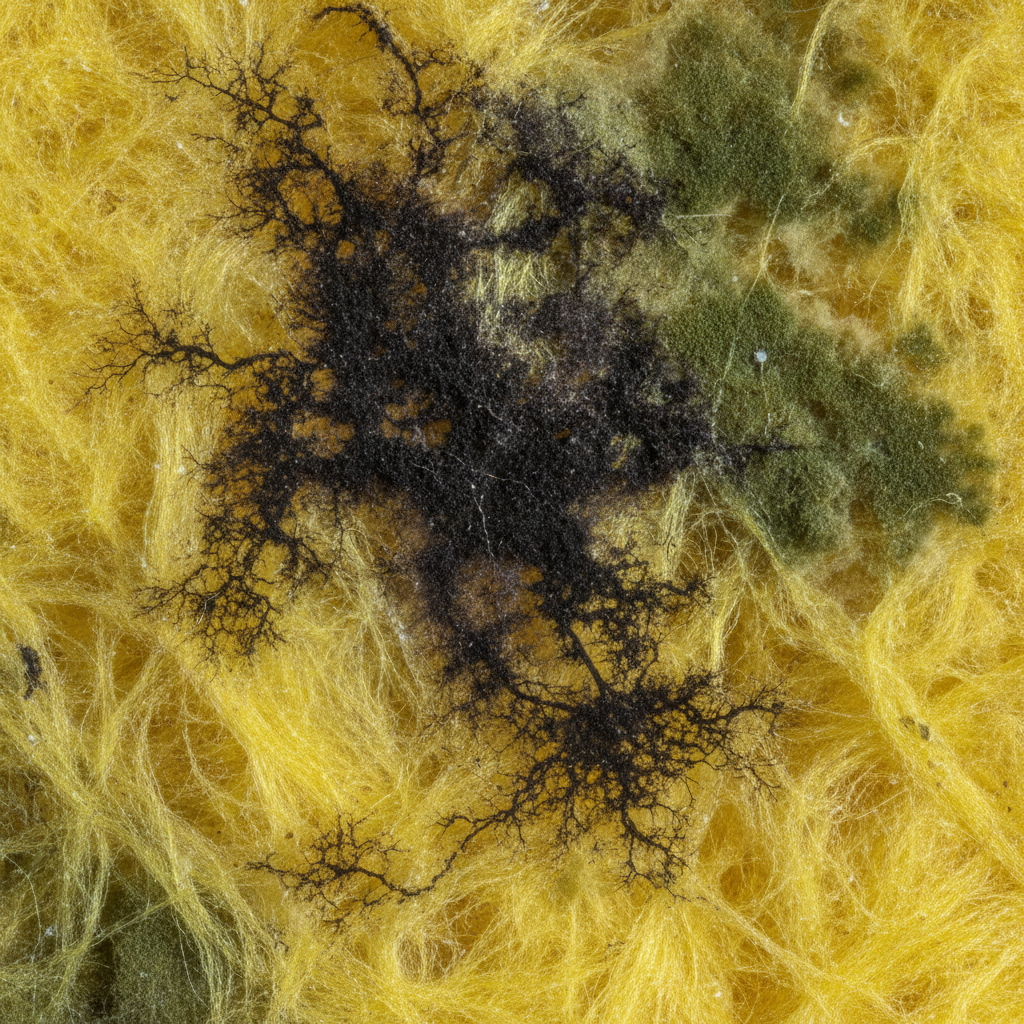
Overview
This guide explains what mould on insulation is, why it forms, how to inspect it, and when to repair versus replace. You’ll get step-by-step remediation best practices, attic and crawl space tips, and a practical decision table. We also outline how ASM Mold Removal supports Scarborough and Ontario homeowners with same-day help.
In plain language, here’s what you’ll learn and put to use today.
- What insulation mold is and why it appears
- Health, energy, and building risks you shouldn’t ignore
- Inspection methods: visual, moisture meters, thermal imaging, air testing
- Repair vs replace: a clear decision framework with a comparison table
- Attic, basement, and crawl space guidance specific to Ontario homes
- Best practices using HEPA, containment, and EPA-approved treatments
- How ASM’s warranty-backed remediation works, end-to-end
What is mould on insulation?
Mould on insulation refers to active mold growth on or within insulating materials such as fiberglass batts, cellulose, or foam. It forms when moisture persists above safe levels, often from roof leaks, humid air, or poor ventilation. The growth can spread to wood framing and reduce energy efficiency if not addressed.
At its core, insulation mold is a moisture problem that has found a porous surface to colonize. Mold spores are everywhere; when relative humidity regularly exceeds about 60% and surfaces stay damp, spores settle and grow. Fiberglass and cellulose can trap dust, which becomes food for colonies. Foam products resist growth better but aren’t immune if organic dust accumulates on the surface.
- Primary drivers: roof or pipe leaks, ice dams, bathroom fans venting into attics, air leaks from living spaces, and long-term high humidity.
- Common locations: attics near sheathing and baffles, rim joists, basement headers, and crawl space ceilings.
- Typical signs: speckled black or green staining on batts, musty odor, matted or damp insulation, and nearby wood discoloration.
If you see these signs, request a prompt assessment. Our team performs free inspections and moisture diagnostics as part of our Mold Inspection & Testing workflow.
Why mould on insulation matters (health, comfort, structure)
Insulation mold matters because it can degrade indoor air quality, signal ongoing leaks, and erode thermal performance. That combination increases health complaints, utility bills, and repair scope. Addressing moisture, removing contaminated materials, and sealing air leaks prevents recurrent growth and protects your home’s structure.
Health-wise, mold can trigger allergies and respiratory irritation. Sensitive groups—including children, older adults, and those with asthma—often report symptoms sooner. In our experience, musty odor complaints typically track with elevated relative humidity and damp insulation. When batts hold moisture, R-values drop; wet insulation conducts heat more readily, undermining comfort.
- Air & comfort: Persistently damp insulation can keep humidity high, making homes feel clammy in summer and drafty in winter.
- Structure: Recurrent moisture threatens roof sheathing and framing. Wood at 16–20% moisture content is at risk for fungal activity.
- Safety: Attic mold can spread to HVAC and living areas through air leaks and pressure differences.
For background context on cleaning topics in general, review a broad mold cleaning overview. While approaches vary, the core principle holds: fix moisture first, then remediate safely.
How mould grows on insulation (moisture dynamics)
Mold grows on insulation when moisture and organic dust persist. Air leaks push humid indoor air into cold zones, where it condenses on sheathing and batts. Over time, damp fibers plus dust create fuel for mold. The remedy is moisture control, air sealing, and targeted remediation.
Here’s the mechanism we see repeatedly during attic mold removal across Ontario: warm, humid indoor air escapes into the attic through gaps around can lights, attic hatches, and plumbing penetrations. When that air hits cold sheathing in winter, condensation forms. If ventilation is inadequate, surfaces stay damp. Dust captured in fiberglass or cellulose serves as a nutrient layer.
- Humidity thresholds: Sustained indoor RH above ~60% supports growth; basements and bathrooms are frequent sources.
- Thermal bridging: Cold surfaces (roof sheathing, exterior walls) become dew-point targets in shoulder seasons and winter.
- Air leakage: Unsealed penetrations are highways for moisture-laden air; sealing is as important as ventilation.
Practically, prevention follows a simple sequence: stop liquid water, control humidity, seal air leaks, improve balanced ventilation, then remediate any contamination following containment protocols.
Types of insulation affected (pros, cons, risk)
Fiberglass and cellulose are most often affected because they trap dust and moisture. Foam products resist colonization better but can grow surface mold if dust accumulates. Each insulation type demands a tailored approach to cleaning, removal, and prevention.
Different materials behave differently under moisture stress. Understanding these differences guides repair vs replace decisions.
- Fiberglass batts: Don’t feed mold directly, but dust on fibers does. Batts compress when wet, losing R-value. HEPA vacuuming and spot removal can work for light, dry surface staining once moisture is resolved.
- Blown cellulose: Paper-based and readily colonized when damp. If saturated or clumped, replacement is generally best after drying the attic and fixing the source.
- Open/closed-cell foam: Mold-resistant core, but surface dust films can support growth. Cleaning often focuses on adjacent wood and air sealing; damaged foam may need localized removal.
- Rigid foam boards: Similar to spray foam—resists colonization but not immune to growth on dusty surfaces; edges and gaps often reveal air-leak paths.
Where we see extensive contamination in cellulose or wet, matted fiberglass, replacement paired with moisture fixes and air sealing yields the most durable result.
Repair vs replace: a practical decision framework
Decide to repair when growth is light, moisture is solved, and insulation remains dry and intact. Replace when insulation is wet, sagging, saturated with debris, or growth is widespread. Pair either path with air sealing, ventilation correction, and a prevention plan to stop recurrence.
Choosing between remediation (clean-and-keep) and full replacement comes down to condition, extent, and risk tolerance. Below is a quick comparison you can use before we inspect.
| Criterion | Repair (Clean & Keep) | Replace (Remove & Install New) |
|---|---|---|
| Extent of growth | Isolated/light surface staining | Widespread, deep, or recurrent growth |
| Moisture status | Dry; source resolved; RH stable < ~60% | Wet/matted; source unresolved or recent leak/flood |
| Material type | Fiberglass with light dust films, foam with surface dust | Cellulose clumping or batts that lost loft |
| Odor & debris | No persistent musty odor; minimal debris | Strong odor; rodent debris; heavy dust contamination |
| Energy performance | R-value retained; no major compression | Compression/cold spots; opportunity to upgrade R-value |
| Access & time | Safe to HEPA vacuum/spot-treat in place | Safer to remove under containment; reinstall clean |
| Documentation | Remediation report, photos, prevention plan | Full removal report + new install specs; stronger clarity for real estate |
In real projects, we pair either path with containment, negative air, and HEPA methods to protect living spaces. For warranty-backed outcomes in Ontario real estate transactions, our teams often recommend removal and reinstallation when contamination is moderate to heavy.
Need fast guidance? Book a same-day attic or insulation inspection anywhere in Ontario. We’ll test moisture, document the findings, and outline a clear plan.
Contact ASM Mold Removal Inc. for a free inspection and moisture assessment.
Inspection and testing methods that actually work
Effective assessment combines visual inspection, moisture and humidity readings, thermal imaging, and targeted air or surface sampling. Document moisture sources first, then quantify contamination. A clear report supports remediation scope, prevention steps, and—when needed—real estate disclosure.
Here’s our standard, field-proven approach for Ontario homes and buildings.
- Visual survey: Photograph staining patterns on insulation and framing; note matted batts, clumping cellulose, and drip tracks from fasteners.
- Moisture diagnostics: Use pin/pinless meters on framing; track RH/temperature to understand dew-point risk. Wood above ~16% MC is a red flag.
- Thermal imaging: Map cold spots and air leaks around chases, hatches, and can lights; confirm ventilation paths.
- Air/surface sampling (when indicated): Establish baseline vs impacted areas; useful for clearance documentation.
- Source tracing: Verify roof leak paths, missing baffles, or bath/kitchen fans venting into the attic.
We include moisture assessment and optional testing in our Mold Inspection & Testing service, then issue a written plan outlining remediation and prevention priorities.
Attic-specific guidance for Scarborough and across ON
In Scarborough and across ON, cold winters, humid summers, and bath fans venting into attics drive many insulation mold cases. Prioritize air sealing around penetrations, balanced soffit–ridge ventilation, and verified exterior venting for exhaust fans to stop recurrence after cleanup.
Local climate swings demand a thoughtful sequence: stop bulk water, air seal, ventilate, and only then remediate. We routinely find bathroom exhausts terminating in attics, missing or blocked baffles at the eaves, and leaky attic hatches. These conditions keep insulation damp and encourage sheathing discoloration.
- Air sealing: Seal around light cans, wiring, plumbing stacks, and the attic hatch before adding or preserving insulation.
- Ventilation balance: Ensure continuous soffit intake and clear ridge/roof vents; aim for even airflow across the deck.
- Exhaust verification: Confirm bath and kitchen fans discharge outdoors through insulated ducts with proper terminations.
- Leak control: Investigate ice dam history and flashing around chimneys, skylights, and valleys during roof inspections.
Local considerations for Scarborough
- Schedule attic checks after spring thaws and fall storms; seasonal roof stress in Scarborough can reveal new leak paths.
- Expect summer humidity spikes; consider whole-home dehumidification to keep indoor RH below roughly 60%.
- During renovations, coordinate trades so new pot lights and bath fans are air sealed and correctly vented from day one.
Crawl space and basement considerations
In basements and crawl spaces, ground moisture, poor encapsulation, and leaky ducts drive insulation mold. Encapsulate or seal the crawl, add vapor control, manage drainage, and dehumidify. Replace waterlogged insulation and clean or treat framing to prevent rebound growth.
Below-grade areas require a moisture-first mindset. We often see fiberglass batts drooping from band joists, paper facings turned the wrong way, or crawl spaces without proper vapor barriers. Where flooding or chronic dampness exists, new insulation should follow drainage and humidity control—not precede it.
- Drainage & vapor: Confirm gutters, downspouts, grading; install vapor barriers on crawl floors and foundation walls where appropriate.
- Dehumidification: Maintain RH near 50% in basements; use sealed sump lids to cut moisture and odor migration.
- Ducts & leaks: Seal supply/return leaks that push moist air into cavities; insulate and seal rim joists properly.
- Material reset: Remove saturated materials under containment; reinstall insulation once the envelope is dry and sealed.
Renovations are a common moment to address these issues. For a general renovation-planning perspective, see this basement-focused legal basement guide; plan moisture control before finishes go up.
Best practices for safe, effective remediation
The safest remediation pairs source control with containment, negative air, HEPA vacuuming, and EPA-approved cleaning agents. Remove unsalvageable insulation, treat affected framing, and verify dryness before reinstalling. Document the process with photos and, when needed, clearance testing.
Our teams follow current industry protocols on every Ontario project. The exact steps vary by space and contamination level, but the framework stays consistent.
- Preparation & containment: Isolate work areas with plastic barriers; establish negative air using HEPA-filtered machines.
- PPE & safety: Use respirators, eye protection, and full-body coveralls; control entry/exit to avoid tracking debris.
- Selective removal: Bag and remove saturated or clumped insulation; preserve clean, dry materials when appropriate.
- HEPA cleaning: Vacuum surfaces thoroughly; apply EPA-approved antimicrobials to stained wood as indicated.
- Drying & verification: Dehumidify and ventilate; confirm wood moisture content and ambient RH are within target range before reinstall.
- Reinstall & air seal: Upgrade R-values if needed; seal penetrations; confirm bath/kitchen exhausts terminate outdoors.
- Documentation: Provide before/after photos, moisture logs, and—when required—post-remediation verification.
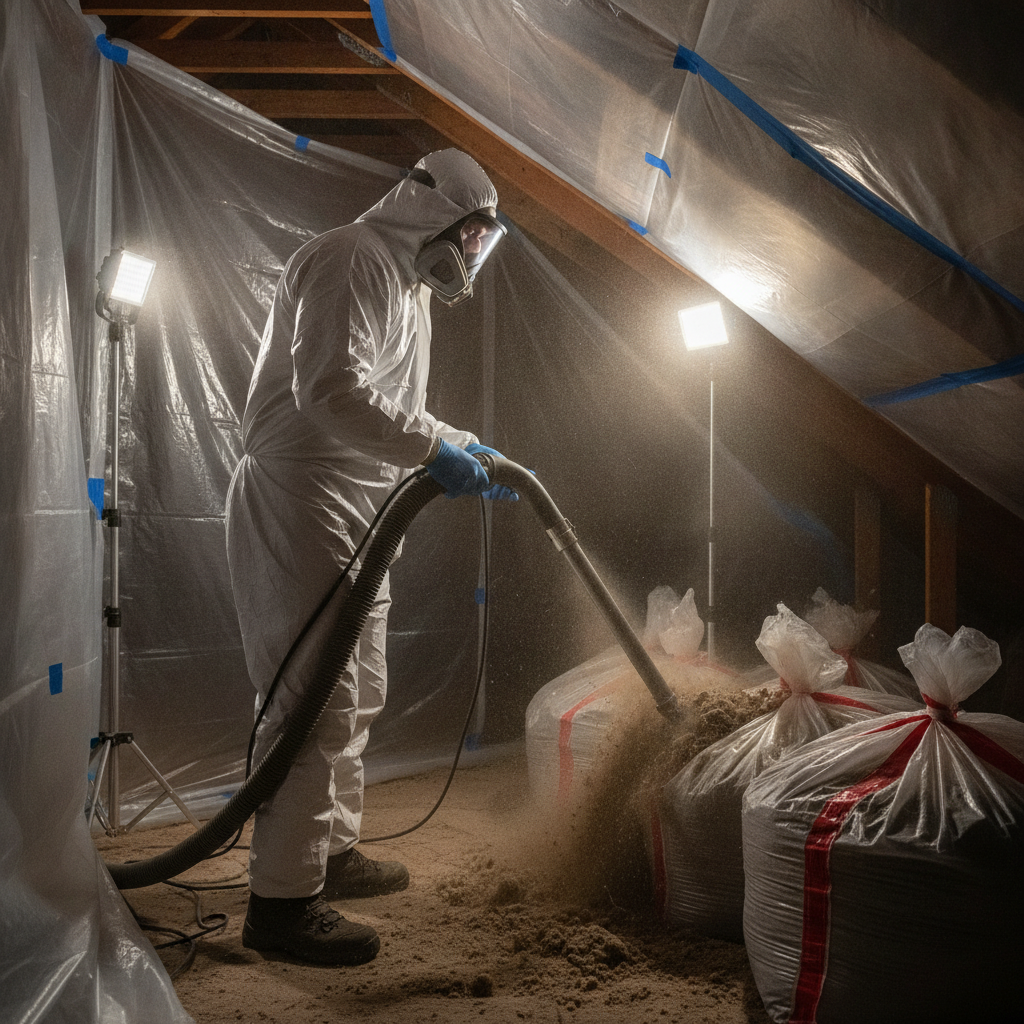
Our Mold Removal & Remediation service includes HEPA filtration and containment to protect occupants and living spaces while we work.
Tools and resources homeowners can trust
A reliable toolkit includes a hygrometer, quality dehumidifier, moisture meter, HEPA vacuum, and proper PPE. Pair tools with a clear plan: measure, correct sources, remediate safely, and verify dryness. When in doubt, schedule a professional inspection to avoid missed problems.
Here are the homeowner-friendly tools we recommend most often during inspections:
- Hygrometer/thermometer: Track indoor RH and temperature; aim to keep RH near 40–50% in living spaces.
- Dehumidifier: Right-size for basement/crawl areas; run to maintain stable RH and protect insulation.
- Moisture meter: Spot-check wood framing; repeated readings guide timing for reinstallation.
- HEPA vacuum: Capture fine dust and spores during cleaning; avoid standard vacuums that can redistribute particulates.
- PPE set: Proper respirator, goggles, gloves, and disposable coveralls for any DIY cleaning steps.
If you’re researching service categories, broad directories sometimes list insulation and remediation providers. One example is this general insulation listings directory. Always verify credentials, containment protocols, and documentation standards before you hire.
Case studies and real-world examples
Across Ontario, we remediate insulation mold by fixing moisture first, then cleaning or replacing materials under containment. The fastest long-term wins pair air sealing, correct ventilation, and documentation. Below are three field-tested scenarios reflecting what we see weekly.
These snapshots summarize the sequence, results, and prevention plan used—useful if you’re comparing repair versus replace.
Scarborough bungalow attic
- Issue: Light speckling on fiberglass near bath fan; musty odor after showers.
- Findings: Fan vented into attic; missing baffles; RH swings 45–65%.
- Action: Air sealed penetrations; rerouted fan outdoors with insulated duct; HEPA vacuumed batts; treated minor staining on sheathing.
- Outcome: Odor resolved; RH stabilized below ~50%; insulation retained.
GTA townhouse with cellulose
- Issue: Widespread discoloration and clumping of cellulose; ice dam history.
- Findings: Soffit vents blocked by insulation; inadequate ridge vent area; sheathing moisture above 16%.
- Action: Full removal under containment; added baffles; improved ridge ventilation; installed new blown-in insulation to target R-value.
- Outcome: Even airflow; dry sheathing; warranty certificate issued for real estate peace of mind.
Ontario school office crawl space
- Issue: Drooping batts with visible growth at rim joists; persistent basement odor.
- Findings: No vapor barrier; unsealed ducts pushing humid air into cavities.
- Action: Encapsulated crawl; sealed ducts; removed and replaced affected batts; added dehumidification with monitoring.
- Outcome: RH stabilized near 50%; odor eliminated; documentation provided to facility management.
Frequently Asked Questions
Homeowners ask how to identify, clean, and prevent insulation mold—and whether they must replace affected materials. These direct answers explain signs to watch for, safe cleanup basics, and when professional remediation and insulation replacement make the most sense.
What are the first signs of mould on insulation?
Look for speckled black or green staining on batts or a dusty film with discoloration. Matted fiberglass, clumped cellulose, and musty odor are common. Check for roof leaks, blocked soffit vents, or bath fans venting into the attic—these moisture sources usually sit behind the visible staining.
Can I keep insulation after mold cleanup?
Yes—if contamination is light, the insulation is dry, and the moisture source is fixed. We often HEPA vacuum and spot-treat nearby wood. If batts are wet, sagging, or cellulose is clumped, replacement is the safer, longer-term option once the space is dry and sealed.
Do I need testing to confirm attic mold?
Not always. A qualified inspection often identifies moisture sources and visible growth patterns. Sampling can help in real estate transactions or for clearance documentation after remediation. We include moisture diagnostics in our inspections and recommend testing when it adds clarity.
What prevents recurrence after remediation?
Control humidity (keep indoor RH near 40–50%), air seal penetrations, balance soffit-to-ridge ventilation, and vent bathrooms and kitchens outdoors. Verify roof integrity and add dehumidification in basements or crawl spaces where moisture tends to pool.
Does spray foam stop insulation mold?
Spray foam resists colonization better than fibrous products, but dust on its surface can still support growth if moisture persists. Air sealing and moisture control remain essential—no insulation type replaces proper ventilation and leak prevention.
Key takeaways
Treat mould on insulation as a moisture problem first and a cleaning task second. Fix leaks, seal air paths, and balance ventilation—then remediate. Keep what’s clean and dry; replace what’s wet or clumped. Document everything for confidence in real estate, insurance, and future maintenance.
- Mold follows moisture. Resolve leaks and humidity before deciding on keep vs replace.
- Light, dry surface staining can often be HEPA-cleaned; wet or clumped insulation should be replaced.
- Air sealing plus balanced ventilation prevents dew-point condensation in Ontario climates.
- Pair remediation with a prevention plan and photos; it protects resale value.
- ASM offers same-day inspections, HEPA containment, and a warranty-backed finish across Ontario.
Conclusion
The best path with insulation mold is methodical: diagnose moisture, choose repair or replacement based on condition, remediate safely, then verify dryness. With the right sequence, you stop recurrence and restore comfort, efficiency, and peace of mind.
Whether you’re a homeowner, buyer, seller, or facility manager, a clear plan reduces risk and speeds resolution. If you suspect mould on insulation—or you just want a confident second opinion—book a same-day inspection. Our Ontario-certified team will document the issue, fix the cause, and deliver a remediation you can stand behind.
Ready when you are. Schedule your free inspection now.
Explore related Mold topics
If you found this helpful, continue with topics that build long-term protection: attic ventilation tuning, air sealing strategies, basement moisture control, and choosing insulation that suits Ontario’s climate. A small prevention plan today prevents major remediation tomorrow.
Great next steps include deep dives on attic ventilation best practices, crawl space encapsulation, and how moisture monitoring keeps RH in the safe zone year-round.