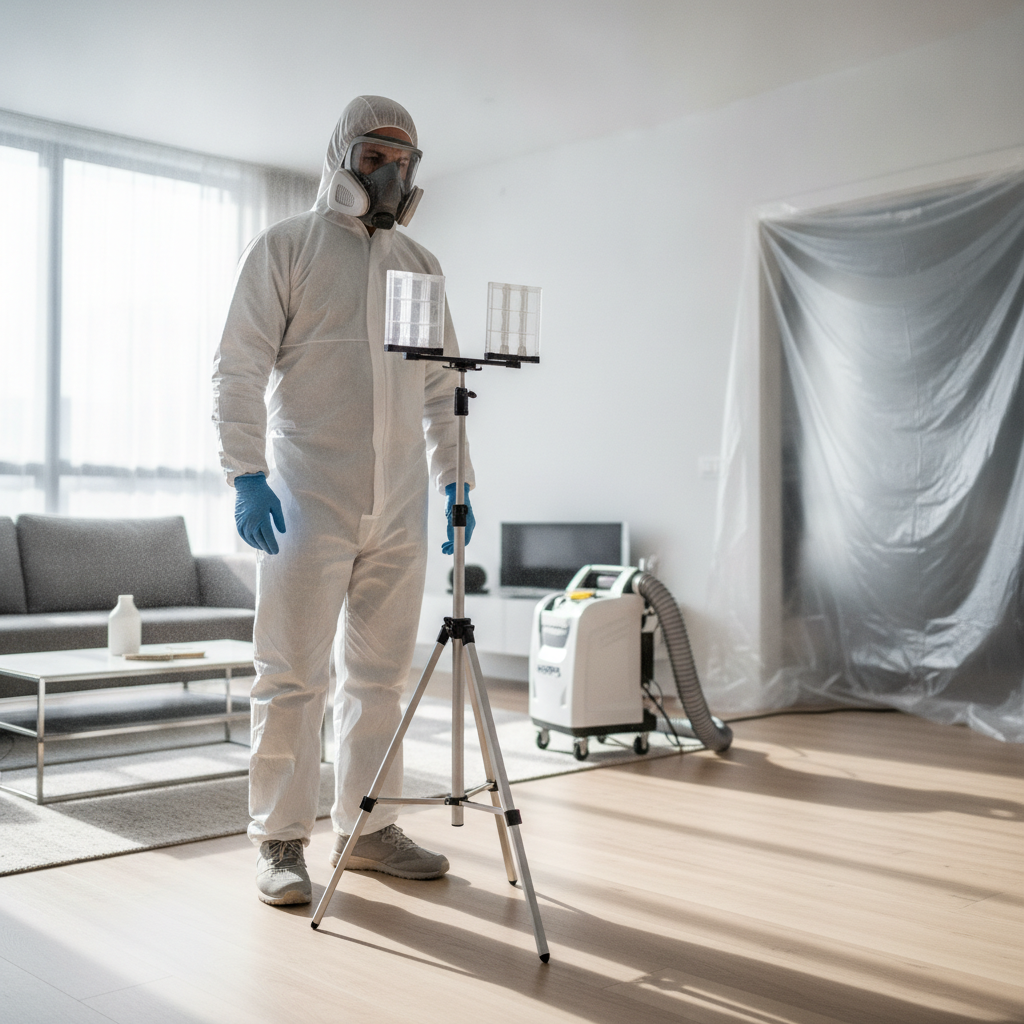
Mold testing is the systematic assessment of indoor environments to identify mold types, levels, and sources using air and surface samples plus moisture diagnostics. Done early, it verifies hidden growth, documents conditions for real estate, and guides safe remediation. From our Scarborough base at 1225 Kennedy Rd, we provide same-day mold testing across Ontario to stop problems before they spread.
By Asmmoldremoval • Last updated: 2026-06-16
Overview: What you’ll learn
This guide explains what mold testing is, why it matters for health and buildings, and how professional sampling, moisture mapping, and lab analysis work together. You’ll see testing methods, best practices, tools we use on Ontario jobs, local tips for Scarborough, real case examples, and clear next steps.
Use this at-a-glance summary and quick table of contents to jump to what you need.
At a Glance
- Plain-English definition and when mold testing is worth it
- How pros collect, handle, and interpret samples
- Air vs surface vs cavity sampling: where each fits
- Moisture diagnostics that actually find the source
- Attic, basement, crawl space, and HVAC scenarios
- Local tips for Scarborough and broader Ontario
- Step-by-step process and ready-to-use checklists
Table of Contents
- What is mold testing?
- Why mold testing matters
- How mold testing works
- Testing methods and when to use them
- Best practices for accurate results
- Tools and resources we use
- Local mold testing in Scarborough, ON
- Case studies and real examples
- Post-remediation verification
- Frequently Asked Questions
- Conclusion and next steps
What is mold testing?
Mold testing is a targeted investigation that combines air sampling, surface sampling, and moisture diagnostics to confirm if indoor mold growth is present, how extensive it is, and what’s driving it. It produces objective lab results and clear documentation to guide remediation and verify healthy conditions afterward.
Mold testing answers three questions: Is there elevated mold? Where is it coming from? What must be fixed so it doesn’t return? When handled by certified pros, testing ties lab data to building science—so you act on causes, not just symptoms.
Key points
- Air sampling quantifies airborne spores compared with a control (typically outdoors) to flag hidden growth.
- Surface sampling (tape lifts or swabs) identifies what’s growing on materials like drywall or framing.
- Moisture mapping (thermal imaging and meters) finds wet building components fueling mold.
- Documentation supports disclosure for buyers, sellers, and property managers during transactions.
In our experience, pairing lab results with a moisture and ventilation assessment prevents repeat issues—especially in attics, basements, and crawl spaces common across Ontario’s climate.
Why mold testing matters
Mold testing protects health, preserves property value, and speeds remediation decisions. It verifies whether visible staining is active growth, reveals hidden mold after leaks, and documents baseline and clearance conditions for real estate and insurance stakeholders.
Here’s why it’s worth doing when you suspect a problem or need evidence for a decision.
Benefits you can measure
- Health context: Airborne spores and fragments increase when active growth exists. Testing shows if levels are typical or elevated indoors.
- Source-focused fixes: Moisture diagnostics point to roof leaks, ice dams, foundation seepage, or HVAC condensation.
- Faster action: Clear readings help you decide on containment, HEPA air filtration, and removal approaches immediately.
- Confidence and records: Baseline and post-remediation testing create a paper trail for buyers/sellers and facility teams.
What most people don’t realize: minor visible growth may coincide with major hidden contamination inside wall cavities. A short round of air and cavity sampling can change the scope—and prevent bigger mold damage later.
How mold testing works
A professional mold testing workflow starts with a moisture-focused inspection, then collects representative air and surface samples with strict chain of custody. Accredited labs analyze samples, and a qualified consultant interprets results to create a remediation and prevention plan.
Below is the step-by-step process we follow on Ontario projects.
Step-by-step process
- Intake and planning: We review your concerns (odors, staining, leaks), prioritize sensitive occupants, and define sampling locations.
- Moisture assessment: Thermal imaging and moisture meters map wet areas. Relative humidity over ~60% indoors signals risk.
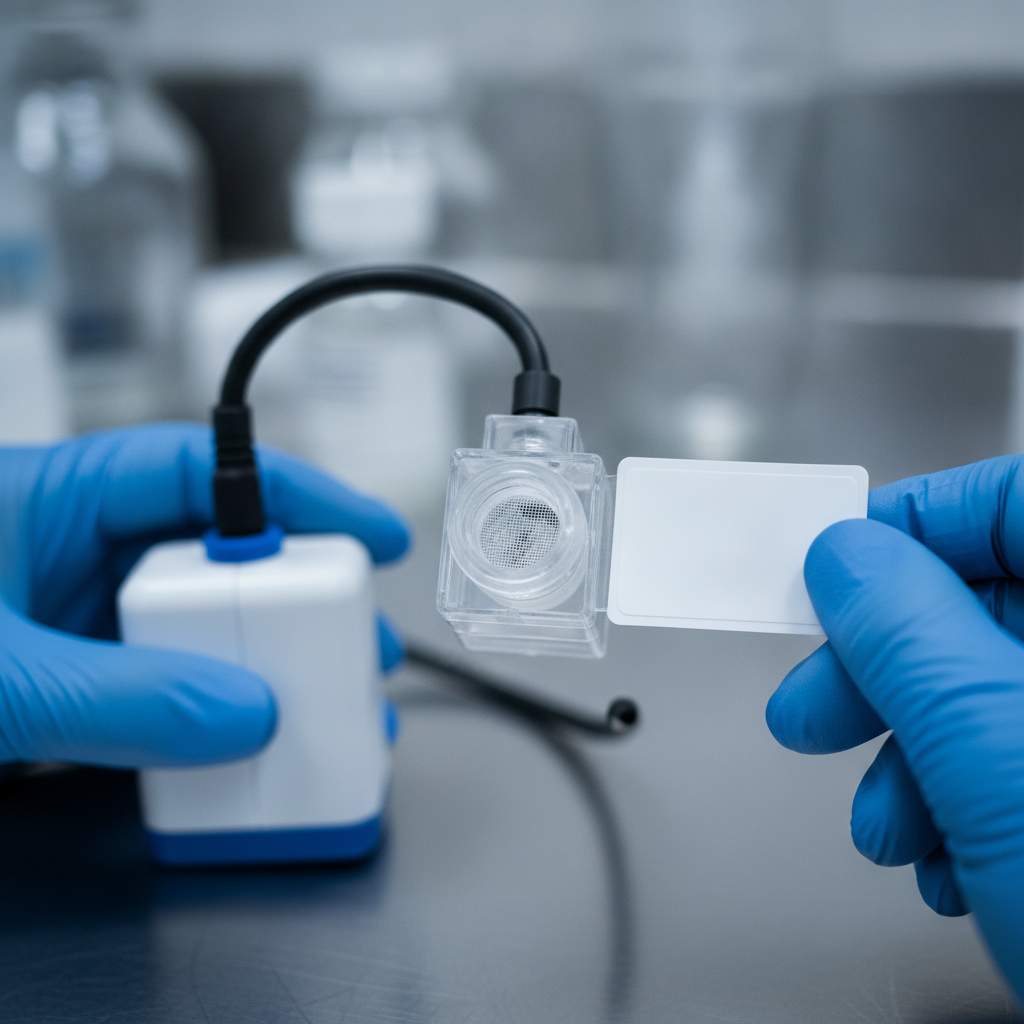
- Air sampling: Spore trap cassettes run for a fixed volume (commonly 75–150 liters) to compare indoor vs outdoor/control.
- Surface sampling: Tape lifts capture spores/hyphae on drywall, trim, or framing; swabs target textured or porous spots.
- Specialized samples: Cavity or HVAC samples assess hidden voids or ducts if symptoms suggest concealed growth.
- Chain of custody: Samples are sealed, labeled, and transferred to the lab with traceable documentation.
- Lab analysis: Accredited analysts identify genera and estimate concentrations; results return within standard turnaround windows.
- Interpretation + report: We correlate lab data with site findings, then outline remediation scope and moisture fixes.
- Verification: After remediation, clearance testing confirms normal indoor fungal ecology before spaces reopen.
Our team uses HEPA air scrubbers and containment when sampling near known growth to avoid cross-contamination. That way, post-remediation verification reads clean and confidently supports re-occupancy.
Testing methods and when to use them
No single mold test fits every situation. We mix air, surface, cavity, and HVAC sampling based on symptoms and building history, then pair results with moisture data to pinpoint causes and prioritize repairs.
Common methods compared
| Method | What it measures | Best use case | Limitations |
|---|---|---|---|
| Air sampling (spore trap) | Airborne spores per unit volume; genera profile | General screening; hidden growth suspicion; baseline vs clearance | Snapshot in time; influenced by activity, HVAC cycling, and weather |
| Surface sampling (tape lift) | What’s present on a surface (viable or non-viable) | Confirm if staining is mold; species-level identification not always necessary | Local to that spot; doesn’t quantify airborne burden |
| Surface sampling (swab) | Material from textured, creviced, or porous areas | When tape won’t adhere; small crevices; suspect HVAC registers | Can overrepresent localized buildup if not contextualized |
| Cavity air sampling | Air inside wall/ceiling voids | Musty odor with clean room air; recent leak behind finishes | Small holes required; still a snapshot |
| Bulk sampling | Piece of material (e.g., drywall) for lab analysis | When demolition is planned and composition matters | Destructive; not needed for most decisions |
| HVAC sampling | Deposits on coils/ducts; airborne load at supply | Odors on startup; visible debris; humidity control issues | Requires careful interpretation with system runtime |
When we recommend testing
- After roof or plumbing leaks when mold can grow in as little as 24–48 hours on damp materials.
- Before attic remediation to set a baseline and define containment and ventilation improvements.
- For real estate clarity where objective documentation supports buyer, seller, and lender confidence.
- After remediation to confirm normal fungal ecology and provide a clean handoff for restoration or re-occupancy.
Testing is not a replacement for a good inspection. We always center the moisture source—because without drying and ventilation fixes, mold returns even after removal.
Best practices for accurate results
Accurate mold testing depends on planning, representative sampling, clean technique, and disciplined chain of custody. Equal weight goes to moisture diagnostics, since water, humidity, and temperature drive growth far more than species ID alone.
Field best practices
- Stabilize conditions: Avoid high-disturbance cleaning or renovations 24 hours before testing.
- Choose representative locations: Sample complaint areas, an adjacent space, and an outdoor/control area.
- Log environment: Record temperature, relative humidity, and HVAC status. RH above ~60% is a red flag.
- Control handling: Label cassettes immediately; seal and protect from dust and temperature extremes.
- Document with photos: Show sampling points, moisture readings, and any visible growth to back the report.
Interpretation principles
- Compare to control: Indoor airborne genera and amounts should generally be similar to outdoor/control unless indoor growth exists.
- Look for water indicators: Indoor presence of water-indicator molds alongside moisture readings strengthens the case for active growth.
- Correlate with building science: Attic sheathing growth often ties to poor ventilation or bathroom exhaust dumping into the attic—not just roof leaks.
- Focus on fixes: Results should lead to source removal, thorough cleaning, and moisture prevention—not just “killing” mold.
We’ve found that when homeowners see the moisture map and the lab summary side by side, decisions become straightforward and faster.
Tools and resources we use
We deploy calibrated bio-pumps with spore trap cassettes, HEPA-filtered air scrubbers, thermal imagers, pin and pinless moisture meters, and professional PPE. Results go to accredited labs under chain of custody, then into a practical remediation and prevention plan.
On residential and commercial jobs, our toolkit adapts to the space and schedule. For schools, offices, and healthcare, we stage sampling outside peak hours to limit disruption, and we use discreet containment where needed.
- Bio-pumps and cassettes for precise air volumes and reliable airborne data.
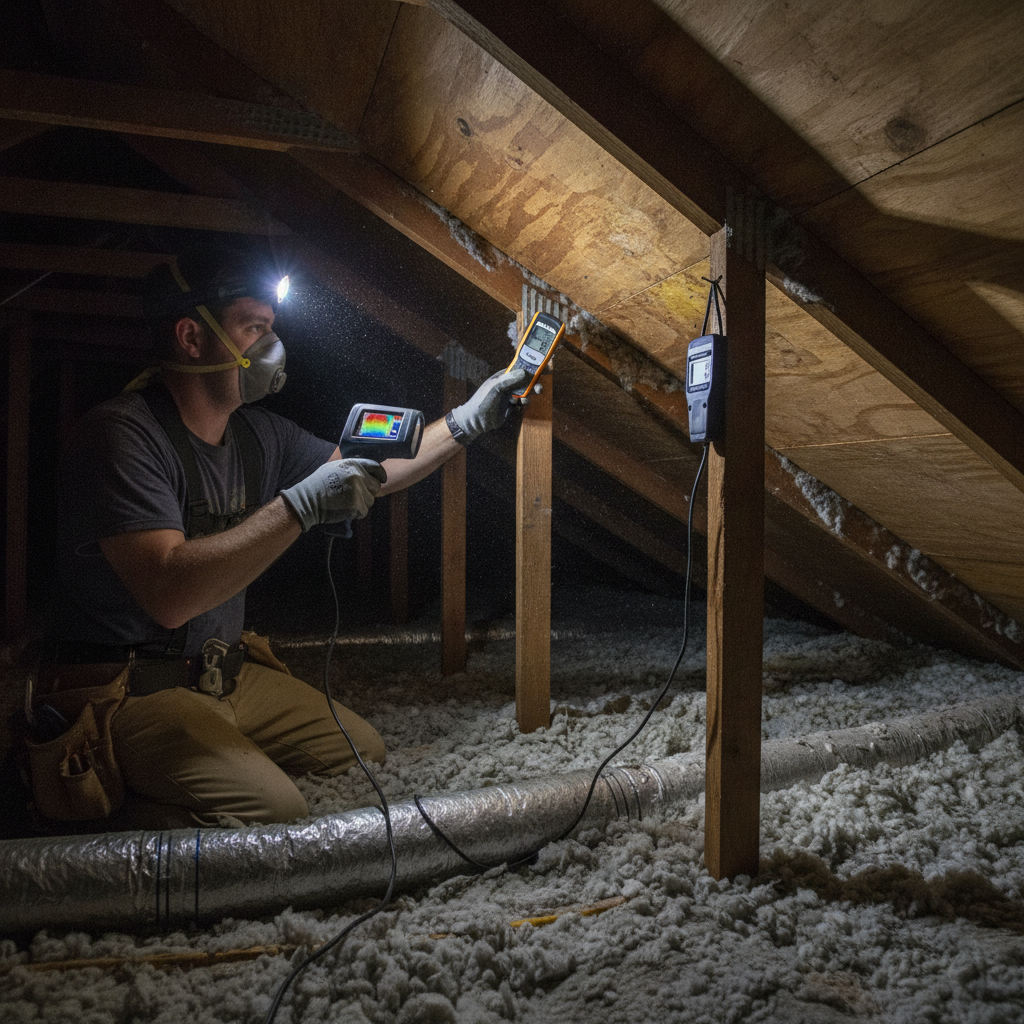
- Thermal imaging + moisture meters to locate leaks, condensation, and wet insulation in minutes.
- HEPA air scrubbers to control particulates during intrusive checks or adjacent remediation.
- PPE and hygiene protocols to prevent cross-contamination between rooms or properties.
- Documentation with photos, readings, and narrative that non-specialists can understand.
Laboratory rigor matters. Many labs follow strict quality controls and method validation across Canadian facilities, which supports consistent, defensible reporting aligned with nationally recognized QA expectations described for quality control testing in Canada. Handling samples correctly—labeling, sealing, and timely shipping—protects validity all the way to the report.
Local mold testing in Scarborough, ON
In Scarborough and across ON, attic and basement mold often ties to winter humidity, roof leaks, and ventilation gaps. We pair targeted mold testing with moisture mapping to confirm sources fast and recommend durable fixes—so homes and businesses get back to normal quickly.
Cold-to-warm seasonal swings, ice damming risks, and mixed-age housing stock make thorough moisture diagnostics essential in this area. Our Scarborough team responds Ontario-wide the same day when urgent leaks, odors, or visible growth appear.
Local considerations for Scarborough
- During winter, indoor humidity can spike from cooking and showers. Use testing plus ventilation checks to stop attic frost and sheathing growth.
- After thaws and heavy rain, test basements and crawl spaces if you notice musty odors—moisture intrusion can be intermittent and subtle.
- For older homes, pair testing with HVAC inspections; legacy ducts and unsealed chases can distribute spores between floors.
Case studies and real examples
Real Ontario projects show how combining testing with moisture fixes prevents repeat mold damage. These snapshots highlight attics, basements, crawl spaces, and HVAC systems—and how data-driven steps resolved them quickly.
Attic, semi-detached home
- Problem: Dark spotting on roof sheathing, musty odor in bedrooms during winter.
- Testing: Air sampling in bedrooms and hallway vs outdoor, tape lifts on sheathing, moisture readings at bath fan duct.
- Findings: Elevated indoor spores during mornings; bath fan vented into attic; localized growth on sheathing.
- Resolution: Attic remediation with containment and HEPA, bath fan re-vented outdoors, added baffles. Clearance passed.
Finished basement, detached home
- Problem: Intermittent odor after spring rains; no visible staining.
- Testing: Cavity air sampling behind baseboards, thermal scan along exterior wall, moisture meter at slab-wall joint.
- Findings: Moisture intrusion at one corner; cavity sample flagged concealed growth in drywall backing paper.
- Resolution: Targeted removal, drying, perimeter sealing. Post-remediation air samples normalized.
Crawl space, cottage-style property
- Problem: Persistent mustiness traveling into main floor via plumbing penetrations.
- Testing: Air sampling in living room and crawl space; surface swabs on joists; RH logging for 48 hours.
- Findings: Elevated RH, insufficient ground vapor barrier; localized growth on joists.
- Resolution: Clean and treat joists, install ground poly, improve vents. Re-testing showed normal indoor ecology.
HVAC, small office
- Problem: Odor on system startup; staff headaches mid-morning.
- Testing: Surface sampling on supply registers, air sampling near returns, inspection of drain pan and coil.
- Findings: Debris on coils and in pan; poor filtration and infrequent maintenance.
- Resolution: Professional HVAC cleaning, filter upgrade, schedule set. Follow-up samples improved.
Each project started with a free inspection and moisture assessment, then used mold testing only where it added clarity. That’s how we minimize disruption while still supplying confident documentation.
Post-remediation verification
Post-remediation verification confirms normal indoor fungal ecology after removal and cleaning. It combines visual inspection, moisture confirmation, and targeted air/surface sampling so you can safely re-occupy and document results for stakeholders.
Verification is the handshake between remediation and long-term prevention. We visually confirm clean surfaces, proper removal of damaged materials, and dry targets before any air or surface sampling. Where appropriate, we deploy HEPA air scrubbers during the final clean to reduce particulates ahead of clearance tests.
- Visual and moisture checks confirm materials are clean and dry to targets before sampling.
- Representative sampling in previously affected rooms and adjacent areas validates containment effectiveness.
- Clear documentation is provided with our Mold Remediation Warranty Certificate upon completion and inspection.
To keep sample integrity strong, we use disciplined labeling and transfer practices that mirror broader Canadian lab expectations for chain-of-custody and sample handling—concepts echoed in national discussions of regulatory testing guidelines and moisture analysis principles. Good hygiene at this stage prevents rework and speeds your reopen timeline.
Need a same-day mold inspection?
Based in Scarborough, we serve Ontario the same day for urgent leaks, odors, or visible growth. Start with a free inspection and moisture assessment.
Learn more about our services • Meet our certified team • Book your appointment
Frequently Asked Questions
These quick answers address the most common questions Ontario homeowners, buyers, sellers, and facility managers ask about mold testing. Each response is clear, direct, and grounded in field experience.
When should I get mold testing instead of just removing visible mold?
Get testing when odors persist without visible growth, when you need documentation for a sale, after leaks to check hidden areas, or to confirm clearance after remediation. Testing is also useful if sensitive occupants are reacting despite recent cleaning.
Do I need both air and surface samples?
Often, yes. Air samples show what occupants are breathing and help screen for hidden sources. Surface samples confirm if staining is active growth and can guide how far removal and cleaning should go. The right mix depends on your building and symptoms.
Will indoor humidity alone cause a failed test?
High humidity doesn’t “fail” a test, but it does drive growth on dust and organic surfaces. If relative humidity stays above roughly 60%, your risk increases. We test, then recommend ventilation, air sealing, or dehumidification to bring RH down and prevent recurrence.
How long does professional mold testing take?
Site work typically takes 60–120 minutes for most homes, depending on size and the number of samples. Accredited labs then analyze samples and return results within a standard turnaround window. We’ll review findings with you and outline clear next steps.
Conclusion and next steps
Effective mold testing blends smart sampling with moisture diagnostics and clear reporting. When data drives your plan—and prevention is built in—you fix the problem once and protect your property’s long-term health.
Key takeaways
- Testing clarifies if growth is active, how widespread it is, and what’s fueling it.
- Moisture mapping is non-negotiable; without it, mold returns.
- Use representative samples and documented chain of custody for reliable results.
- Verify work with post-remediation testing and keep records for stakeholders.
Next steps
- Schedule your free inspection and moisture assessment.
- Review our credentials and methods so you know what to expect.
- Start remediation quickly if testing shows elevated levels, and plan prevention improvements right away.
Ready to act? Book a same-day appointment in Scarborough or anywhere in Ontario. Our certified team will test, explain, and help you breathe easier—fast.
Featured image credit: mold testing inspector in a living room setup with tripod-mounted air sampling pump and HEPA scrubber.