Mold mitigation services are the professional strategies used to prevent mold growth, control moisture, and protect building materials before a full-blown infestation takes hold. At our Scarborough hub (1225 Kennedy Rd), we deliver same-day assessments across Ontario so problems are contained early, documentation is clear, and remediation—if needed—stays targeted and safe.
Byline: Written by ASM Mold Removal Inc. • Last updated: 2026-05-21
Quick Summary
Mold mitigation reduces risk by controlling moisture, improving ventilation, and applying safe, preventative treatments. It pairs inspection and monitoring with targeted interventions—like HEPA filtration and air sealing—so small issues don’t become structural or health hazards. The goal is simple: stop mold before it spreads, then document clear, warranty-backed results.
Here’s what you’ll learn in this complete guide, designed for Ontario homeowners, facility managers, and real estate stakeholders:
- What mold mitigation services include and how they differ from remediation and removal
- Why proactive mitigation protects health, property value, and transaction timelines
- How we inspect, measure, and prevent mold using industry-standard methods
- Which approaches work in attics, basements, crawl spaces, HVAC, and commercial spaces
- Best practices, toolkits, and real Ontario case examples you can use right away
Local considerations for Scarborough
- Transit access near Lawrence East makes same-day site visits easier during urgent weather events; plan 30–45 minutes for setup in multi-family buildings.
- Freeze–thaw cycles spike attic condensation in winter; schedule attic checks right after cold snaps and before spring rains.
- Retail corridors near Midland Lawrence Plaza see heavy door traffic; use entryway dehumidification to offset humidity loads on rainy days.
What Are Mold Mitigation Services?
Mold mitigation services are proactive measures that prevent mold from taking hold: moisture control, air sealing, ventilation improvements, and safe surface treatments. Unlike remediation, mitigation targets sources—leaks, high humidity, cold surfaces—so colonies never thrive, cutting future cleanup time and helping maintain clean indoor air.
Mitigation focuses on root causes. That means finding hidden moisture, sealing air leaks, balancing ventilation, and using EPA-approved antimicrobials when appropriate. The objective is to keep indoor relative humidity around 30–50%, ensure adequate air exchanges, and eliminate persistent dampness that enables mold growth within 24–48 hours after wetting.
- Scope: Attics, basements, crawl spaces, bathrooms, kitchens, utility rooms, and HVAC systems.
- When used: After water events, before renovations or sale, or when smell/staining suggests early growth.
- End state: Documented readings (RH, moisture content), photos, and a prevention plan—often supported by a warranty inspection.
At ASM Mold Removal Inc., mitigation is built into every free inspection and moisture assessment. If we discover active growth, our certified team transitions seamlessly into safe remediation, then re-establishes prevention baselines to reduce recurrence.
Why Mold Mitigation Matters (Health, Property, Compliance)
Mitigation protects health and property value by stopping mold at the source. In Scarborough and the greater Toronto area, seasonal humidity swings and roof leaks can fuel growth. A proactive program reduces allergens, preserves wood framing, keeps transactions on schedule, and minimizes disruption for families and businesses.
Health-wise, mitigation reduces exposure to mold fragments and spores that can aggravate asthma and allergies. Property-wise, controlling moisture prevents staining, wood rot, and insulation damage. For compliance, clean documentation supports real estate disclosures and institutional standards—especially for schools, healthcare, and multi-tenant buildings.
- Time to growth: Many materials can support mold within 24–48 hours after water intrusion if drying lags.
- Humidity target: Keep indoor RH near 30–50% to limit condensation on cold surfaces.
- Air changes: HEPA air scrubbers commonly deliver multiple air changes per hour in contained work zones.
We’ve found that early measurements—surface moisture and ambient RH—paired with strategic air movement can shorten drying cycles by days, protecting drywall, subfloors, and stored contents from secondary damage.
How Mold Mitigation Works (Step-by-Step)
Effective mitigation follows a measurable workflow: assess and test, isolate and ventilate, dry and dehumidify, treat and seal, then verify and document. Each step targets the conditions mold needs—especially moisture—so you remove the cause, not just the symptom.
- Free inspection and moisture assessment: Visual survey, thermal imaging, and meter readings locate leaks, cold spots, and damp substrates.
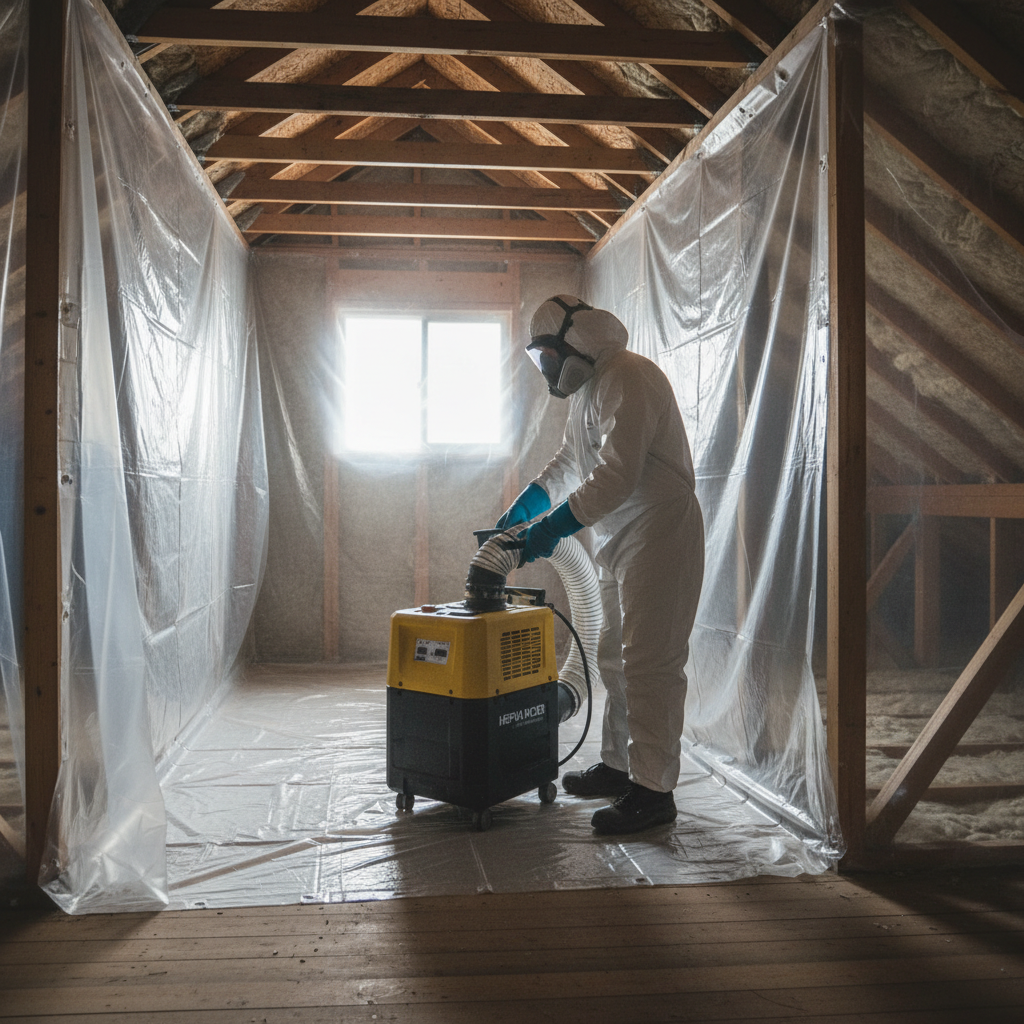
- Containment and ventilation: Poly barriers and negative air maintain safe pressure; HEPA filtration captures airborne particles.
- Drying and dehumidification: Air movers and dehumidifiers move moisture from materials to air, then to collection—measured daily.
- Targeted surface treatments: EPA-approved antimicrobials on qualified surfaces; sanding or removal where deterioration exists.
- Air sealing and insulation tuning: Reduce attic bypasses, right-size insulation, and balance ventilation to stop condensation cycles.
- Verification and documentation: Post-dry readings, photo logs, and a prevention plan; if remediation was performed, a warranty inspection follows.
In our experience, scheduling verification 24 hours after equipment shutdown confirms conditions have stabilized—crucial for basements with cooler slabs and slow moisture rebound.
Types, Methods, and Approaches You Can Count On
Mitigation blends moisture management, air management, and material protection. From attic ventilation corrections to basement dehumidification and HVAC hygiene, the mix changes by space. The best programs pair measurement with durable fixes—so you see readings improve and issues stay resolved.
Attics (condensation, roof leaks, and insulation)
- Air seal warm air bypasses at can lights, hatches, and top plates to curb frost and drip cycles.
- Right-size soffit and ridge vents; relieve blocked baffles and compressions in insulation.
- After leaks, dry sheathing to safe moisture content before applying antimicrobial treatment.
Basements and crawl spaces
- Use continuous dehumidification to maintain 45–50% RH during humid seasons.
- Address capillary moisture: install vapor barriers on soil and consider slab edge insulation.
- Direct downspouts 6–10 feet from foundation; verify positive grade to shed stormwater.
HVAC systems
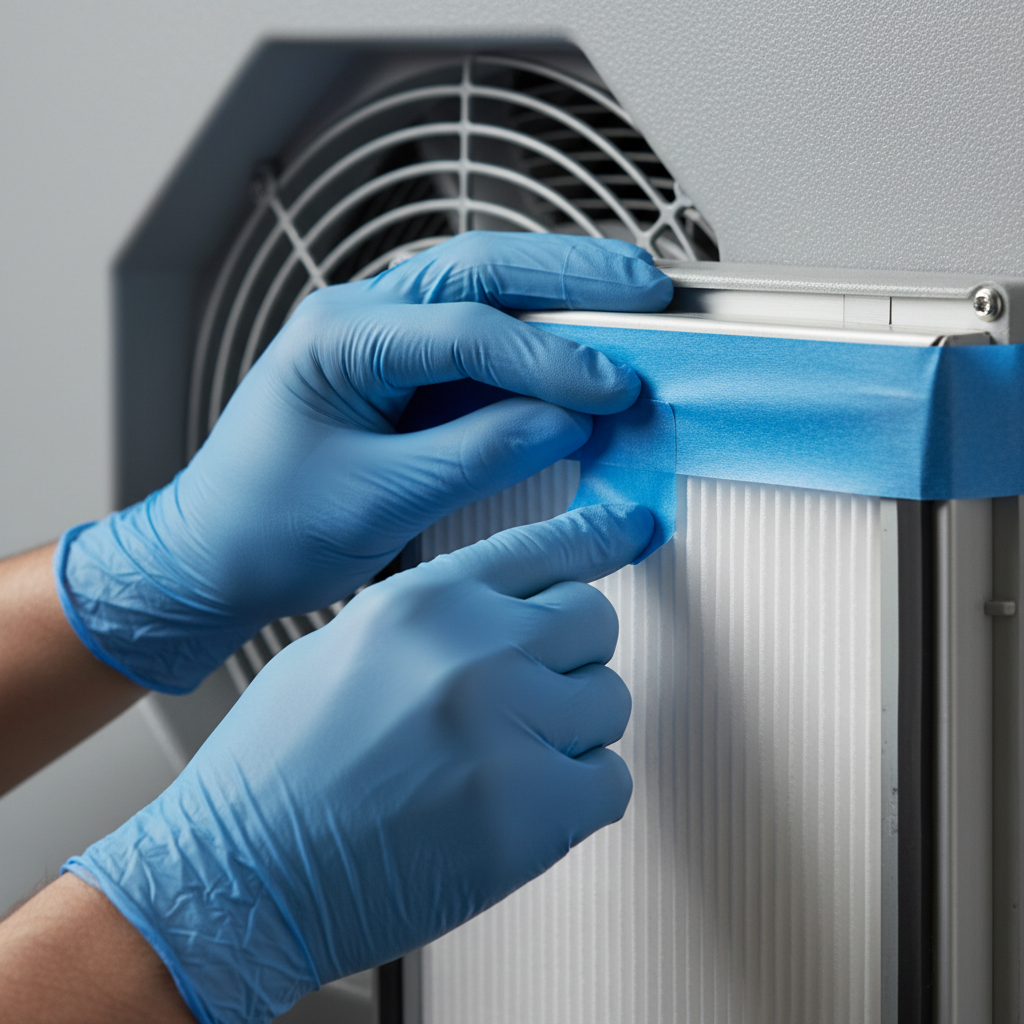
- Clean coils, pans, and supply boots; replace filters on schedule to reduce organic debris.
- Keep ducts dry; investigate sweating on uninsulated sections and correct temperature differentials.
- Balance airflow to avoid cold spots that invite condensation on nearby building surfaces.
For commercial spaces, we often schedule mitigation overnight to minimize disruption. Negative air machines with HEPA capture and discreet containments maintain IAQ while teams work in active retail or office settings.
Best Practices for Lasting Prevention
The strongest mitigation plans combine quick wins—like fixing leaks and lowering RH—with durable building improvements. Track moisture with meters, dehumidify persistently damp areas, and document changes. Prevention becomes routine maintenance, not a one-time event.
- Make moisture visible: Keep a simple log of RH and temperature in basements and attics; review monthly.
- Dry fast: After a spill or leak, start air movement within hours and dehumidify until materials stabilize.
- Vent right: Kitchen and bath fans should exhaust outdoors; verify airflow and runtimes after showers and cooking.
- Seal smart: Weatherstrip attic hatches; insulate ductwork to reduce condensate risk on cold runs.
- Inspect seasonally: In Ontario, check roofs/gutters before fall rains and after snowmelt; scan for ice-dam scars.
Documentation matters. Real estate deals move faster when moisture baselines, photos, and treatment notes are organized. Our teams provide a Mold Remediation Warranty Certificate after project completion and final inspection when remediation was required.
Tools and Resources We Use on Every Project
Reliable mitigation depends on accurate measurement and clean air handling. Thermal imagers, moisture meters, and HEPA equipment verify progress. Antimicrobial agents and sealants protect surfaces, while photo logs and checklists create the proof buyers, tenants, and insurers expect.
Here’s our standard toolkit and how each item supports prevention:
- Thermal imaging cameras: Reveal hidden dampness behind drywall and in attic sheathing.
- Moisture meters (pin/pinless): Confirm when framing and drywall are back in safe ranges.
- HEPA air scrubbers and negative air machines: Reduce airborne load during disturbance; maintain safe pressure.
- Commercial dehumidifiers and air movers: Shorten drying times by increasing evaporation and collection.
- EPA-approved antimicrobials and stain removers: Treat qualified surfaces without leaving harsh residues.
- Containment materials: Poly sheeting, zippers, and tape to isolate work zones and protect occupants.
We integrate these tools into a repeatable field workflow so readings trend down day by day. See our remediation standards and approach for how containment and HEPA filtration protect occupied spaces during work.
Mitigation vs. Remediation vs. Removal (What’s the Difference?)
Mitigation prevents mold by controlling conditions. Remediation eliminates existing mold safely and restores materials. Removal refers to physically taking out contaminated materials. Most real projects use a blend: remediate what’s active, then mitigate to prevent it from returning.
| Approach | Primary Goal | Typical Triggers | Key Tools | Outcome |
|---|---|---|---|---|
| Mitigation | Prevent growth | High RH, condensation, leaks | Dehumidifiers, air sealing, ventilation | Lower risk, stable readings |
| Remediation | Remove active mold | Visible growth, positive tests | Containment, HEPA, EPA antimicrobials | Clean surfaces, safe IAQ |
| Removal | Discard contaminated material | Decay, deep staining, damage | Selective demolition, disposal | Rebuild-ready substrate |
Our Ontario projects often combine all three. Example: attic leak (removal of damaged insulation), light sheathing remediation, then long-term mitigation via air sealing and ventilation correction.
Case Studies and Real-World Examples (Ontario)
The most dependable mitigation pairs fast action with durable fixes. These Ontario snapshots show how early measurements, tight containments, and building improvements prevent repeat issues—and keep families and businesses on schedule.
Scarborough attic: winter condensation cycle
A homeowner near Kennedy Rd reported musty odor after cold snaps. Thermal imaging revealed warm air bypasses around pot lights; sheathing moisture measured elevated. We air-sealed penetrations, corrected baffles, dried sheathing to safe ranges, and applied antimicrobial treatment. Follow-up RH logs stayed within 35–45% during subsequent cold spells.
Toronto retail space: after-hours mitigation
In a busy storefront, we installed discreet containments and HEPA negative air overnight. A pin meter verified damp drywall from a prior leak; targeted drying brought readings down quickly. Work concluded before opening hours, and staff noted improved air freshness with RH stabilized around 45%.
Basement with recurring seepage
We tracked seasonal RH swings and slab-edge moisture in a finished basement. Downspout extensions, grade correction, and continuous dehumidification held RH near 45–50%. When heavy storms arrived, hygrometers showed only brief spikes—no odor, no staining, and no drywall damage.
For same-day help or a free inspection, you can request a free assessment—we’ll measure, document, and outline a step-by-step plan.

Water Events and Fast Mitigation (Timing Matters)
Speed is everything. Dry within 24–48 hours to prevent mold on common materials. Start containment, air movement, and dehumidification promptly; verify progress with daily readings. Quick action often turns a potential remediation into a straightforward mitigation task.
Floods, burst lines, and storm backups require structured response. Establish safety, isolate affected zones, extract standing water, then drive evaporation and collection. On multi-level properties, track moisture migration vertically and laterally—stairwells, chases, and shared walls can hide dampness that re-seeds problems weeks later.
For a helpful overview of municipal flood prevention incentives that influence mitigation planning, see this discussion of Toronto’s subsidy framework in basement flooding programs. When property drainage improves, interior humidity and seepage risks fall measurably.
Inspection and Testing: When and How We Measure
Inspection anchors mitigation. We combine a free visual and moisture assessment with optional air sampling or surface testing where indicators warrant. The aim is clarity: locate moisture sources, confirm material conditions, and decide if prevention alone suffices—or if remediation is required.
- Visual indicators: Discoloration, suspect odors, or condensation beads near thermal bridges.
- Instrument data: Thermal patterns, moisture content in wood/drywall, and RH/temperature trends.
- Sampling (when justified): Air or surface samples to inform the remediation scope or clearance targets.
Bathroom mold often traces back to runtimes and ventilation pathways. For a plain-language refresher on everyday moisture drivers in bathrooms, see this overview of bathroom mold causes. Correcting fan exhaust and runtimes typically lowers spikes by dozens of percentage points.
Learn how mitigation folds into our larger service approach on the ASM Mold Removal Inc. homepage.
Mitigation Checklists You Can Use
A good checklist turns prevention into habit. Track RH, inspect known risk zones, and log actions. Over time you’ll see patterns—like a basement corner that spikes every storm—so you can target fixes that stick.
- Keep indoor RH near 30–50%; run dehumidifiers automatically in humid months.
- After showers, run the bath fan 20–30 minutes; verify it exhausts outdoors.
- Inspect attics each season for frost stains, blocked baffles, or wet sheathing.
- Redirect downspouts at least 6–10 feet and maintain positive grading.
- Replace HVAC filters on schedule; clean coils and pans to prevent biofilm.
- Log leaks, drying actions, and final readings; attach photos before listing or tenant turnover.
Even small steps—like adding door sweeps to cold utility rooms—can reduce condensation on nearby materials by several degrees of dew point margin, enough to curb recurring surface growth.
Need Guidance? Get a Free, Same-Day Assessment
If you’re noticing odors, staining, or elevated humidity, we can be onsite quickly. We measure, document, and deliver a prevention plan on the spot—escalating to remediation only if necessary. You get clear next steps and a path to warranty-backed results.
Our teams serve homes, offices, retail stores, warehouses, schools, and healthcare facilities discreetly and efficiently. We prioritize safety, containment, and communication, so you can keep daily life and operations moving while we mitigate risk.
Frequently Asked Questions
These concise answers address the questions we hear most about mitigation, inspection, and prevention—especially from Ontario homeowners, buyers, sellers, and facility managers preparing for transactions or seasonal shifts.
What’s the difference between mitigation and remediation?
Mitigation prevents problems by controlling conditions like humidity, air leaks, and temperature. Remediation removes active mold safely using containment, HEPA filtration, and approved treatments. Often, we remediate existing growth and then implement mitigation to keep it from returning.
How fast should I act after a leak or flood?
Begin drying immediately. Many materials can support mold within 24–48 hours if moisture lingers. Start air movement and dehumidification, verify progress with moisture readings, and isolate the area. Quick action can turn a potential remediation into simple mitigation.
Do I always need air testing?
Not always. We start with a free visual and moisture assessment. If indicators suggest wider impact—or documentation is needed for a transaction—we can add air or surface sampling to inform scope and verify results.
Will mitigation disrupt my daily routine?
Typically, no. We schedule work to minimize disruption and use containments with negative air to protect occupied spaces. Commercial projects often run overnight so staff and customers aren’t impacted.
Key Takeaways
Prevent first, measure always, and document everything. These three habits turn mold control from a one-time fix into a resilient building practice—one that protects health, preserves value, and speeds up real estate timelines.
- Mitigation controls conditions so mold never takes hold.
- Attics, basements, crawl spaces, and HVAC each need tailored tactics.
- 24–48 hours is the critical drying window after water events.
- Keep RH near 30–50% and log changes seasonally.
- Documentation and follow-up keep transactions smooth and occupants safe.
Conclusion and Next Steps
A strong mitigation plan blends rapid response with durable building improvements. If moisture is controlled and airflow is right, mold struggles to grow—saving you weeks of disruption later. When in doubt, measure, document, and act quickly.
Ready to put a prevention plan in place? Explore our service overview, review our standards and warranty process, or book a same-day inspection in Scarborough. Our team will help you stabilize conditions, prove results, and keep them that way.
For additional context on cleaning approaches and moisture control concepts that complement mitigation planning, you can browse this practical mold cleaning overview. For local moisture drivers and programs that influence basement risk, see these discussions on bathroom mold causes and basement flooding programs.