Mold cleanup is the safe removal of visible and hidden mold colonies and the correction of the moisture source that caused them. Within 24–48 hours of a leak, growth can begin. At our Scarborough location (1225 Kennedy Rd, ON), ASM Mold Removal Inc. provides certified inspection and remediation to restore healthy indoor air.
By Asmmoldremoval • Last updated: 2026-06-10
Quick Summary
Effective mold cleanup removes active growth and fixes the moisture driving it. The winning formula is simple: assess, contain, filter, remove or treat, dry, repair, and verify. This complete guide explains each step, what tools to use, and when Ontario homeowners should call certified professionals for faster, safer results.
Here’s the plan at a glance so you can act with confidence today.
- Understand what mold cleanup is, why timing matters, and how to stop regrowth.
- Follow a proven, step-by-step remediation sequence used by certified teams.
- See what changes in attics, basements, crawl spaces, and HVAC systems.
- Use prevention tactics: humidity control, ventilation, drainage, and maintenance.
- Decide DIY vs. pro using a clear comparison of risks and requirements.
In our experience serving Ontario homes and commercial sites, the first 24–72 hours after water intrusion decide outcomes. Keep indoor relative humidity generally below ~50%, target wood at safe moisture content before rebuild, and document every step with photos and readings. When the area is large, porous, or tied to HVAC, professional containment and HEPA air control minimize disruption and protect occupants. For details about our credentials and process, see our company background.
What Is Mold Cleanup?
Mold cleanup is the systematic removal of mold from building materials, paired with moisture correction to prevent regrowth. It combines assessment, source repair, containment, HEPA air filtration, safe cleaning or selective removal, thorough drying, and post-remediation verification for a durable, health-focused result.
Mold thrives where moisture, a food source, and time converge. Cleanup breaks that triangle. We start by finding where water is entering or condensing, and we don’t rebuild until materials are dry to target levels. On non-porous surfaces, we often HEPA vacuum and damp wipe with EPA-appropriate antimicrobials. On porous materials (like drywall or insulation) with embedded growth, removal and replacement is the safer path.
Think of mold cleanup as both a hygiene process and a building science correction. Without fixing ventilation, insulation gaps, or drainage, cleaning alone rarely holds. That’s why our Ontario projects pair remediation with prevention measures—bath fan terminations to the exterior, attic ventilation balancing, sill plate sealing, and dehumidification where needed.
Self-contained answer: Mold cleanup means removing growth and eliminating the moisture that fuels it. For hard, non-porous surfaces in a dry environment, HEPA vacuuming, damp wiping with an appropriate antimicrobial, and complete drying can suffice. For porous materials or damp areas, controlled removal with containment and HEPA filtration is the standard-aligned solution.
Why Mold Cleanup Matters
Timely mold cleanup protects health, preserves building materials, and prevents reoccurrence. Left unchecked, colonies spread across porous surfaces, release spores, and move through return air paths. Fast, standards-driven remediation reduces occupant exposure, limits structural damage, and keeps real estate transactions on track.
Why act quickly? Growth can begin in 24–48 hours on damp cellulose. Indoor humidity above ~60% extends risk windows, especially in basements after spring thaws. Spores hitch rides in airstreams; a leaky return can spread issues room-to-room. The longer materials remain wet, the deeper mold penetrates and the more selective removal you’ll need later.
There’s a practical cost to waiting beyond health considerations: drywall, insulation, carpet, and MDF trim absorb moisture quickly. Porous, colonized materials are rarely salvageable. We’ve seen Ontario sellers lose weeks while chasing re-cleanings that ignore the moisture source. Projects finish faster when the plan pairs removal with measured drying and ventilation or drainage improvements.
Self-contained answer: Mold cleanup matters because moisture-driven growth damages materials and degrades indoor air quality. Acting within the first 1–3 days after a leak, containing the work area, filtering air with HEPA, and drying to target levels prevents spread, protects occupants, and leads to durable, verifiable results.
How Mold Cleanup Works (Step-by-Step)
Professional mold cleanup follows a repeatable sequence: assess and map moisture, isolate the area, set negative air with HEPA filtration, remove or treat affected materials, dry to target levels, repair, and verify with inspection and optional air sampling. Documentation supports insurance and real estate needs.
Here is the process we use across Ontario homes, retail units, offices, and institutions. Each step builds safety and certainty.
- Inspection and moisture mapping: Visual review, thermal imaging, and pin/pinless moisture meters locate leaks and hidden damp areas. We record baseline readings and take photos for your file.
- Source correction: From roof leaks to bathroom fans exhausting into attics, the moisture driver is addressed first. Drains, flashing, and plumbing are checked; fans and dryer vents must terminate outdoors.
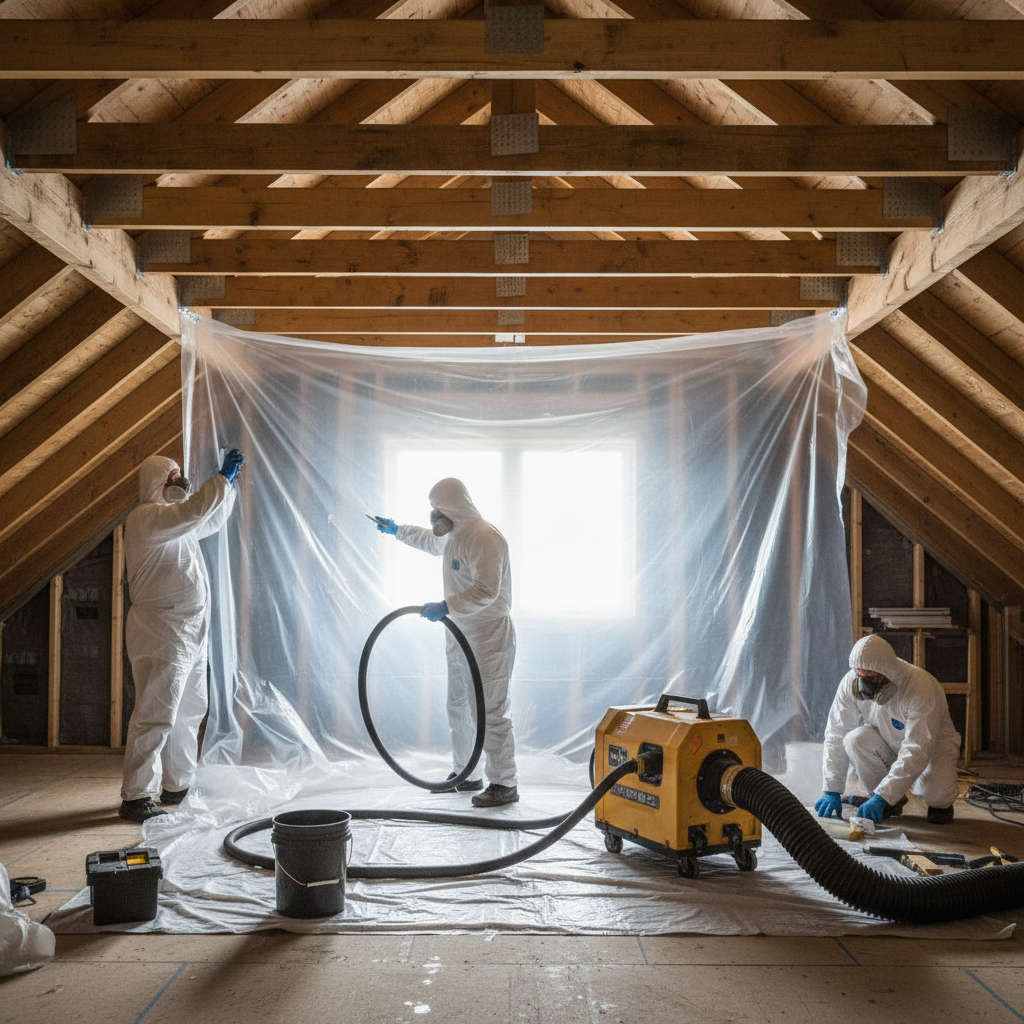
- Containment setup: Poly sheeting with sealed seams, zipper access doors, and floor protection isolate the work zone. Pressure monitoring or smoke tests confirm negative pressure.
- Air control with HEPA: Negative air machines capture airborne spores and fine dust. We size machines to room volume and maintain steady air exchanges for the duration of work.
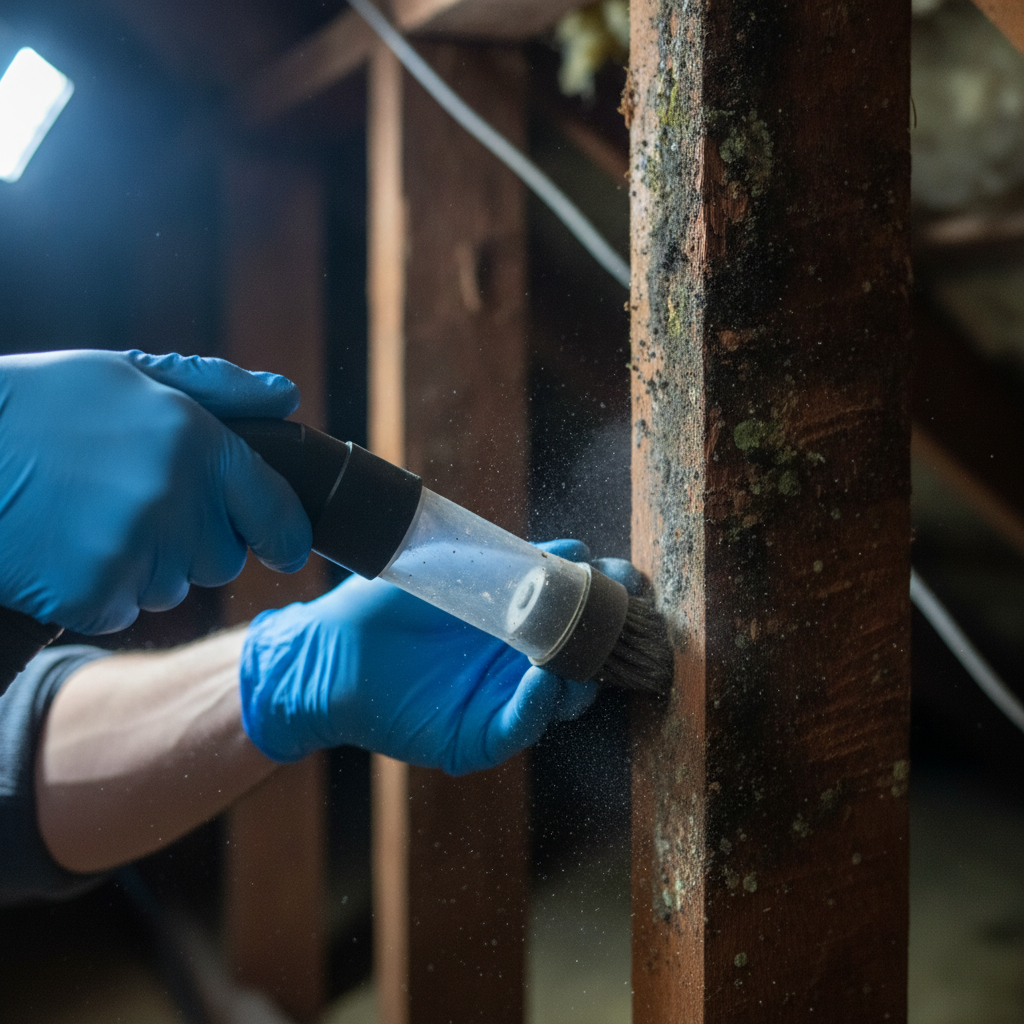
- Selective removal and cleaning: Porous materials with embedded growth are cut, bagged, and removed under containment. Non-porous and semi-porous surfaces are HEPA vacuumed and damp wiped with an EPA-appropriate antimicrobial, then detailed.
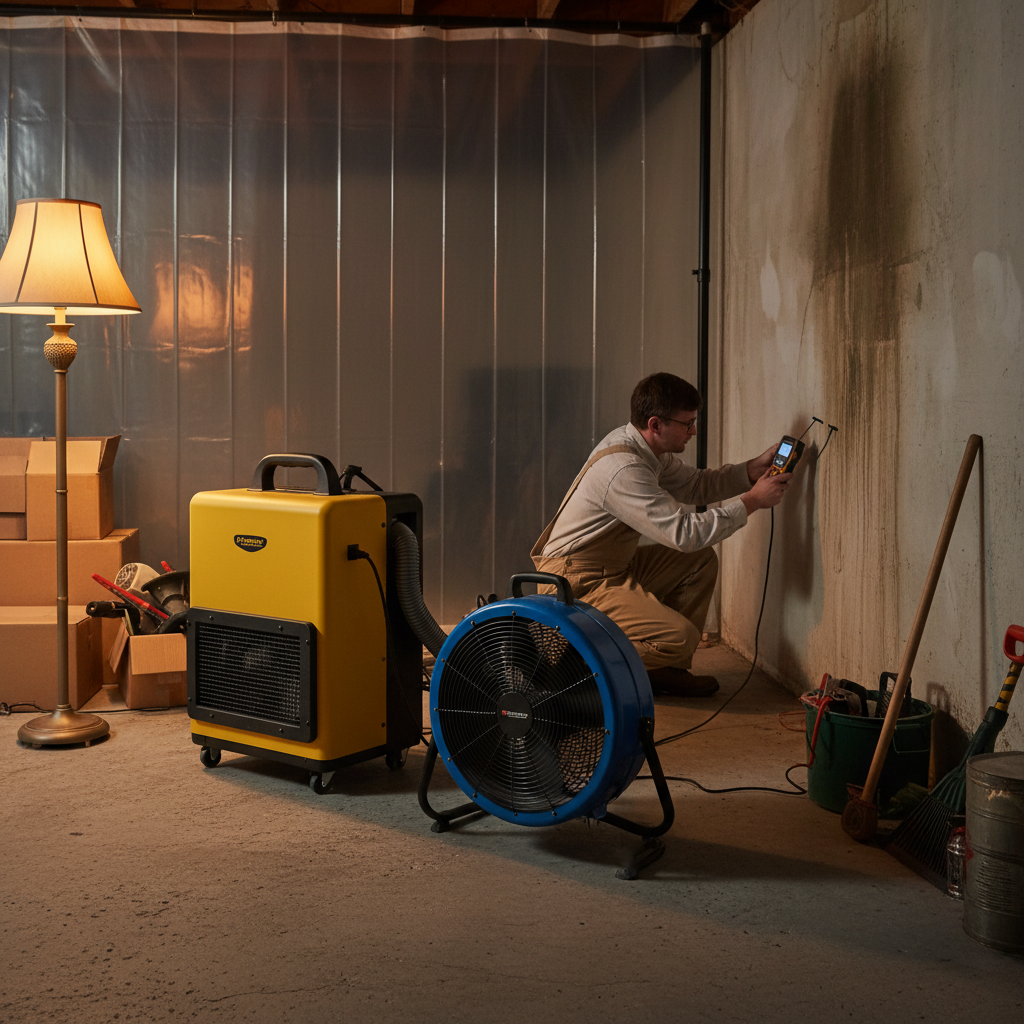
- Drying and stabilization: Commercial dehumidifiers and air movers target safe moisture content in wood and drywall. We monitor daily until stable, generally holding indoor RH below ~50%.
- Repairs and restoration: We replace insulation, drywall, and trim, then prime/seal as appropriate. Where needed, we improve ventilation balance or drainage to prevent recurrence.
- Verification: A visual clearance, dry readings, and optional air sampling confirm success. You receive documentation and our Mold Remediation Warranty Certificate upon completion and inspection.
For urgent issues, our Ontario same-day response gets containment and HEPA filtration running quickly, minimizing disruption to families and businesses.
Self-contained answer: The step-by-step mold cleanup workflow is: find and fix moisture, isolate the area, run HEPA filtration under negative pressure, remove or treat affected materials, dry to safe targets, restore, and verify. Follow this sequence to protect occupants and ensure long-term success.
Types, Methods, and Approaches
Approaches vary by material and location. Clean and treat hard, non-porous surfaces; remove colonized porous materials; and pair every method with moisture correction. Attics, basements, crawl spaces, and HVAC systems each have distinctive drivers and best-practice responses.
By material
- Non-porous (tile, metal, glass, sealed finishes): HEPA vacuum + damp wipe with an appropriate antimicrobial; verify dryness before use.
- Semi-porous (finished wood, subfloors): Detail clean, light abrasion if needed, antimicrobial application, and sealing once dry and clean.
- Porous (drywall, insulation, carpet, MDF): If colonized, remove and discard. Clean the substrate and dry before rebuild.
By location
- Attics: Correct fan terminations, soffit/ridge ventilation, and roof leaks. Treat sheathing/rafters under containment; replace compromised insulation.
- Basements: Manage hydrostatic pressure and seepage; treat framing; use dehumidifiers and verify RH stays generally below ~50%.
- Crawl spaces: Install or repair vapor barriers, add drainage where needed, treat framing; consider encapsulation strategies.
- HVAC systems: Address condensate, duct leakage, and filtration (proper MERV rating). Clean coils and pans; seal returns to prevent cross-contamination.
Special cases—like black mold concerns, wood framing discoloration, or roof leak mold damage—follow the same logic: source first, then safe removal or treatment, then drying and prevention.
Self-contained answer: Choose methods by material and moisture condition. On hard, dry surfaces, HEPA vacuuming and antimicrobial wiping may suffice. On porous or damp materials, controlled removal under containment prevents spread. In attics and basements, pair remediation with ventilation, drainage, and dehumidification to stop recurrence.
Best Practices and Checklists
The most reliable mold cleanup combines safety controls with disciplined drying and thorough verification. Maintain negative pressure, use true-HEPA capture, record moisture readings, keep RH generally below ~50%, and don’t rebuild until materials meet target moisture content for your area.
Safety and containment
- Seal containment seams and protect floors to keep dust and spores inside the work zone.
- Confirm negative pressure with a manometer or a simple smoke test before demolition.
- Use appropriate PPE (respirator, gloves, eye protection) and change filters as directed.
Moisture and drying
- Use a thermal camera to find hidden cold/damp spots behind walls and in corners.
- Target typical wood moisture content ranges before closing walls; verify daily until stable.
- Ensure continuous dehumidifier drainage; clean filters to maintain performance.
Verification and documentation
- Take before/after photos, note meter readings, and keep a daily log of humidity and temperature.
- Clean grills and returns near the work zone; replace filters after work completes.
- Request a written summary and, where applicable, a warranty-backed clearance.
Regional practices and third-party overviews vary widely; some public write-ups discuss basic “mould cleaning” steps in different climates, such as this general mould cleaning overview. Use local, standards-aligned practices for Ontario homes and businesses.
Self-contained answer: Best practice mold cleanup prioritizes safety (containment and HEPA), moisture targets (dry to safe levels; RH generally below ~50%), and proof (photos, readings, clearance). Don’t close walls or reinstall insulation until measurements confirm stability and the source of moisture is corrected.
Tools and Resources
Plan tools around two goals: control air and control moisture. HEPA vacuums and negative air machines capture spores; dehumidifiers and air movers dry materials; thermal cameras and moisture meters confirm progress; EPA-appropriate antimicrobials assist surface cleaning.
From urgent attic mold removal to basement mold cleanup after a thaw, we deploy equipment to match volume and material type. Typical setups include one or more negative air machines sized to space, sealed ducting, perimeter dehumidification, and targeted air movers to eliminate dead zones inside containment. We also stage microfiber cleaning kits, sprayers, and sealants for detailed work.
- Air control: Negative air machine (true HEPA), flexible ducting, pressure monitoring.
- Drying: Commercial dehumidifier with continuous drain, calibrated hygrometer/thermometer.
- Verification: Thermal imaging camera; pin/pinless moisture meters with recorded baselines.
- Cleaning: HEPA vacuum, microfiber tools, sprayers, EPA-appropriate antimicrobial.
- Protection: Poly sheeting, floor protection, zipper doors, PPE.
Equipment lists from other regions can be illustrative but may not reflect Ontario conditions; for example, a Sydney-focused mould cleaning write-up emphasizes climate-specific humidity control. Apply tools and targets suited to your property and season.
Soft CTA: Need certified technicians, containment, and HEPA filtration set up today? Our team offers Ontario-wide, same-day response with end-to-end remediation. Book a free inspection.
Mold Cleanup in Scarborough, ON: What to Know
In Scarborough and across ON, seasonal humidity swings and attic ventilation issues create frequent mold hotspots in attics and basements. Successful cleanup corrects moisture, improves ventilation, and uses HEPA-controlled removal followed by documented verification that property stakeholders can trust.
Housing stock and weather patterns shape typical problems—and practical solutions. Attics often show sheathing discoloration where bathroom fans exhaust into the space or soffit vents are blocked by insulation. Basements face spring thaw moisture and hydrostatic pressure after heavy rain. Schools and retail units need discrete containment with after-hours schedules to limit downtime. Our Scarborough team stages gear to address these local realities rapidly.
We also see crawl space moisture move upward into main-floor framing during humid stretches. A reinforced vapor barrier and improved grading can lower ground moisture exposure. For HVAC systems, correcting condensate drainage and improving filtration helps prevent spores from cycling through return air pathways during seasonal changeovers.
Local considerations for Scarborough
- Schedule attic assessments before colder months; confirm bath and dryer fans vent outdoors and soffit/ridge ventilation is clear.
- Plan basement dehumidification ahead of spring thaw; track RH weekly and keep it generally below ~50%.
- For offices and retail, request after-hours containment and staging so staff access is uninterrupted during remediation.
Regional service directories may list “certified” providers with varying standards; listings like this Ontario mold listing show how wide the field is. Always verify containment, HEPA, and documentation practices before hiring.
Self-contained answer: For Scarborough and ON, focus on attic ventilation fixes, basement dehumidification after thaw, and HVAC maintenance during seasonal changeovers. Pair remediation with moisture correction and request written verification to satisfy homeowners, buyers, sellers, and property managers.
Case Studies and Real Examples
Successful projects all follow the same playbook: fix the source, remediate under containment with HEPA, dry to targets, then verify. Attic, basement, crawl space, and commercial scenarios here illustrate how prevention decisions—venting, dehumidification, grading—change outcomes.
Attic mold with bathroom fan correction
Finding: A Scarborough homeowner noticed dark sheathing in winter. Inspection showed a bathroom fan exhausting into the attic, blocked soffits, and high humidity during showers. Thermal imaging and meter readings confirmed cool, damp zones across the north slope.
- Action: Redirected the fan to the exterior, cleared soffits, added baffles, established containment, and treated sheathing and rafters.
- Drying: Held RH under ~50% during work and monitored wood moisture daily until stable.
- Result: Clean surfaces, dry readings, and a warranty-backed clearance that satisfied the buyer’s agent.
Basement seepage after spring thaw
Finding: Musty odor and sill plate discoloration in a finished basement. Moisture readings were elevated along the perimeter after freeze–thaw cycles. We mapped thermal anomalies near a downspout discharge.
- Action: Exterior drainage improvements, interior sill plate and joist treatment under containment, and targeted dehumidification.
- Stabilization: Continuous drain on the dehumidifier; RH tracked daily to remain generally below ~50%.
- Result: Odor elimination, stable readings, and preserved finishes without recurring callbacks.
Retail unit with hidden HVAC return leak
Finding: Ceiling tiles showed spotting above aisles. A leaky return drew spores across the sales floor. Inventory and hours couldn’t be disrupted.
- Action: Nighttime containment and HEPA filtration, selective ceiling tile removal, return seal and condensate fix, and cleaning of nearby grills.
- Scheduling: After-hours staging with daily handover to keep operations normal.
- Result: Zero daytime disruption; documented clearance satisfied the landlord and insurer.
Self-contained answer: Case outcomes improved when we corrected moisture first, then remediated under containment with HEPA, dried to targets, and provided documentation. The constant across homes and businesses: moisture control and verification prevent repeat issues.
DIY vs. Professional: Comparison
DIY fits small, dry, non-porous surfaces with a corrected moisture source. Professional remediation is right for porous materials, recurring dampness, HVAC involvement, or larger areas. Containment, HEPA air control, and documentation are the big differentiators.
Use this table to decide your next step. When in doubt, call for a same-day inspection—clear guidance early prevents false starts and repeat cleanings that don’t hold.
| Scenario | DIY Approach | Professional Approach |
|---|---|---|
| Small spot on tile | HEPA vacuum + damp wipe; dry thoroughly; monitor RH | Not usually required if the moisture source is fixed |
| Drywall discoloration | Risky—porous; avoid disturbance that spreads spores | Containment, selective removal, HEPA filtration, drying |
| Attic sheathing growth | Limited DIY; ventilation/source correction essential | Treat under containment; fix ventilation; restore insulation |
| HVAC involvement | Not recommended | System-safe cleaning, filtration upgrade, condensate fix |
Self-contained answer: Choose DIY only for small, dry, non-porous areas after fixing the source. For porous materials, damp zones, attic or basement systems, or any HVAC spread, professional remediation with containment and HEPA filtration ensures safety and a verifiable finish.
Frequently Asked Questions
These quick answers target decisions homeowners and property managers face most often—how fast mold grows, where DIY applies, what verification means, and the habits that keep mold from returning.
How fast does mold grow after a leak?
Growth can begin within 24–48 hours on damp materials. Rapid drying and containment limit spread. If porous materials remain wet for several days, schedule a professional assessment to prevent deeper colonization.
When is DIY mold cleanup okay?
If the area is small, on non-porous surfaces, and the source is already corrected, DIY can work: HEPA vacuum, damp wipe with an appropriate antimicrobial, and dry fully. Porous materials, recurring moisture, or HVAC involvement warrant professionals.
What is post-remediation verification?
Verification confirms the work succeeded. It typically includes a visual inspection, dry moisture readings, and optional air sampling. Documentation helps homeowners and real estate parties proceed with confidence.
How do I prevent mold from coming back?
Control moisture. Keep indoor humidity generally below ~50%, vent bathrooms and dryers outside, fix leaks quickly, maintain drainage, and use dehumidifiers in basements. Verify that materials are dry before closing walls or reinstalling insulation.
Key Takeaways
Stop moisture, remediate safely under containment, dry to targets, and verify. Prevention—ventilation, drainage, dehumidification, and habits—keeps your property protected and your indoor air healthier over the long term.
- Moisture control is the foundation of every successful mold cleanup.
- Containment and true-HEPA filtration protect occupants during work.
- Porous, colonized materials are usually removed, not cleaned.
- Photos, readings, and a warranty-backed finish support real estate needs.
Conclusion and Next Steps
The most dependable mold cleanup is structured and documented: fix the source, contain and filter, remove or treat, dry, restore, and verify. If your situation is beyond a small hard-surface spot, call certified professionals who can respond same day and stand behind the result.
ASM Mold Removal Inc. serves homeowners, property managers, and businesses across Ontario with same-day inspections, safe remediation, and a Mold Remediation Warranty Certificate after completion and inspection. Visit our homepage to learn more or book a free inspection now.