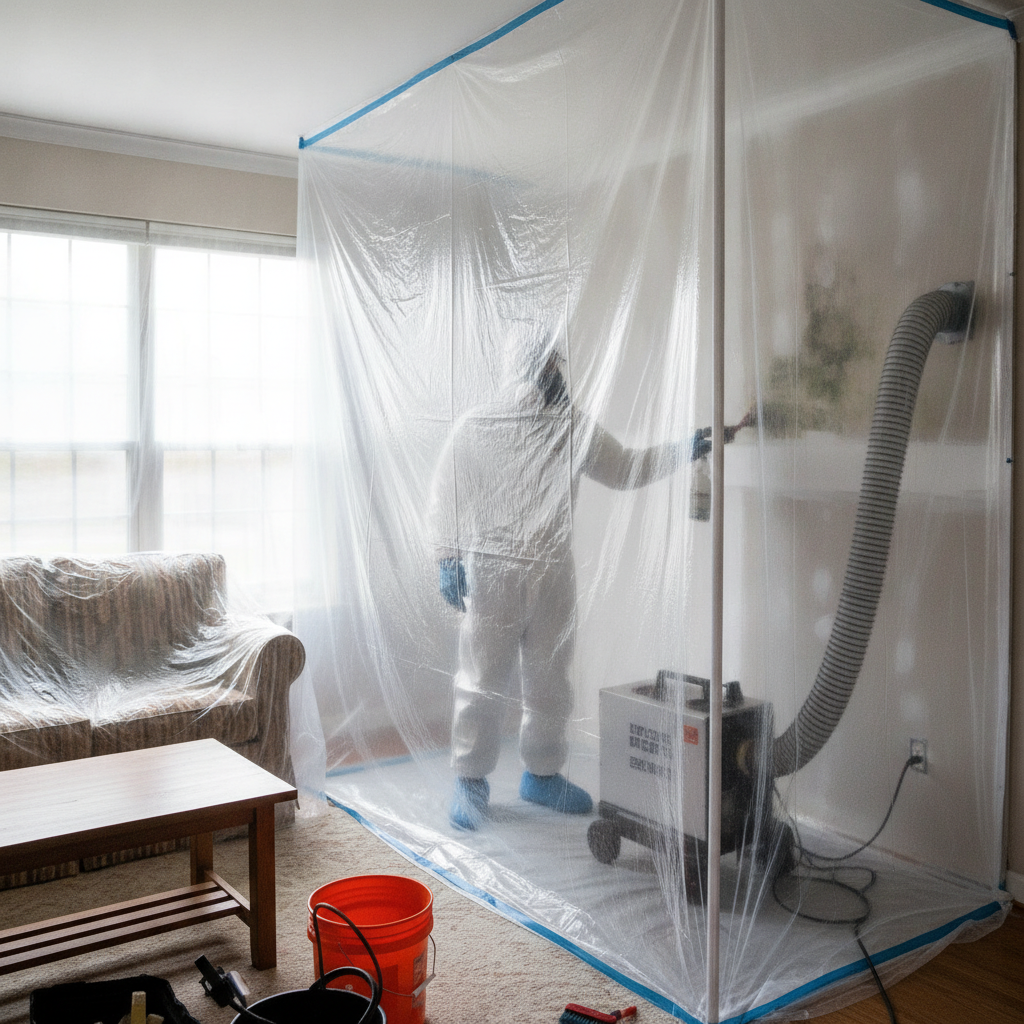
To kill mold on drywall, stop the moisture source, isolate the area, and clean small, surface growth with hydrogen peroxide or an EPA-registered fungicide; replace waterlogged or crumbling drywall. From our Scarborough hub at 1225 Kennedy Rd (ON), ASM Mold Removal Inc. uses HEPA filtration, containment, and verification to keep families safe.
By ASM Mold Removal Inc. • Last updated: 2026-06-17
Quick Summary
Drywall mold is a moisture problem first. Fix leaks, dry the wall, and choose the right response: clean small surface spots; remove and replace porous, damaged sections. Use containment and HEPA filtration to prevent spread. When in doubt—or if the area exceeds about 10 sq ft—call certified remediation specialists.
This complete guide shows homeowners exactly how to evaluate, clean, or replace mold-affected drywall—and when to bring in a certified crew. You’ll also find prerequisites, a step-by-step workflow, troubleshooting tips, and prevention strategies that align with professional standards.
- What drywall mold is and how it spreads
- Prerequisites: safety, scope, and moisture control
- Step-by-step cleanup for painted vs. unpainted drywall
- Methods compared: clean, remove, encapsulate
- Prevention playbook for attics, basements, and bathrooms
- When to call ASM Mold Removal Inc. for same-day help across Ontario
What Is Drywall Mold and Can You Actually Kill It?
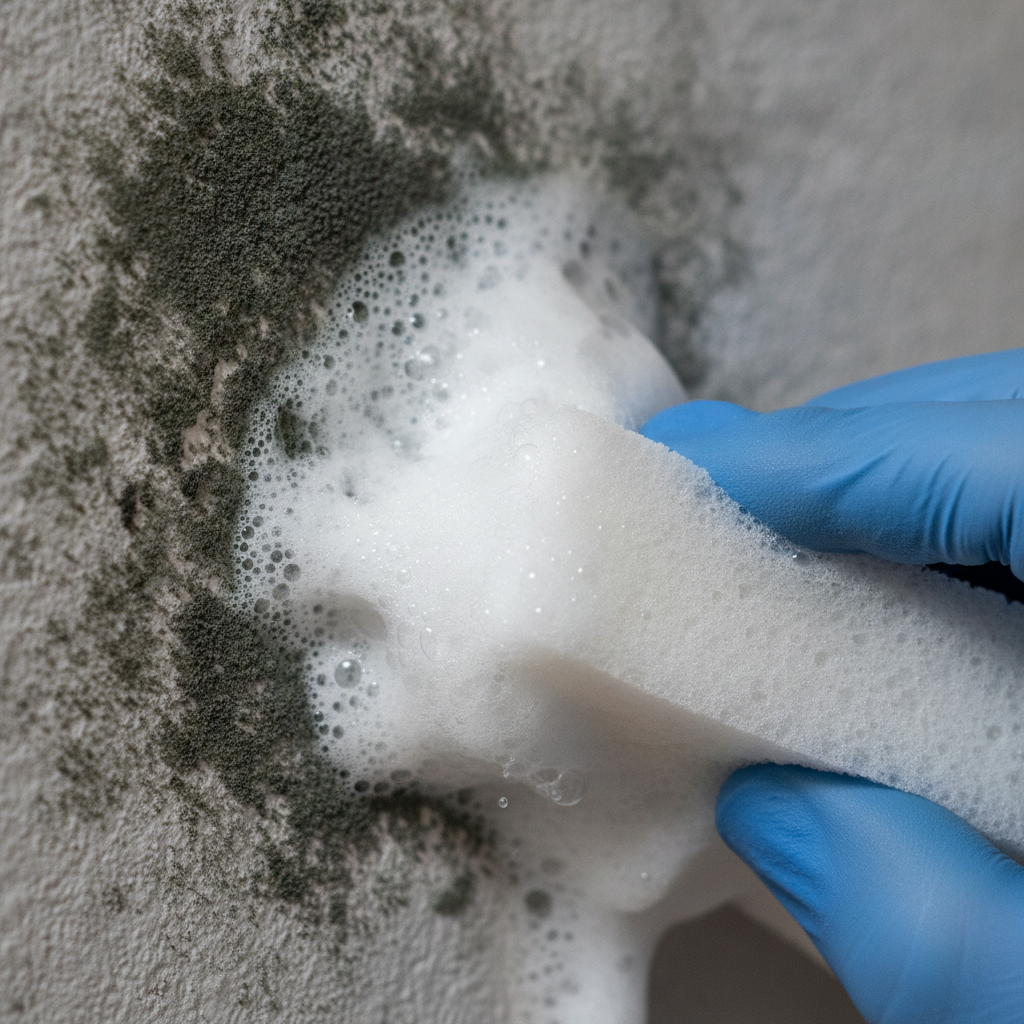
Drywall mold is a fungal colony feeding on paper-faced gypsum when moisture lingers 24–48 hours. You can kill surface-level growth on intact, painted drywall, but porous or water-damaged boards must be removed. Success depends on stopping moisture, isolating spores, and verifying dryness after treatment.
Drywall is a sandwich: a gypsum core wrapped in paper. That paper is cellulose—food for mold. When relative humidity stays high or a leak wets the board, spores germinate and spread. Spotting and musty odor are common first signs. Thermal imaging and a moisture meter confirm what the eye can’t see.
- Surface vs. subsurface: Painted drywall can resist shallow penetration; unpainted or saturated board allows hyphae to root deeper.
- Time to growth: Mold often begins growing within 24–48 hours after water exposure if the wall isn’t dried quickly.
- Health context: Sensitive occupants may react to spores and fragments; source removal and filtration reduce exposure.
In our Ontario projects, once moisture is stabilized below typical building material baselines (often under ~15% for drywall), visible growth either cleans off painted skins or necessitates surgical removal and replacement. The right call comes from measurement, not guesswork.
Why Killing Mold on Drywall Matters
Unresolved drywall mold drives recurring odors, staining, and spore dispersal, while signaling an active moisture fault. Addressing it protects indoor air quality, preserves finishes, and prevents wider mold damage to framing, insulation, and contents.
Left alone, drywall mold doesn’t plateau—it migrates. Air movement, temperature swings, and occupant activity send spores throughout rooms. Every cleanup that ignores moisture data (and containment) risks a comeback. We’ve seen attics seed bedrooms, and tiny bathroom leaks stain adjoining closets within weeks.
- Property risk: Extended wetness wicks into studs and insulation, complicating what could have been a simple panel swap.
- Indoor air quality: Spores, fragments, and microbial VOCs contribute to musty odors and occupant complaints.
- Real estate friction: Home inspections flag past or active mold; documented remediation smooths transactions.
When our certified team documents moisture sources, isolates work areas, and verifies dryness, recurrence rates drop dramatically. That’s why our projects include prevention plans and a Mold Remediation Warranty Certificate upon completion and inspection.
Prerequisites: Safety, Scope, and Moisture Control
Before any drywall mold work, verify safety, define scope, and stop water. Wear PPE, set containment, measure moisture, and choose clean-or-replace based on board condition. If growth exceeds roughly 10 sq ft, call a certified remediation company for professional containment and HEPA filtration.
Preparation determines outcome. Skipping containment or drying wastes effort and spreads spores. Here’s how we prep Ontario homes and what you can mirror safely on small areas.
Safety checklist
- PPE: N95 or half-face respirator with P100 filters, gloves, eye protection, disposable coveralls.
- Ventilation: Avoid box fans that push spores; professionals use negative air machines with HEPA.
- Isolation: Plastic sheeting to form a work zone; seal HVAC supply/return within the zone.
Scope and moisture
- Moisture meter: Compare suspect drywall to adjacent, unaffected areas; map the wet perimeter.
- Thermal imaging: Identify cold, damp anomalies around plumbing, windows, or roof lines.
- Decision rule: Painted, intact drywall with small spots may clean; soft, sagging, or crumbling panels require removal.
When to call ASM Mold Removal Inc.
- Growth larger than about 10 sq ft or multiple rooms.
- Attic sheathing or insulation also shows contamination.
- Recurrence after DIY cleaning, or suspected HVAC involvement.
If you’re unsure about safety or scope, schedule a free inspection and moisture assessment through our contact page. We offer Ontario-wide same-day response for urgent issues.
Step-by-Step: How to Kill Mold on Drywall (Painted vs. Unpainted)
Clean small spots on painted drywall with hydrogen peroxide (3%) or an EPA-registered fungicide after setting containment and drying. For unpainted, waterlogged, or deteriorated drywall, cut out 12–24 inches beyond visible staining, bag debris, HEPA-vac, and reinstall new board before priming and painting.
Clean small spots on painted drywall
- Set containment: Plastic off the area; close doors; switch HVAC to off for the zone.
- HEPA vacuum: Gently capture loose spores from the surface (brush attachment).
- Apply cleaner: Lightly mist 3% hydrogen peroxide or an EPA-registered fungicide; allow dwell time per label.
- Agitate and wipe: Use disposable microfiber pads; avoid over-wetting.
- Dry and verify: Promote drying; re-check with a moisture meter before repainting.
Remove and replace damaged or unpainted drywall
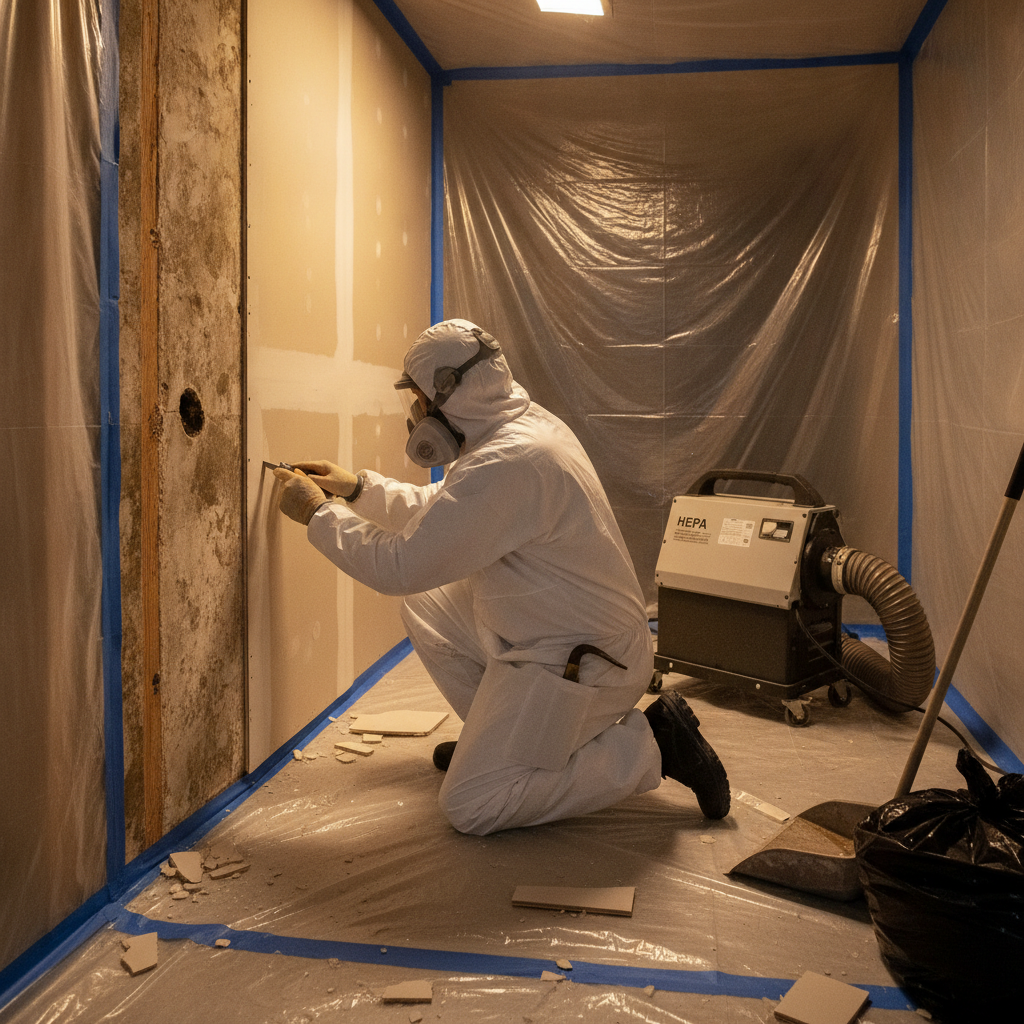
- Score and cut: Mark 12–24 inches beyond staining; cut to the centerline of studs.
- Bag debris: Double-bag drywall and insulation inside the containment.
- Clean cavity: HEPA vacuum studs; apply antimicrobial to framing; dry to baseline.
- Reinstall: New drywall, tape, and mud; prime with stain-blocking primer; repaint.
- Re-pressurize home: Resume normal HVAC after clearance cleaning.
Measure twice, cut once. Removing a bit extra beats leaving a contaminated edge. We routinely extend cuts until staining disappears on both the face and back of the board.
How It Works: Chemistry, Containment, and HEPA Filtration
Drywall mold control pairs chemistry that oxidizes or denatures spores with engineering controls that trap particles. Peroxide and registered fungicides inactivate growth; containment and HEPA air filtration prevent cross-contamination. Verification with moisture readings and visual inspection confirms success.
Cleaners work because oxidizers and antimicrobial actives disrupt cell walls and metabolic pathways. But chemistry alone is never enough. Spores aerosolize easily when wiped. That’s why we always isolate a work zone and run HEPA air scrubbers while cleaning or cutting.
- Containment: Poly sheeting, zipper doors, and tape form a pressure-managed workspace.
- Air changes: HEPA scrubbers cycling room air reduce airborne spore counts during activity.
- Verification: A clean finish includes dry materials, no visible growth, and no musty odor.
On projects where wall cavities also tested damp, we pair cavity drying (dehumidifiers, directed airflow) with leak correction. Repainting before confirming dryness often traps stains and promotes recurrence.
Methods Compared: Clean, Remove, or Encapsulate?
Choose cleaning for small, surface spots on sound, painted drywall; choose removal when drywall is soft, stained through, or unpainted; choose encapsulation only after thorough cleaning and drying to lock in minor residual staining. The best method always starts with stopping moisture first.
There’s no single “best” method—there’s the right method for the material state and moisture reality. Here’s a practical comparison to help you pick a path that sticks.
| Situation | Best approach | Why it works | Tools |
|---|---|---|---|
| Small spots on painted drywall | Clean + dry | Growth is superficial; paint film limits penetration | Peroxide or registered fungicide, HEPA vac, microfiber |
| Unpainted or saturated drywall | Remove + replace | Porous paper holds hyphae; removal eliminates source | Knife, bags, HEPA scrubber, replacement drywall |
| Minor residual stains after cleaning | Encapsulate | Seals in discoloration on fully dry, clean surfaces | Stain-block primer, paint |
| Recurring mold near plumbing chase | Investigate + targeted repair | Stops the root cause—hidden leaks or condensation | Moisture meter, thermal camera |
When drywall is removed to the stud plane, proper reinstallation matters. For framing and drywall interface basics useful during rebuilds, see this overview of drywall and metal studs. During patching, avoiding common framing errors also helps prevent future cracks and gaps; here’s a quick primer on framing mistakes to avoid.
Troubleshooting: Stains, Odors, Recurrence, and Hidden Moisture
If stains bleed back, odors persist, or spots return, you likely missed moisture or cleaned the wrong material. Re-check for hidden leaks, wet insulation, or unsealed cut edges. Use a moisture meter, expand removal, and re-establish containment with HEPA filtration before repeating work.
Persistent staining after repaint
- Likely cause: Residual contamination or moisture above baseline.
- Fix: Strip paint in the patch zone, re-clean, dry thoroughly, then use a stain-blocking primer.
Musty odor even after cleaning
- Likely cause: Wet insulation or adjacent framing still harboring growth.
- Fix: Open the cavity; remove damp insulation; treat studs; dry to baseline before closing.
Recurring spots near a bathroom
- Likely cause: High humidity and poor ventilation re-wetting the surface.
- Fix: Improve ventilation; use moisture-resistant coatings rated for baths; verify fan CFM and runtime.
When rebuilding high-humidity areas, product choices matter. Moisture-tolerant paints and finishes reduce future wall wetting; this practical overview of bath and kitchen paint options is a helpful complement when you’re at the finishing stage.
Prevention Best Practices for Drywall, Attics, and Basements
Prevent drywall mold by controlling moisture: fix leaks fast, vent showers and dryers outside, keep indoor RH near 40–50%, and insulate cold surfaces. In attics, balance intake/exhaust ventilation; in basements, dehumidify and manage foundation drainage.
Whole-home moisture control
- Leak response: Dry within 24–48 hours after any water event; open walls if meters stay high.
- Humidity: Maintain indoor relative humidity around 40–50% in living spaces.
- Air sealing: Stop warm, moist air from reaching cold surfaces (attic bypasses, rim joists).
Attic and upper-floor tips
- Vent pathing: Ensure bath fans vent outdoors, not into attics or soffits.
- Insulation: Even coverage reduces cold spots that condense moisture on ceilings.
- Roof checks: Inspect after storms and freeze–thaw cycles; address ice dam risks.
Basement and crawl space tips
- Dehumidification: Use a dehumidifier seasonally; keep RH around 50% to protect finishes.
- Drainage: Direct water away from the foundation; maintain gutters and downspouts.
- Vapor barriers: In crawl spaces, continuous ground vapor barriers limit ambient humidity.
Local considerations for Scarborough
- Seasonal freeze–thaw and lake-effect weather can drive roof leaks; schedule quick attic checks after heavy snow or spring rain.
- Humidity spikes in summer mean bathrooms and basements need stronger ventilation and dehumidification to protect drywall.
- Older Scarborough homes often have mixed insulation—air seal and insulate cold ceiling areas to prevent ceiling mold spots.
When prevention improvements require removal of contaminated insulation or ventilation upgrades, our crews integrate remediation with repair to minimize disruption for families and businesses.
Tools and Resources Checklist (Homeowner + Pro)
Successful drywall mold control uses measuring tools, containment materials, and targeted cleaners. Homeowners need PPE, a moisture meter, and peroxide or registered fungicide. Pros add HEPA filtration, negative air, and documentation—delivering warranty-backed outcomes and long-term prevention plans.
Homeowner starter kit
- Respirator (N95 or P100), gloves, goggles, disposable coveralls
- Plastic sheeting, painter’s tape, contractor bags
- HEPA vacuum with brush attachment
- Moisture meter and infrared thermometer (optional but valuable)
- 3% hydrogen peroxide or EPA-registered fungicide; microfiber pads
Professional toolkit we bring
- Negative air machines with HEPA filtration and pressure monitors
- Commercial dehumidifiers and directed airflow for cavity drying
- Thermal imaging, pin/pinless moisture meters, and documentation photos
- Full repair capability: drywall replacement, insulation, and painting
Explore our Ontario-wide services and emergency response from the ASM Mold Removal Inc. homepage, and learn about our approach and credentials on the About page. If you need help today, reach us via the contact page.
Mini Case Studies: Ontario Homes We Made Safer
Across Ontario, our teams resolve drywall mold by pairing moisture fixes with targeted cleanup or replacement. In attics, bathrooms, and basements, we stabilize moisture, isolate work areas, and repair finishes—backed by a Mold Remediation Warranty Certificate after post-project inspection.
1) Bathroom ceiling in a semi-detached home
- Issue: Peeling paint and speckled spots across 6–8 sq ft.
- Findings: Fan duct terminating in the attic; high RH after showers.
- Action: Cleaned painted surface, re-routed vent to exterior, applied stain-block primer; no return at 6-month check.
2) Basement stairwell after a sump failure
- Issue: Waterline along base of drywall with soft gypsum core.
- Findings: Elevated moisture in lower 18 inches; insulation damp.
- Action: Removed two lower courses of drywall, dried cavity, replaced insulation and board, tightened foundation drainage plan.
3) Attic knee wall behind a bedroom
- Issue: Musty odor and cold-season staining.
- Findings: Air bypasses and thin insulation at the eaves.
- Action: Source removal, air sealing, added insulation, and balanced ventilation; issued warranty after clearance.
Each scenario followed the same blueprint: stop moisture, isolate, remediate, repair, and prevent. That’s the surest path to lasting results for homes and businesses.
Scarborough, ON Homeowners: What to Do First
In Scarborough, ON, act fast: photograph damage, stop the leak, and ventilate without blowing spores through the home. For small, painted areas, careful cleaning may work; for saturated drywall, schedule same-day help from certified specialists who can contain, filter, and restore.
- Document leaks and stains for your records and any real estate or insurance needs.
- Shut off impacted fixtures or appliances to prevent re-wetting.
- Call for a free inspection and moisture assessment if the area is larger than a dinner table.
Our Scarborough teams coordinate discreetly with homeowners, property managers, and real estate agents so remediation doesn’t derail daily life or transactions.
Frequently Asked Questions
These concise answers address the most common drywall mold questions: what to clean, when to cut, and how to prevent recurrence. For tailored guidance, request a free, on-site inspection and moisture assessment.
Can I kill mold on drywall without removing it?
Yes, if the drywall is painted, intact, and only lightly spotted. Set containment, dry the area, HEPA-vac, and clean with hydrogen peroxide (3%) or an EPA-registered fungicide. If the board is soft, swollen, or unpainted, removal is the safer, lasting fix.
Is bleach good for drywall mold?
Bleach can discolor surfaces but doesn’t perform well on porous materials or behind paint films. Oxygen-based cleaners and EPA-registered fungicides work more reliably, especially when paired with containment, HEPA filtration, and proper drying.
How do I know if drywall must be replaced?
Replace drywall that’s soft, crumbling, deeply stained, or unpainted and wet. Cut back 12–24 inches past visible damage to the nearest stud centerline. Always remove wet insulation behind it and treat the framing before reinstalling new board.
When should I call a professional?
Call a pro when growth exceeds about 10 sq ft, multiple rooms are involved, odors persist, or the source is unknown. Certified teams use containment, HEPA filtration, moisture mapping, and provide documentation that supports real estate and warranty needs.
Key Takeaways
Fix moisture first, then choose the right drywall response: clean small, surface spots; remove and replace wet or unpainted board; and encapsulate only after thorough cleaning and drying. Use containment and HEPA filtration to prevent spread, and document moisture readings before rebuilding.
- Moisture control determines success; dry within 24–48 hours after water events.
- Painted, intact drywall can often be cleaned; saturated or unpainted drywall should be replaced.
- Containment and HEPA filtration reduce cross-contamination during work.
- Verify dryness and cleanliness before priming and painting.
- For larger areas, coordinate with certified remediation specialists.
Need Hands-On Help? We’re Ready Today
If you’re facing active drywall mold, we can help today. ASM Mold Removal Inc. offers Ontario-wide, same-day inspections, moisture mapping, safe remediation with HEPA filtration, and integrated repairs—backed by a Mold Remediation Warranty Certificate after completion and inspection.
Prefer a professional on-site? Our certified, insured technicians will isolate, remediate, repair, and verify. Start with a free inspection and moisture assessment on the contact page or learn more about our process.