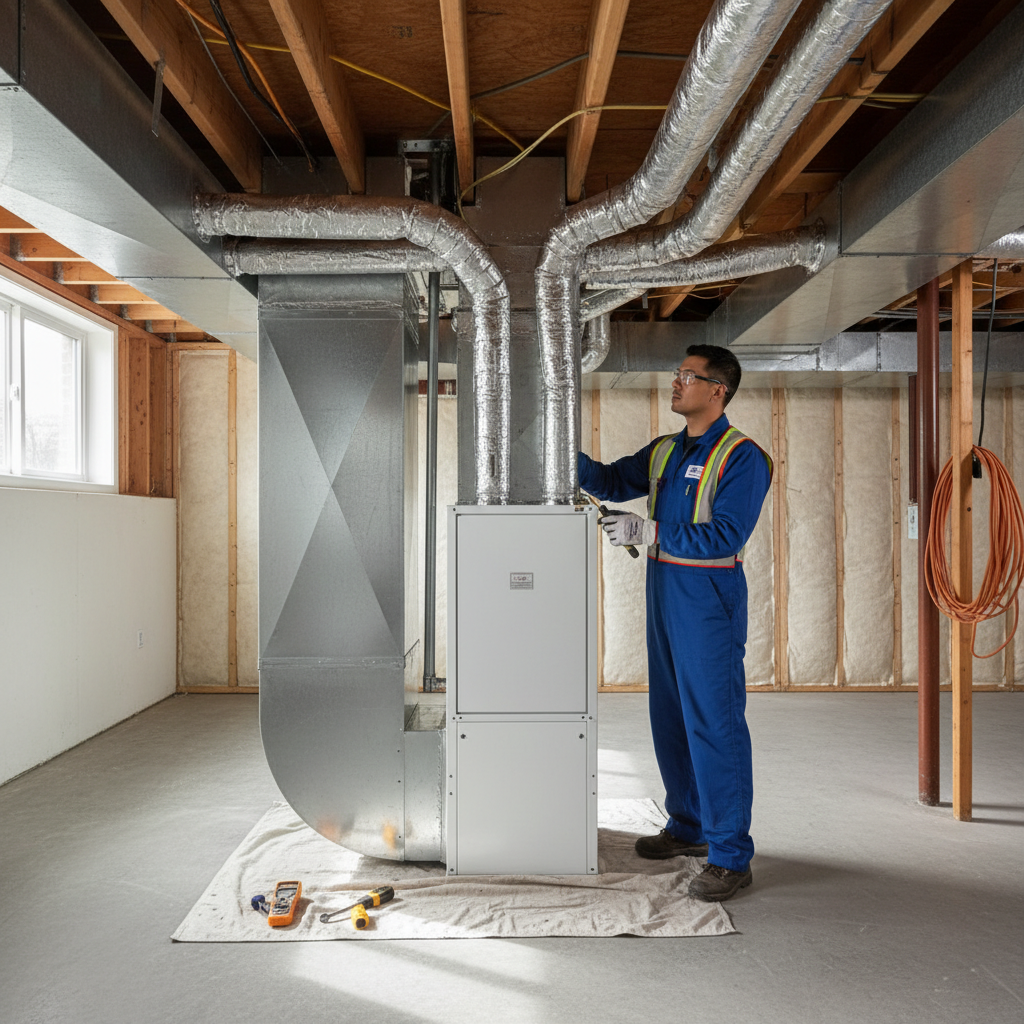
HVAC mold treatment is the targeted inspection, cleaning, and disinfection of air handlers, coils, and ductwork to remove active mold and prevent regrowth. Done correctly, it restores healthy indoor air and stops spores from circulating. At 1225 Kennedy Rd in Scarborough, our team delivers same-day assessments and remediation using containment and HEPA filtration.
By ASM Mold Removal Inc. • Last updated: May 26, 2026
Overview and table of contents
This complete guide explains what HVAC mold treatment is, why it matters for health and building safety, and how professionals remove and prevent it. You’ll see step-by-step methods, tools we use on real Ontario jobs, quick checklists, and FAQs so you know exactly what to do next.
Here’s what you’ll learn and get from this guide:
- Clear definition of HVAC mold remediation and when you need it (24–48 hours of moisture is enough for growth).
- Why untreated mold spreads through supply vents and affects allergy/asthma symptoms.
- A precise 10-step workflow used by certified technicians with negative air and HEPA.
- Prevention tactics that hold humidity near 30–50% RH and block future regrowth.
- Tools we bring on-site: HEPA vacuums, borescopes, moisture meters, ULV foggers.
- Ontario-focused examples, including Scarborough and the Toronto metro area.
At a glance
- Primary goal: stop spore spread at the source (air handler, coils, ducts).
- Key controls: negative pressure (≈ -5 Pa), 4–6 air changes per hour in containment, MERV 13 or higher filtration.
- Success check: post-cleaning air sampling shows indoor results at or below typical outdoor baselines.
What is HVAC mold treatment?
HVAC mold treatment is a professional process that isolates the system, removes visible growth mechanically, disinfects contact surfaces, and restores clean airflow. The work targets coils, drain pans, supply trunks, and returns, then verifies results with visual inspection and air sampling.
In plain terms, it’s mold remediation applied to your heating and cooling system. Because ducts can distribute spores across rooms, the process prioritizes containment, negative pressure, and filtration. Our technicians in Ontario combine HEPA vacuuming, rotary brushing, EPA-approved disinfectants, and moisture control to solve both the symptom (growth) and the cause (water and humidity).
Core components included
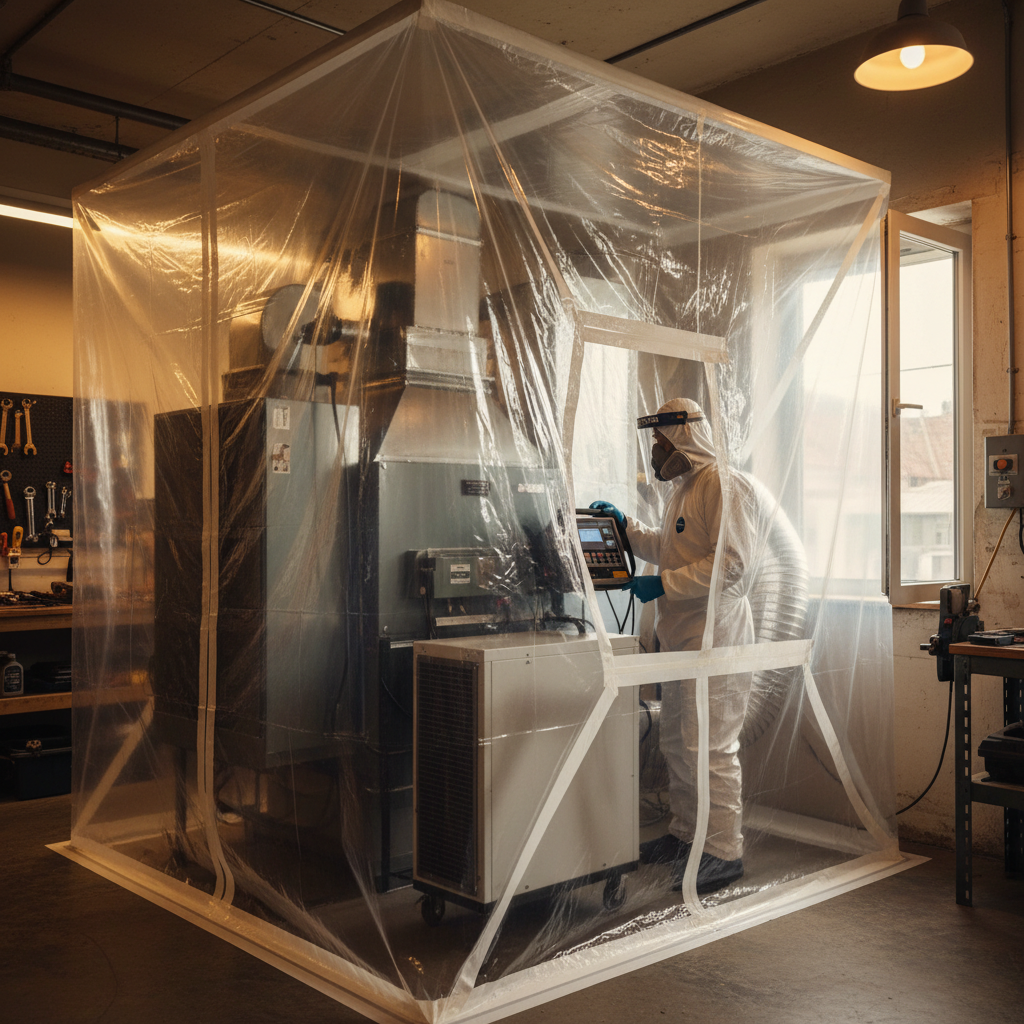
- System isolation: shut down HVAC, seal vents and returns, and build containment around the air handler.
- Source removal: mechanical cleaning of coils, pans, blower housings, and duct interiors.
- Surface disinfection: apply antimicrobial treatments to cleaned, dry surfaces.
- Moisture correction: fix leaks, unclog drains, adjust condensate slopes, and stabilize RH near 30–50%.
- Validation: visual clearance and optional air sampling to confirm normal microbial ecology.
When the HVAC is the distribution path, remediation must be thorough. Even a thin biofilm can reseed growth. That’s why we combine source removal with moisture fixes and follow-up monitoring.
Why it matters for health and safety
Untreated HVAC mold can circulate spores, fragments, and musty odors through every supply vent. In Scarborough and the Toronto area, we often see symptoms flare with system runtimes. Fixing the source improves indoor air quality and supports healthier living and working spaces.
Here’s the thing: a central system can move hundreds of cubic feet of air per minute. If growth forms on coils or inside returns, it rides the airflow. People with allergies or asthma feel it first. Occupants often report “worse in the morning” or “whenever the AC runs.” Rapid action limits exposure windows, and targeted remediation prevents recurrences.
Health and building impacts
- Respiratory irritation: sensitive occupants may notice coughing, sneezing, or scratchy throats when the fan cycles.
- Odors and comfort issues: mustiness is a red flag—especially near returns and supply vents.
- Efficiency loss: biofilms on coils reduce heat exchange; even thin layers can impair airflow by noticeable margins.
- Moisture damage: clogged pans overflow; condensate can wick into insulation and framing within hours.
Most growth begins with water: high humidity, a pan that’s not draining, or a roof/attic leak that found the return path. Stabilizing RH near 30–50% and restoring proper drainage interrupts the cycle. Documenting fixes is vital for buyers, sellers, and facility managers who need proof of resolution.
How HVAC mold treatment works (step-by-step)
The most reliable HVAC mold treatment follows a controlled sequence: isolate, contain, create negative air, remove growth mechanically, disinfect, dry, and verify. This 10-step workflow keeps spores from spreading and restores clean airflow while addressing the moisture root cause.
- Confirm the problem: inspection, photos, moisture mapping, and air sampling if indicated. Many colonies establish within 24–48 hours of consistent moisture.
- Shut down the system: power off and lockout/tagout before opening the air handler or ducts.
- Build containment: poly sheeting with zipper access; maintain negative pressure around -5 Pascals using a HEPA-filtered negative air machine.
- Protect spaces: cover belongings, seal supply/return grills, and lay tacky mats to control debris transfer.
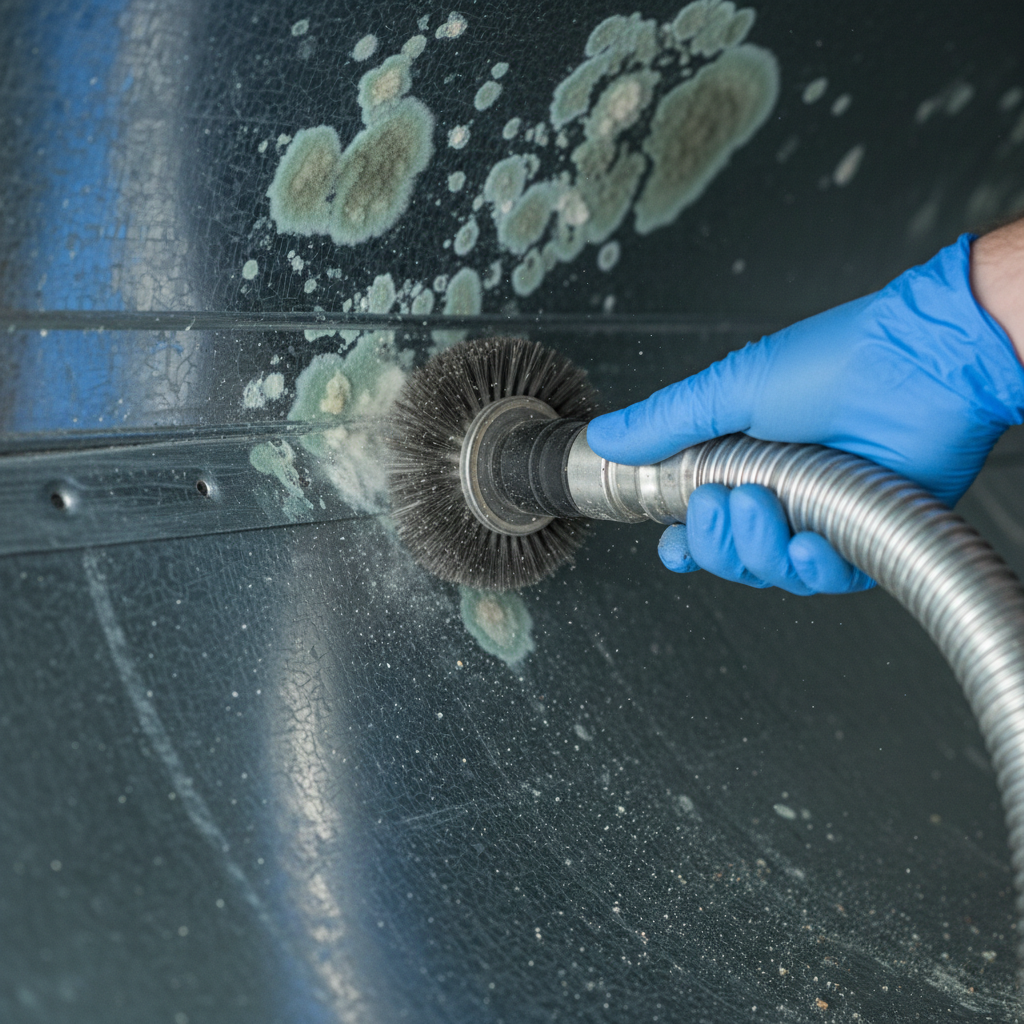
- Mechanical removal: HEPA vacuuming and rotary brushing of ducts; hand-clean coils, blower wheels, and drain pans to bare, cleanable surfaces.
- Disinfect and treat: apply EPA-approved antimicrobial solutions to cleaned, dry surfaces per label directions.
- Moisture correction: clear condensate lines, set proper pan pitch (≈ 1/8 in. per foot), and repair leaks before restart.
- Filtration upgrade: install MERV 13 (or highest the system can handle without harming static pressure) to capture fine particles.
- Post-clean validation: visual clearance plus optional air sampling to show indoor levels at or below typical outdoor baselines.
- Documentation: photos, service notes, and a remediation summary to support real estate or compliance needs.
When we remediate occupied properties, we typically hold 4–6 air changes per hour inside the containment for effective capture. That, combined with methodical source removal, is what stops recontamination.
Methods and approaches you can expect
Professional teams combine mechanical cleaning, targeted disinfection, moisture repair, and filtration upgrades. Where helpful, they add UVGI for biofilm control and seal minor duct leaks that entrain humid air. The right mix depends on contamination extent, duct material, and system capacity.
Mechanical and chemical controls
- HEPA vacuuming and brushing: removes settled dust and colonies from galvanized steel, lined, and flex ducts.
- Coil and pan cleaning: clears biofilms; even a thin layer reduces heat transfer and raises energy use.
- EPA-approved antimicrobials: applied to cleaned, dry, non-porous surfaces to inhibit regrowth.
- ULV fogging (as indicated): fine droplet application to reach complex duct geometry after source removal.
Moisture and air management
- Condensate fixes: unclog lines, add cleanout tees, and confirm proper slope to prevent standing water.
- Humidity control: maintain indoor RH near 30–50% in cooling seasons; 40–60% in shoulder seasons.
- Duct sealing (targeted): seal obvious gaps that pull humid attic/basement air into returns.
- Ventilation balance: ensure adequate makeup air so the system doesn’t pull damp air through leaks.
Enhancements that help prevention
- UV germicidal irradiation (UVGI): mounted near coils to limit future biofilm accumulation.
- Filter upgrades: MERV 13 captures smaller particles; replace on a 60–90 day schedule or per load.
- Insulation improvements: replace wet duct liner and repair torn vapor barriers that condense moisture.
Every recommendation is calibrated to system capacity. For example, MERV 13 is ideal, but only if static pressure stays in spec. We test and adjust so performance, air quality, and longevity improve together.
Best practices and prevention checklists
The best HVAC mold prevention combines moisture discipline, filter maintenance, and routine inspections. Keep RH near 30–50%, verify pan drainage monthly in cooling season, and schedule system inspections twice a year. Document findings to spot patterns early.
Owner/manager checklist
- Target indoor 30–50% RH; use dehumidification where needed.
- Change filters on a 60–90 day cadence or as loading demands.
- Check the drain pan and line monthly during cooling season.
- Keep returns unblocked; avoid storing porous items near air handlers.
- Log odors; if mustiness appears when the system runs, book an inspection.
Service program highlights
- Spring/fall inspections of coils, pans, and blower assemblies.
- Thermal imaging and moisture readings when leaks are suspected.
- Documented cleaning/disinfection with before/after photos.
- Optional air sampling to verify normal post-remediation ecology.
For homes and businesses, a 2-visit annual schedule is a practical baseline. Properties with prior water events, high occupant sensitivity, or complex ducting may benefit from quarterly checks.
Tools and resources professionals use
Effective HVAC mold treatment uses containment, negative air with HEPA, and purpose-built cleaning tools. Moisture meters, thermal imaging, and borescopes locate the source. Technicians validate progress with visual checks and optional air sampling before handing the system back.
- Containment materials: poly sheeting, zipper doors, tape systems.
- Air handling: HEPA-filtered negative air machines sized for 4–6 ACH in the work zone.
- Inspection gear: moisture meters, hygrometers, thermal cameras, and borescopes to find hidden wet spots.
- Cleaning tools: rotary brushes, whip systems, and HEPA vacuums (99.97% at 0.3 µm).
- Treatments: EPA-registered antimicrobials applied per label.
- Verification: visual clearance criteria and optional air sampling.
| Issue | Tool | Action | Target result |
|---|---|---|---|
| Coil biofilm | Coil cleaner + UVGI | Hand clean to bare metal; add UVGI | Restored airflow and efficiency |
| Standing water in pan | Wet vac + slope adjust | Clear line; set 1/8" per foot pitch | No stagnant water |
| Duct dust + colonies | Rotary brush + HEPA | Source removal under containment | Clean interior surfaces |
| High indoor RH | Dehumidifier | Stabilize 30–50% RH | Less condensation risk |
Local HVAC mold considerations for Scarborough and Toronto
In Scarborough and across Toronto, seasonal humidity swings and older building stock drive HVAC mold issues. Focus on drainage and ventilation in summer, and attic/return leaks year-round. Fast diagnostics and same-day containment reduce spread in busy, multi-unit settings.
Local considerations for Scarborough
- Summer humidity and lake-effect weather can push RH above 60%. Prioritize dehumidification and condensate checks near Lawrence East–area properties with older returns.
- Spring and fall transitions: verify filter changes and pan drainage before long runtime periods.
- Community spaces near the Toronto Public Library - McGregor Park Branch see fluctuating occupancy; adjust ventilation and filtration to match load.
Based at 1225 Kennedy Rd, our team coordinates access windows that minimize disruption for homes, condos, and commercial suites. We document findings for buyers, sellers, property managers, and real estate agents who need assurance that mold damage has been addressed and prevented.
Case studies and examples (Ontario projects)
These brief examples show how targeted HVAC mold treatment restores clean air and prevents recontamination. Each project combined source removal, moisture fixes, and validation to protect occupants and maintain system performance.
Scarborough semi-detached home
- Problem: Musty odor whenever the AC ran; visible growth on the air handler pan.
- Action: Built containment (≈ -5 Pa), HEPA vacuumed and brushed returns, cleaned coils to bare metal, disinfected, and cleared the condensate line.
- Result: Odor resolved after restart; post-clean visual clearance passed and indoor RH stabilized near 45%.
Toronto retail unit
- Problem: Dusty, humid storage area entraining air into returns; staff discomfort during long runtime days.
- Action: Sealed return gaps, upgraded to MERV 13, added scheduled filter swaps, and performed duct cleaning and disinfection.
- Result: Noticeable comfort improvement and cleaner vents; follow-up checks at 30 and 90 days showed no regrowth.
Warehouse office suite
- Problem: Intermittent drain pan overflow during heat waves; staining and odor at nearest supply.
- Action: Corrected pan pitch, added cleanout tee, cleaned coils and blower, disinfected surfaces, and set dehumidification controls.
- Result: Stable condensate flow; IAQ complaints dropped, and visual inspection remained clear over one season.
In our experience, documenting moisture corrections is as important as the cleaning itself. It’s what prevents callbacks and protects transaction timelines.
When to call a professional vs. DIY
Call certified technicians when mold is in ducts, on coils, or near the air handler. The risk of spreading spores system-wide is high without containment and HEPA capture. DIY is reasonable for filter changes and basic pan checks—leave system cleaning and disinfection to pros.
- DIY-safe: replace filters, clear accessible drain lines, monitor humidity, and clean exterior grills.
- Pro-needed: visible growth inside ducts/air handler, musty air from multiple vents, or recurring pan overflows.
- Urgent: after leaks or flooding; mold can colonize in 24–48 hours of wetness.
If you’re unsure, start with a free inspection. Our Ontario-wide team provides same-day assessments, then explains options plainly.
Need help fast? Request a free moisture and HVAC mold inspection today. We’ll isolate the source, outline a clear plan, and get containment in place quickly.
Book your inspection or call 647-451-0493.
Helpful guidance you can review
For broader context on ventilation hygiene and indoor air, review practical cleaning and air quality resources. These articles outline maintenance habits, risk factors, and cleaning sequences that complement professional HVAC mold remediation.
For a homeowner-friendly overview of how duct hygiene ties to indoor air, see this practical note on duct cleaning and air quality. For moisture triggers that often start growth, this bathroom mold guide outlines everyday causes that can also impact returns and adjacent spaces. For grease- and vent-related insights that parallel hygiene principles, consider this primer on vent cleaning best practices.
FAQ: HVAC mold treatment
These quick answers cover the questions we hear most—from timelines to verification. Each response is designed to be direct and actionable so you can move forward with confidence.
How long does professional HVAC mold treatment take?
Small residential systems are often completed in a day once containment is built. Larger homes or commercial suites may take 1–3 days depending on duct length, access, and moisture repairs. We provide a timeline after inspection so you know what to expect.
Will treatment damage my ducts or HVAC equipment?
No—when done correctly. We match tools to the duct material, use HEPA capture to control debris, and follow manufacturer-friendly coil cleaning methods. The goal is clean, dry, and intact components that perform better after service.
How do I know it worked?
We document before/after results with photos, visual clearance criteria, and optional air sampling. Post-service, odors should be gone, and vents should look clean. Many clients also notice steadier humidity and improved comfort once drainage is restored.
Do I need to leave my home during treatment?
Most projects don’t require full vacating. We isolate the work area, run negative air, and coordinate access to minimize disruption. Sensitive occupants may prefer to be away during active cleaning and return after ventilation has cleared the work zone.
Key takeaways and next steps
Stop mold at the source, not just the symptom. Isolate the HVAC, remove growth mechanically, correct moisture, and verify results. If you smell mustiness when the system runs, schedule a same-day inspection to protect health and comfort.
- Growth starts with moisture; fix drainage and keep RH near 30–50%.
- Use containment, negative air, HEPA, and methodical source removal.
- Upgrade to MERV 13 (as system allows) and log filter changes.
- Validate with visuals and optional air sampling.
Ready to move? Our Ontario-wide team provides free inspections and detailed plans. Learn about our approach on the ASM Mold Removal Inc. homepage, read our story on the About page, or book a visit now.