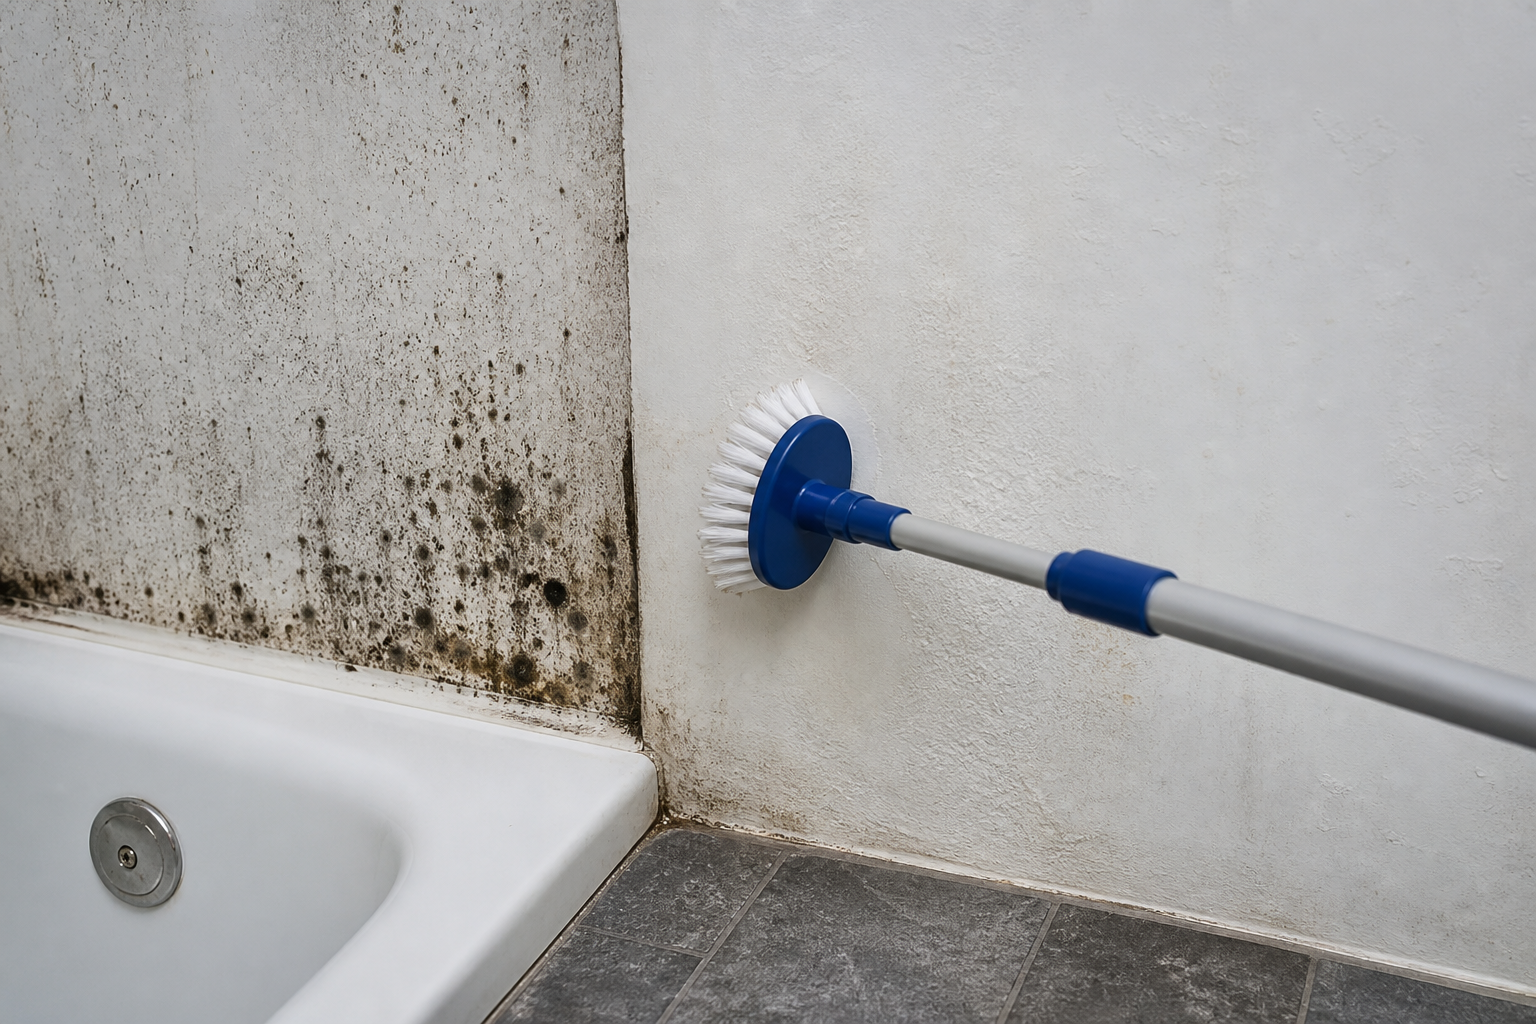
Bathroom walls routinely face warm, humid air and occasional splashes—ideal conditions for mold. While small surface spots are often manageable with careful cleaning, lingering moisture can cause mold to return. This guide walks you through safe preparation, effective cleaning methods for different wall types, and practical ways to reduce moisture so mold is less likely to reappear. It is informational only and not a substitute for professional inspection or medical advice. If you are unsure about your situation or have health concerns, consult qualified professionals.
Assess and prepare safely
Before you grab a brush, take a minute to size up the problem and assemble basic safety gear. Mold can release particles when disturbed, so simple precautions help you clean more safely and avoid spreading it around.
- Work area: Open a window or run the exhaust fan to increase air flow. Close the bathroom door to limit spread to other rooms.
- Personal protection: Wear disposable gloves, eye protection, and a well-fitted mask or respirator rated to filter fine particles. Long sleeves help reduce skin contact.
- Containment: Lay down an old towel or plastic sheeting to catch drips and debris. Keep pets and other household members out of the area while you work.
- Power and fixtures: Turn off any bathroom exhaust fan while you apply liquid cleaners to avoid pulling particles through ducts; turn it back on for drying when cleaning is complete.
Consider the scale and setting. Small, well-defined spots on non-porous surfaces are very different from extensive growth or mold that traces back to a leak. If you suspect hidden moisture inside walls, recurring mold despite cleaning, or widespread growth, pause and consult a qualified remediation professional.
Tools and materials checklist
Gather your supplies before you start so you can move through cleaning efficiently:
- Disposable gloves, safety glasses or goggles, and a suitable mask/respirator
- Plastic sheeting or old towels for floors and counters
- Soft scrub brush and non-scratch sponge
- Microfiber cloths or paper towels
- Bucket, spray bottles, and measuring cup
- Mild detergent (non-ammonia)
- Optional spot treatments: white vinegar, 3% hydrogen peroxide, or a diluted household bleach solution
- Old toothbrush for grout and tight edges
- Fan or dehumidifier for drying
Important safety notes:
- Never mix bleach with ammonia or vinegar. Mixing certain chemicals can create hazardous gases.
- Test cleaners on a small, inconspicuous area first to check for discoloration or surface damage.
- Follow all product labels and ventilation guidance from the manufacturer.
Identify your wall surface
Bathroom walls are typically one of the following, and the cleaning method differs slightly for each:
- Painted drywall: Common in living spaces; the painted layer is less tolerant of heavy scrubbing or prolonged soaking.
- Semi-gloss or glossy paint on drywall: Slightly more washable but still vulnerable to excessive moisture.
- Tile and grout: Non-porous tile tolerates scrubbing; grout is porous and may stain or harbor residue.
- Fiberglass or acrylic shower surrounds: Non-porous but can scratch; prefer non-abrasive tools.
Step-by-step cleaning on painted drywall
Painted drywall requires a lighter touch to avoid damage while still removing mold from the surface. Work in sections and avoid saturating the wall.
- Dry dust control: Lightly mist the affected area with clean water to reduce airborne particles. Do not scrape or sand dry, as that can spread spores.
- Initial wash: Mix warm water with a small amount of mild, non-ammonia detergent. Dampen (do not soak) a sponge and gently clean the moldy area using circular motions. Rinse the sponge often.
- Targeted spot treatment (if needed): For persistent discoloration, apply one of the following to a cloth or sponge and gently dab the spots:
- White vinegar (full strength). Allow a 10–15 minute contact time, then wipe.
- 3% hydrogen peroxide. Allow several minutes of contact, then wipe.
- Bleach solution prepared per label directions (for example, a mild dilution in water). Apply sparingly and avoid dripping. Never mix bleach with other cleaners.
- Rinse and blot: Wipe the area with a clean, damp cloth to remove cleaner residue. Then blot dry with microfiber towels.
- Thorough drying: Run the exhaust fan, open a window, and use a portable fan or dehumidifier until the wall is bone-dry.
If painted drywall has soft spots, bubbling paint, a musty odor that persists, or mold returns quickly after cleaning, underlying moisture (like a slow leak or poor ventilation) may be present. Cleaning alone won’t solve a hidden moisture problem—find and correct the source.
Step-by-step cleaning on tile and grout
Tile is resilient, but grout lines can hold residue. Gentle abrasion plus a suitable cleaner usually works well.
- Pre-wet and ventilate: Lightly mist the area with clean water and ensure good airflow.
- Apply cleaner: Use one of the following approaches:
- Mild detergent solution: Effective for general soil and light mold films.
- Vinegar or hydrogen peroxide: Apply and allow several minutes of contact time on grout and caulked seams.
- Diluted bleach solution: For stained grout, apply carefully with an old toothbrush. Follow label directions and rinse thoroughly. Avoid mixing with other cleaners.
- Scrub: Use a soft brush or non-scratch pad on tile; use a toothbrush on grout. Work in small sections and avoid over-scrubbing caulk to prevent tearing.
- Rinse well: Wipe with clean water and a sponge to remove residues.
- Dry completely: Squeegee or towel-dry the walls, then run the exhaust fan until all surfaces are dry to the touch.
Grout can retain stains even after the surface is clean. If discoloration remains, consider gently repeating the process after the area is fully dry, or plan to reseal grout once clean and dry to make future maintenance easier.
Cleaning around caulk and sealants
Caulked seams and flexible sealants are prone to mold because they trap moisture in corners and edges. Clean carefully and evaluate the condition of the caulk.
- Clean using mild detergent first; step up to vinegar, hydrogen peroxide, or a diluted bleach solution only as needed.
- If the caulk is cracked, peeling, or permanently stained, remove it after the area is dry and re-caulk following product instructions. Allow full cure time before exposing it to water.
- After re-caulking, keep the area dry for the recommended cure period to improve adhesion and longevity.
Disposal and cleanup
Wrap up safely to keep spores and residues from spreading back into your home.
- Bag used paper towels, disposable wipes, and debris in a dedicated trash bag. Seal it before carrying through the house.
- Wash reusable cloths and brushes promptly with hot water and detergent. Dry completely.
- Launder the clothes you wore during cleaning and wash your hands thoroughly after removing gloves and goggles.
Drying and moisture control
Even the best cleaning job will be short-lived if humidity stays high. Focus on quick drying after each shower and overall moisture reduction.
- Run the bathroom exhaust fan during showers and for at least 20–30 minutes afterward to clear humid air.
- Open a window when possible to promote cross-ventilation.
- Use a squeegee or towel to remove water from walls and glass right after bathing.
- Keep shower curtains or doors open after use so surfaces can dry.
- Place a portable fan or dehumidifier in the bathroom if humidity remains elevated.
Prevent mold return
Prevention is a combination of moisture control, surface protection, and routine checks.
- Fix water sources: Address drips from faucets, loose showerheads, and weeping supply lines. Check that toilet connections are dry.
- Improve ventilation: Verify the exhaust fan is venting outside and is powerful enough for the room size. Clean the fan grille and ducting as needed.
- Reduce surface wetness: Squeegee or towel-dry walls and corners after showers, especially grout lines and caulked seams.
- Seal porous materials: Reseal grout periodically per product directions.
- Choose appropriate finishes: In repainting projects, consider paints labeled for high-humidity areas.
- Routine inspections: Check corners, behind shampoo caddies, and along baseboards for early signs of discoloration.
Troubleshooting: When not to DIY
There are situations where home cleaning is not the right approach. Stop and seek qualified help if any of the following apply:
- The moldy area is extensive or keeps returning after careful cleaning and drying.
- You notice persistent musty odors, soft drywall, warped trim, or peeling paint that suggests hidden moisture.
- There was a recent water incident (like a leak or overflow) and walls remained wet for more than a day.
- You or someone in the home has health concerns that could be affected by mold exposure.
Large or recurring problems typically involve moisture sources beyond routine bathroom humidity and may require repair, targeted drying, or specialized remediation.
Frequently asked questions
Is bleach the best choice for cleaning mold on bathroom walls?
Bleach can help lighten staining on non-porous surfaces like tile and can be effective when used correctly, but it is not always necessary. Start with mild detergent and water to remove surface soil and films. For lingering discoloration, spot-treat with vinegar, hydrogen peroxide, or a diluted bleach solution—never mix cleaners, and follow all label directions. On painted drywall, use the mildest effective option and avoid over-wetting to protect the paint.
Why does mold keep coming back after I clean it?
Recurring mold almost always points to persistent moisture. Common sources include poor ventilation, slow leaks behind fixtures, damp caulk or grout that never fully dries, and condensation on cooler walls. Improve airflow during and after showers, fix leaks, dry surfaces promptly, and consider resealing grout. If discoloration or musty odors return quickly, there may be hidden moisture that needs professional assessment.
Can I just paint over moldy spots to cover them?
Painting over active mold or damp surfaces traps moisture and discoloration, and the problem typically resurfaces. Clean thoroughly, let the area dry completely, and address moisture sources first. If you choose to repaint later, use products suited for humid bathrooms and follow the manufacturer’s prep instructions.
How do I tell the difference between mildew and mold?
In everyday use, the terms overlap, and both thrive in damp bathrooms. Thin, surface-level gray or black films that wipe away easily are often what people call mildew. Heavier growth, musty odor, or recurring spots suggest a broader moisture issue commonly referred to as mold. The cleaning approach in this guide applies to small surface spots, regardless of the label, but persistent or extensive growth warrants professional input.
Is it safe to clean bathroom mold if someone in the home is sensitive to allergens or has respiratory issues?
Take extra care with ventilation, containment, and protective equipment, and keep sensitive individuals away from the area during and after cleaning until the bathroom is fully dry. This article is not medical advice; consult a qualified healthcare professional for guidance specific to your situation. When in doubt, seek professional remediation rather than a DIY approach.
Quick reference checklist
- Ventilate the bathroom, isolate the area, and wear gloves, eye protection, and a suitable mask.
- Start with mild detergent and water; use vinegar, hydrogen peroxide, or diluted bleach only as needed. Never mix chemicals.
- Use gentle tools on painted drywall; avoid soaking. Scrub tile and grout with non-scratch tools.
- Rinse residues, dry thoroughly, and dispose of used wipes and debris in a sealed bag.
- Control moisture daily: run the fan, squeegee or towel-dry, and keep doors or curtains open after showers.
- Investigate and repair leaks; reseal grout or replace damaged caulk as needed.
- Seek qualified help for large, recurring, or moisture-damaged areas.
Next steps
A practical next step
To discuss the options that apply to your situation, contact Asmmoldremoval and request the relevant details before moving forward.