
Cleaning black mold from a shower is the targeted removal of visible growth from tile, grout, and caulk, followed by moisture control to stop it from returning. In Scarborough at 1225 Kennedy Rd (ON), our team at ASM Mold Removal performs same-day inspections and safe remediation. Use PPE, vetted cleaners, and strong ventilation to protect indoor air quality.
By Amardeep Mamidi — Asmmoldremoval
Last updated: 2026-06-15
Quick Summary
Black shower mold thrives where water lingers and ventilation is weak. Clean it with hydrogen peroxide or an EPA-registered mold cleaner, scrub grout and caulk, rinse, and dry thoroughly. Keep bathroom humidity under 50% and run the exhaust fan for 20–30 minutes after each shower to prevent regrowth.
Here’s the thing: cleaning black mold from a shower is only half the job. The other half is stopping the moisture that feeds it. In this how-to, we combine homeowner-ready steps with professional insights from ASM Mold Removal’s Ontario-wide remediation work so you can eliminate growth and keep it from coming back.
- Clear, step-by-step process you can follow in one afternoon
- Prerequisites that keep you safe and prevent cross-contamination
- Common mistakes that make shower mold worse (and how to avoid them)
- Troubleshooting for stains, odors, and recurring spots
- Pro-level prevention tips borrowed from our remediation playbook
Introduction: Why Shower Mold Keeps Coming Back
Shower mold reinfests because moisture outlasts your cleaning. Steam drives humidity up, water stays in grout pores, and silicone caulk traps colonies below the surface. The long-term fix pairs proper cleaning with faster drying, better ventilation, and replacing stained, mold-harboring caulk.
Bathrooms are perfect for mold: warm air, frequent water, and porous grout. After a 10-minute hot shower, room humidity often spikes and can take an hour or more to normalize without a fan. That lag is why black specks reappear. The solution is twofold—effective cleaning and reliable drying.
In our experience serving Ontario homes and commercial spaces, recurring shower mold usually points to one of three causes: insufficient exhaust ventilation, silicone caulk harboring growth below the surface, or a minor leak behind tile. Address those, and routine cleaning starts to last.
Before You Start (Prerequisites)
In Scarborough, ON bathrooms, winter condensation and summer humidity fuel shower mold. Before cleaning, gear up (N95, gloves, eye protection), ventilate the room, and fix any leaks. Choose safe cleaners and set basic containment if growth extends beyond the shower to prevent spore spread.
Preparation matters. It protects your lungs and eyes, and it keeps spores and residue from spreading to towels, rugs, and adjacent rooms. A few minutes of setup prevents hours of rework later.
Safety and setup
- Personal protective equipment: N95 respirator, nitrile gloves, and eye protection.
- Ventilation: Turn on the bathroom fan and crack the door open after cleaning; avoid recirculating air into other rooms.
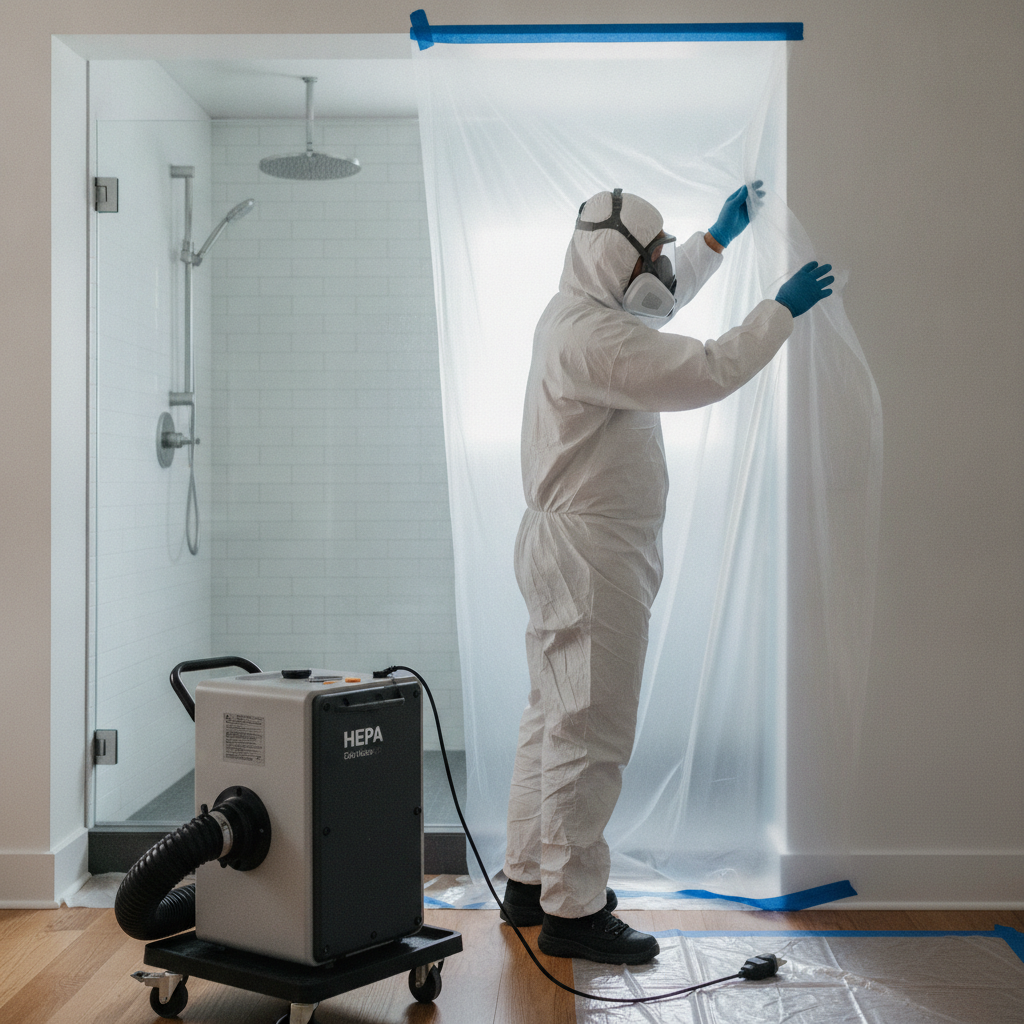
- Containment (if needed): If mold is beyond the shower, hang plastic sheeting at the doorway to limit drift.
- Remove absorbent items: Take out bathmats, towels, and fabric shower curtains before you begin.
Tools and cleaners to gather
- Cleaners: 3% hydrogen peroxide or an EPA-registered mold cleaner (follow label directions). Avoid mixing chemicals.
- Agitation tools: Nylon grout brush and non-scratch pad. Use soft pads on tile faces—never on natural stone.
- Moisture control: Squeegee and microfiber towels to speed drying.
- Disposal: Heavy-duty trash bags for used towels and removed caulk.
As a remediation contractor, we often spot upstream moisture drivers during this setup—slow plumbing drips, loose shower trim, or a weak fan. If you find any, note them and plan repairs after the clean.
Local considerations for Scarborough
- Cold winters cause wall and window condensation—let the fan run longer after hot showers.
- Humid Ontario summers raise baseline RH—crack the door and keep the fan on while surfaces dry.
- Older homes may have low-CFM fans—upgrading to a higher capacity unit reduces mold pressure.
7-Step Process: Cleaning Black Mold from a Shower
To clean black mold from a shower, pre-clean soap scum, apply hydrogen peroxide, scrub grout and caulk, rinse well, dry fully, and dehumidify the space. Replace stained silicone caulk if discoloration remains. Finish by running the exhaust fan for 20–30 minutes.
Follow these seven steps to complete the job with minimal disruption. Each step builds on the last so you aren’t sealing in moisture or leaving roots behind in caulk.
- Ventilate and isolate. Turn on the fan, open a window if available, set containment if growth extends beyond the stall, and put on PPE. Remove bathmats and fabrics.
- Pre-clean soap film. Detergent breaks up soap scum so antimicrobial products reach the target. Rinse and squeegee before moving on.
- Apply 3% hydrogen peroxide. Saturate grout lines, corners, and caulk. Let it dwell for about 10 minutes so it can foam and penetrate.
- Scrub with a nylon brush. Work in sections. Use a non-scratch pad only on glazed tile. Avoid acidic products on natural stone.
- Rinse thoroughly. Warm water helps lift residues. Squeegee walls and glass to remove most of the water load.
- Dry completely. Wipe with microfiber towels. Keep the fan running for 20–30 minutes to drop humidity under 50%.
- Replace stained silicone. If black shadows persist in caulk, cut it out and re-caulk using a mold-resistant silicone. Allow full cure per label.
At ASM Mold Removal, we mirror this process at a professional scale—adding HEPA filtration, negative air, and documentation when projects go beyond routine shower cleanup and into full remediation.
5 Shower Mold Mistakes That Make the Problem Worse
Avoid mixing chemicals, cleaning without fixing moisture, ignoring stained caulk, skipping protective gear, and stopping at “looks clean.” These habits spread fumes or spores and allow hidden growth in silicone to survive. Verify dryness and address the source to break the cycle.
We see the same pitfalls across homes, condos, and commercial locker rooms. Here’s how to steer clear.
- Mixing bleach, vinegar, or ammonia. Never combine. Chemical reactions can create dangerous fumes and reduce cleaning effectiveness.
- Cleaning without drying. If relative humidity stays high, regrowth is likely in days. Drying is not optional; it’s the cure.
- Ignoring caulk. Silicone often harbors mold below the surface. If it’s stained through, replacement is the only lasting fix.
- No PPE. Irritants and fine particles affect lungs and eyes. Wear an N95 respirator, gloves, and eye protection.
- Stopping at “looks clean.” Surfaces can appear bright while moisture and spores remain. Verify with touch-dry surfaces and good airflow.
If your bathroom has chronic moisture—small shower, low-CFM fan, or long, hot showers—plan for a daily drying habit and a fan timer. That single change prevents most callbacks we see.
Troubleshooting: Stains, Odors, and Recurring Growth
If stains won’t lift, replace the caulk and switch to a proven antimicrobial. Musty odors mean moisture remains—check humidity, run the fan longer, and inspect adjacent walls or ceilings. Spots that reappear within a week signal hidden leaks; schedule a professional inspection.
Not every stain is the same. These practical checks help you decide when to keep cleaning and when to escalate.
When discoloration won’t fade
- Try a second peroxide dwell and rescrub. If shadows remain, the pigment is likely below the surface.
- Cut out and replace blackened silicone; mold threads often extend into the bead and won’t respond to surface cleaners.
- Seal clean, dry grout to reduce future absorption and make maintenance faster.
When you notice musty odors
- Run the fan 20–30 minutes after each shower and keep the door ajar to improve air exchange.
- Target 40–50% RH. If the room won’t drop below 55–60% after 30 minutes, consider a stronger fan or a dehumidifier.
- Inspect ceilings below the bathroom for water stains—recurring odors may mean a slow leak.
When new spots show up fast
- Recheck for plumbing drips at the shower arm, valve trim, and around the tub edge.
- Look for missing grout or cracked caulk that wicks water behind tile.
- If problems persist, book a professional moisture assessment and air testing to trace hidden sources.
If recurrent shower mold hints at wider moisture migration (for example, into an attic above or a crawl space below), our team can extend the scope—attic mold removal, crawl space cleanup, HVAC mold treatment, and full restoration are all in our wheelhouse.
Advanced Tips: Lasting Prevention
Lasting control pairs daily drying with upgrades: squeegee walls, keep RH under 50%, seal grout, and swap old caulk for mold-resistant silicone. Improve fan performance and address attic or wall moisture paths so steam doesn’t condense elsewhere and feed new growth.
Here’s what our Ontario crews recommend when a bathroom keeps slipping back into trouble.
Daily habits that work
- 60-second squeegee: Remove the bulk of surface water after each shower.
- Fan and door: Run the exhaust fan 20–30 minutes and crack the door to vent steam.
- Wipe hotspots: Corners, niches, and horizontal ledges dry slow—hit them with a microfiber towel.
Material choices that resist mold
- Penetrating grout sealer: Apply to clean, dry grout to slow absorption and staining.
- Mold-resistant silicone: Replace stained or failing beads; follow cure times carefully.
- Bathroom-rated paints: Semi-gloss or specialty paints help in painted zones outside the wet area.
Ventilation and humidity upgrades
- Higher CFM fan or timer switch: Ensure the fan actually runs long enough; timers make it automatic.
- Ducting matters: Poorly routed ducts choke airflow; straighten runs and vent outdoors.
- Whole-home balance: Keep home RH in the 40–50% range during humid months.
When remodeling is on the table, consider layout and materials that shed water quickly. For design ideas that reduce moisture traps, this small bathroom remodel guide shows common layout decisions that influence drying. It’s not a mold manual, but it illustrates airflow-friendly choices.
Cleaner and Material Options (At a Glance)
Use peroxide or an EPA-registered cleaner on typical ceramic tile and grout. Avoid acidic products on natural stone. Replace stained silicone with mold-resistant caulk. After drying, seal grout to reduce future absorption and make weekly maintenance faster.
| Option | Best For | Safe On | Notes |
|---|---|---|---|
| 3% Hydrogen Peroxide | Everyday shower mold | Ceramic/porcelain tile, grout | Foams on contact; do not mix with vinegar or bleach. |
| EPA-registered cleaner | Stubborn colonies | Most hard, non-porous surfaces | Follow label dwell times and ventilation guidance. |
| White Vinegar | Light mineral film | Glazed tile, glass | Avoid on natural stone; never mix with bleach. |
| Mold-resistant Silicone | Replacing stained caulk | Wet areas | Allow full cure before shower use. |
| Penetrating Grout Sealer | Post-clean protection | Cementitious grout | Reapply per label, often annually. |
If you suspect your bathroom issue ties into wider mold damage elsewhere (attic, crawl space, or HVAC), it’s time to step beyond DIY and involve certified technicians.
Free Inspection and Same‑Day Help
If shower mold keeps returning, book a free inspection. Across Ontario, we provide same‑day visits, moisture assessments with meters and thermal imaging, safe remediation, and a Mold Remediation Warranty Certificate upon successful completion.
Cleaning black mold from a shower solves the visible problem. Our inspection finds the cause. ASM Mold Removal serves homeowners, buyers, sellers, and property managers across Ontario with certified, insured technicians, HEPA filtration, and eco‑friendly, EPA-approved treatments. Learn who we are on our About page, or book a free inspection now.
Community directories sometimes list remediation support; here’s one example of a certified mold removal service in Ontario. While not a standard reference, it shows the breadth of regional demand and urgency.
FAQ: Cleaning Black Mold from a Shower
You can clean small areas yourself with peroxide, a nylon brush, PPE, and strong ventilation. Replace stained caulk and seal dry grout. If spots return within days or you notice musty odors outside the bathroom, schedule professional inspection and testing to stop hidden moisture and mold damage.
What’s the safest way to clean black mold from a shower?
Wear an N95, gloves, and eye protection. Pre-clean soap scum, then apply 3% hydrogen peroxide or an EPA-registered cleaner. Let it dwell 10 minutes, scrub grout and caulk, rinse, and dry fully. Keep humidity under 50% and run the exhaust fan 20–30 minutes after each shower.
When should I replace shower caulk instead of scrubbing?
If silicone is stained through or the bead peels, replacement is the lasting fix. Mold often threads below the surface and resists surface cleaners. After re-caulking with a mold-resistant product, allow full cure time and then seal grout to slow future absorption.
Why does shower mold return even after I clean it thoroughly?
Moisture outlasts your cleaning. Steam drives humidity high, and water lingers in grout pores and corners. Without reliable drying and ventilation, new growth appears within days. Improve airflow, run the fan 20–30 minutes post-shower, and repair leaks or missing grout/caulk.
Is bleach the best product for shower mold?
Bleach can lighten stains on hard, non-porous surfaces but isn’t necessary for most cases and should never be mixed with other chemicals. 3% hydrogen peroxide or an EPA-registered cleaner, plus scrubbing and thorough drying, is effective and easier to ventilate safely.
When should I call a professional for shower mold?
Call if mold returns within a week, if you smell musty odors outside the bathroom, or if you find leaks, loose tile, or ceiling stains below. Pros can test air, trace hidden moisture with meters and thermal imaging, and remediate safely using HEPA filtration and containment.
Key Takeaways
Clean thoroughly, dry quickly, and fix the source. Squeegee surfaces, run the fan 20–30 minutes, keep RH under 50%, and replace stained caulk. If growth returns or odors spread, book a professional inspection to find hidden moisture and protect your home from mold damage.
- Cleaning black mold from a shower requires both removal and moisture control.
- Replace stained silicone—scrubbing won’t reach growth below the bead.
- Drying and ventilation (20–30 minutes) are non-negotiable for prevention.
- Seal grout after it’s clean and dry to reduce re-absorption.
- Recurring mold suggests hidden moisture—schedule inspection and testing.
Additional Resources
For persistent mold, combine DIY steps with professional assessment. Explore our Ontario-wide services, book a same-day inspection, and review design choices that help bathrooms dry faster. These resources help you move from quick cleanups to long-term control.
Learn more about our Ontario-wide remediation and prevention approach on the ASM Mold Removal website. If you’re planning a renovation, airflow-friendly layouts—like those in this bathroom remodel overview—can reduce future moisture traps. For a general sense of cleaning practices, this mould cleaning overview shows how different surfaces respond to various methods.