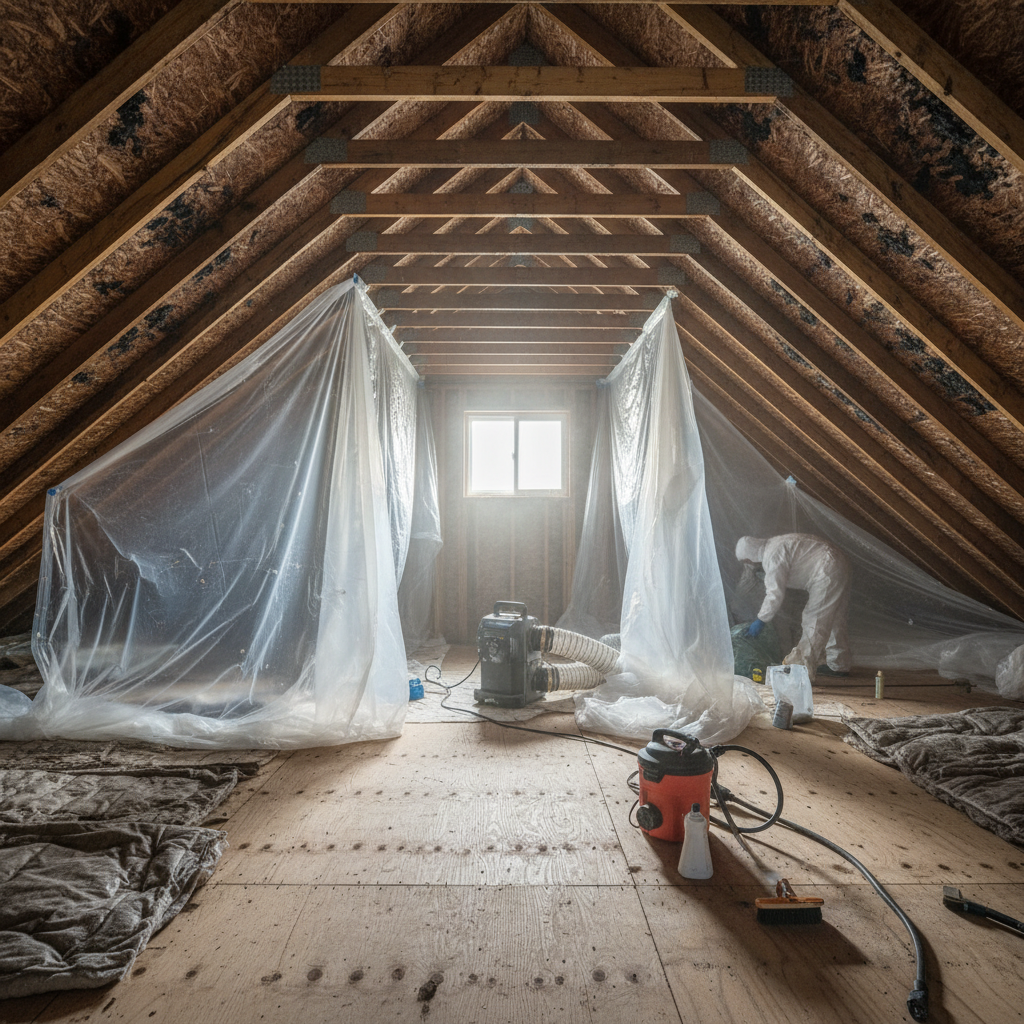
Black mold on wood is fungal growth that feeds on moist cellulose in framing, sheathing, subfloors, and trim. It develops when wood stays damp, often after leaks, attic condensation, or flooding. At ASM Mold Removal Inc. in Scarborough (1225 Kennedy Rd), we inspect, remediate, and document affected wood safely using HEPA filtration and EPA-approved methods.
By ASM Mold Removal Inc. • Last updated: May 24, 2026
Overview: Black Mold on Wood (2026 Guide)
Black mold on wood should be addressed quickly by controlling moisture, deciding whether to clean, encapsulate, or replace, and verifying results with inspection and air sampling when appropriate. Safe remediation relies on containment, HEPA filtration, and approved biocides—followed by fixes that prevent future moisture.
This complete, homeowner-friendly guide shows you when stained wood can be cleaned, when it must be replaced, and how professionals keep your family safe during remediation.
- How to tell mold vs. soot or tannin stains
- Moisture thresholds that drive growth
- Step-by-step containment and cleanup
- Encapsulation vs. replacement decision criteria
- Attic, basement, crawl space examples from Ontario homes
- What our Mold Remediation Warranty Certificate includes
Jump to a section:
- What is black mold on wood?
- Why it matters
- How it forms
- Prerequisites before cleaning
- Step-by-step removal
- Encapsulate vs replace
- Tools and resources we use
- Troubleshooting
- Scarborough context
- Case studies
- FAQ
- Conclusion
What Is Black Mold on Wood?
Black mold on wood is visible fungal growth on damp timber surfaces such as rafters, joists, and sheathing. It thrives when wood stays above typical moisture levels, producing discoloration, musty odor, and potential allergenic effects. The solution starts with moisture control, then surface remediation or structural replacement if decay is present.
Black mold on wood refers to colonies that spread across cellulose when moisture, temperature, and still air align. While color isn’t a species diagnosis, the risk profile is similar: moisture fuels growth. Many Ontario attics show dark staining from winter condensation on cold sheathing, especially where ventilation is weak.
Here’s how we define the condition during inspection:
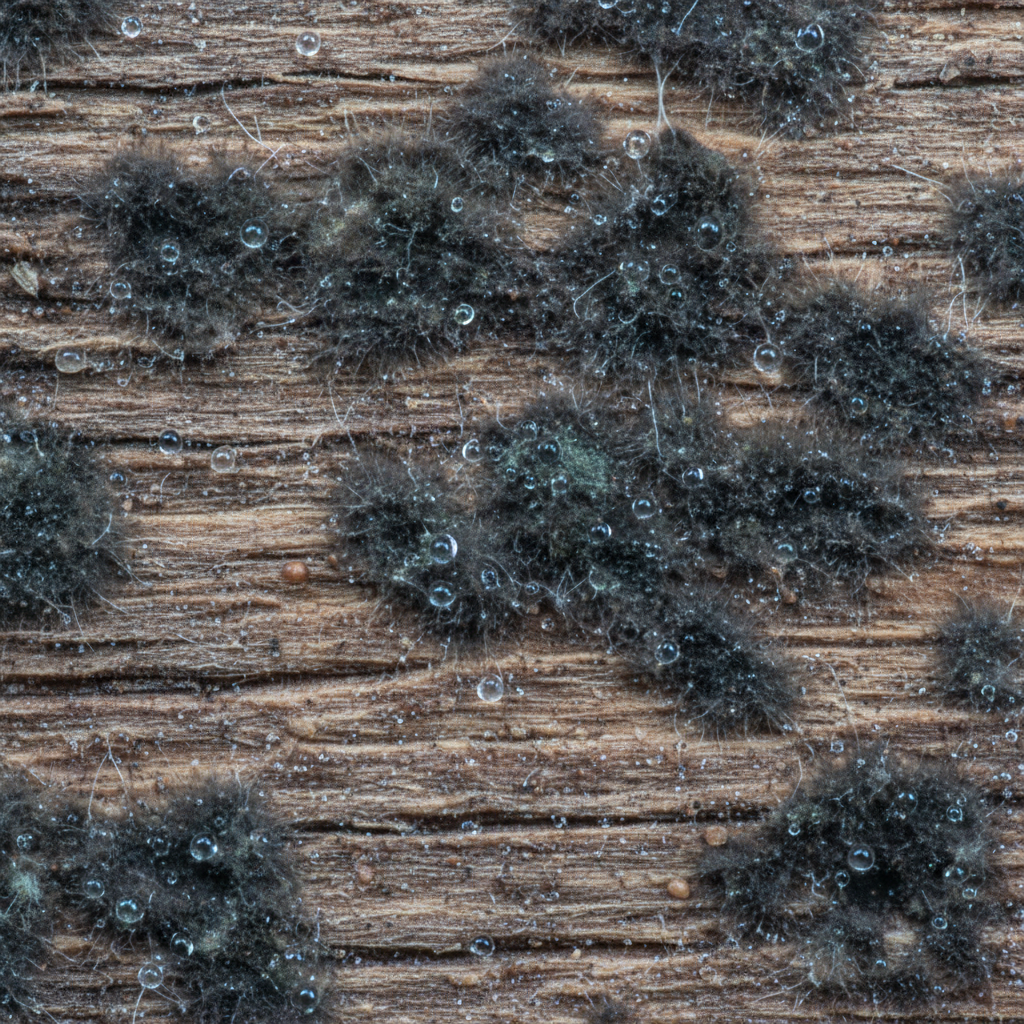
- Growth indicators: fuzzy or smeared texture, irregular edges, musty odor, and transfer when wiped.
- Common look-alikes: tannin stains from wood, soot from candles or furnaces, and dirt. These don’t smear wet like mold films.
- Typical trigger: sustained wood moisture content above roughly 16–20% and relative humidity above 60% in confined spaces.
In our experience inspecting Toronto-area homes, black discoloration on roof sheathing often maps to bath fan exhausts terminating in the attic or blocked soffit vents. Addressing those sources is as important as cleaning the surface.
Why Black Mold on Wood Matters
Black mold on wood matters because it signals persistent moisture that can weaken structures, degrade insulation, and impact indoor air quality. Left unchecked, it can spread to drywall and contents. Effective remediation protects health, preserves framing, and prevents costly future repairs.
Why act fast? Mold signals a moisture problem that won’t fix itself. Prolonged dampness degrades wood fibers and can accelerate decay. In attics, it compresses insulation performance and elevates humidity in living spaces. In basements and crawl spaces, it often rides with seepage, plumbing leaks, or poor drainage.
- Structural risk: Persistent wetting can coincide with wood rot, requiring sistering or full replacement.
- Air quality: Musty odors and particles migrate via stack effect; HVAC returns can spread them further.
- Real estate friction: Buyers, sellers, and agents rely on clear documentation and post-remediation verification to close on schedule.
For homeowners in Ontario, our team pairs remediation with prevention: ventilation improvements, air sealing around can lights, insulated ducting, and vapor barrier corrections—fixes that keep wood dry after treatment.
How Black Mold Forms on Wood (Moisture Pathways)
Black mold forms on wood when liquid water or high humidity elevates wood moisture content for days, not hours. Typical pathways include roof leaks, attic condensation, foundation seepage, and unvented appliances. Breaking those moisture paths is the first step—cleanup is the second.
Growth is a moisture equation. When wood stays damp, spores already present in dust colonize the surface. Occupied homes produce water vapor through bathing, cooking, and breathing; without ventilation, that load condenses on cold wood in winter.
- Attics: Undersized or blocked soffits/ridge vents, bath fans dumping into the attic, air leaks from the house, and roof leaks.
- Basements: Foundation cracks, poor grading, unsealed sump pits, and dryer vents exhausting indoors.
- Crawl spaces: Exposed soil, missing vapor barriers, and low airflow keep joists wet.
- HVAC: Dirty coils, wet duct liners, or high humidity from oversizing can transport spores on air currents.
We find that mold can colonize damp building materials within roughly 24–48 hours after a water event. That’s why same-day response and containment matter when you spot discoloration on wood framing.
Prerequisites Before Any Cleaning
Before cleaning black mold on wood, stop the water source, verify safety, and set containment with HEPA filtration. Measure wood moisture, plan ventilation fixes, and select the right method: physical removal, antimicrobial application, and, if needed, encapsulation or replacement.
Solid preparation prevents cross-contamination and repeat growth. Our free inspection and moisture assessment create a clear plan your family can live with—even during repairs.
- Source control: Repair leaks, extend downspouts, re-route bath fans outdoors, and correct grading.
- Moisture verification: Use a calibrated pin meter; target wood drying near seasonal equilibrium (often under ~15%).
- Containment: Poly barriers, negative air with HEPA, and controlled access.
- PPE: Respirators with proper filters, gloves, eye protection, and disposable suits in tight spaces.
- Method choice: Abrasion (sanding/soda blasting), HEPA vacuuming, wet-wipe, and approved biocide where appropriate.
- Post-work plan: Encapsulation paints, ventilation upgrades, and re-insulation as needed.
Step-by-Step: Remove Black Mold from Wood Safely
To remove black mold from wood, isolate the area, run HEPA negative air, physically remove growth, apply an approved antimicrobial, and verify dryness before encapsulating. Finish with clearance inspection and, when applicable, air sampling to confirm normal indoor levels.
Here is a high-level process our certified team follows in Ontario homes. Use this to understand what to expect during a professional visit.
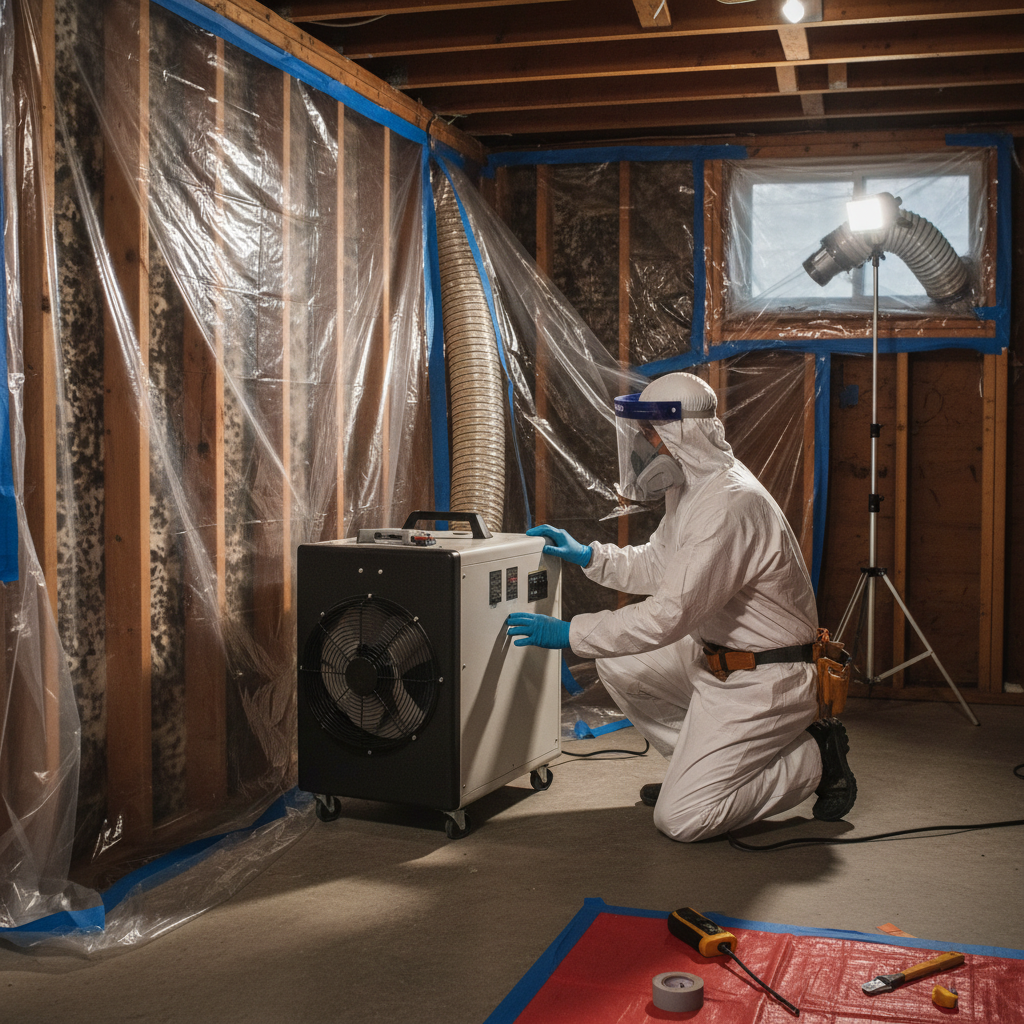
- Safety and containment: Build poly barriers and establish negative pressure with HEPA air scrubbers.
- Drying and dehumidification: Remove saturated insulation, promote airflow, and deploy dehumidifiers until wood reaches target moisture.
- HEPA vacuum: Capture loose growth and dust from surfaces and framing interfaces.
- Abrasion: Light sanding, wire-brushing, or media blasting to remove bonded growth and reveal clean wood.
- Antimicrobial application: Apply an EPA-approved product per label to treated wood.
- Encapsulation (if specified): Coat cleaned wood with a mold-resistant sealer to lock in residual staining.
- Re-insulate and air seal: Replace insulation, seal penetrations, and ensure bath fans vent outdoors.
- Verification: Visual inspection and, when requested, air/surface sampling to document normal conditions.
We back completed projects with a Mold Remediation Warranty Certificate after final inspection—documentation that helps homeowners, buyers, and agents move forward confidently.
Free same-day inspection (Ontario): If you see black mold on wood, request an assessment from our certified team. We’ll measure moisture, identify sources, and outline a safe, warranty-backed plan.
Book your inspection or call 647-451-0493.
When to Encapsulate vs Replace Moldy Wood
Clean and encapsulate wood when it’s structurally sound and dry after remediation. Replace wood when rot, delamination, deep pitting, or repeated wetting compromise integrity. When in doubt, pair an engineer’s opinion with a remediation contractor’s findings.
Staining alone isn’t a reason to remove framing. What matters is wood integrity and moisture control. Below is a quick decision framework we use during inspections across Scarborough and the Greater Toronto Area.
| Condition | Recommended Action | Why |
|---|---|---|
| Light surface growth; wood dries to seasonal norm; no odor | Clean + optional encapsulate | Surface mold removed; sealer locks in residual discoloration |
| Moderate bonded growth; minor staining persists | Abrade + encapsulate | Abrasion exposes clean fibers; encapsulant provides durable finish |
| Soft, punky, or structurally weakened sections | Partial replacement / sistering | Compromised strength requires new material |
| Recurrent wetting from unresolved source | Fix source first; re-evaluate | Cleaning fails if moisture persists |
| Delaminated sheathing, pervasive rot | Full replacement | Safety and performance concerns |
We often encapsulate attic sheathing after thorough cleaning. The coating brightens the space, aids future leak detection, and adds a forgiving layer if brief humidity spikes occur next winter.
Tools and Resources We Use
Professional mold work depends on measurement, containment, and verification. We use moisture meters, hygrometers, HEPA air scrubbers, negative air machines, approved antimicrobials, and encapsulants—plus documentation that proves the work was done to standard.
Our approach is built around safety and transparency. You’ll see what we see and receive photos before and after treatment, with notes on the fixes that prevent recurrence.
- Measurement: Pin and pinless moisture meters, thermal imaging for hidden leaks, and humidity logging.
- Containment & filtration: Poly barriers, zipper doors, negative air, and HEPA scrubbers.
- Surface removal: HEPA vacuums with sealed canisters, sanding, brushing, and media options.
- Treatments: EPA-approved antimicrobials and mold-resistant encapsulants for wood.
- Restoration: Insulation removal/replacement, drywall repairs, ventilation improvements.
- Documentation: Photos, moisture readings, and our Mold Remediation Warranty Certificate.
Explore how we work and who we serve on our About page, or see our Ontario-wide service scope on the homepage.
Troubleshooting: Stains That Return, Odors, and Failing Tests
If stains return or odors persist after cleaning, moisture is still present or ventilation is inadequate. Re-check sources, measure wood moisture, and review encapsulation coverage. If air tests fail, expand cleaning scope, upgrade filtration, and verify that the space is truly at negative pressure.
Recurring symptoms point to a missed root cause. Here’s how we resolve the most common issues in attics, basements, and crawl spaces.
- Stain reappearance: Inspect for active leaks; confirm bath fans exit outdoors; check for blocked soffits.
- Persistent odors: Evaluate insulation and stored materials; odor can stick to cardboard and fabrics.
- Dusty surfaces post-clean: Extend HEPA runtime; wipe HVAC returns; replace filters.
- Elevated spore counts: Expand cleaning footprint, including the back sides of trim or sheathing laps.
- Humidity rebounds: Add dehumidification and air seal top plates, chases, and attic hatches.
We also revisit air balance. If a home is strongly negative from exhaust-only ventilation, outside air may draw through leaky attics or crawl spaces, reintroducing particulates.
Black Mold on Wood in Scarborough Homes: What to Know
In Scarborough and the Toronto metro, winter condensation on cold roof decks and summer humidity in basements are the top drivers of black mold on wood. Local remediation focuses on ventilation fixes, air sealing, and drainage—plus safe cleaning and encapsulation where wood remains sound.
Neighborhood housing stock often includes vented attics with limited soffit area and older bath fan runs. We frequently update ducting and clear soffits while treating stained sheathing and rafters. Basement joists near foundation walls can stay cool and damp—especially after heavy rains—so drainage and dehumidification are key.
Local considerations for Scarborough
- Plan access around transit and peak times near the Lawrence East subway station; we coordinate arrival windows to minimize disruption.
- Winter projects prioritize condensation control; summer projects focus on dehumidification and drainage checks after storms.
- For multi-family or commercial spaces along Kennedy Rd, we stage discreet containment so foot traffic and operations continue safely.
Our facility at 1225 Kennedy Rd makes same-day inspections across Toronto practical. You’ll get a clear plan and a documented close-out, not just a quick wipe-down.
Case Studies: From Attic Sheathing to Basement Joists
Real projects show the difference between cosmetic stains and structural problems. We pair moisture control with precise cleaning, then verify with readings and photos. When needed, we coordinate partial replacement and issue a warranty-backed close-out.
These short Ontario examples mirror what many homeowners experience.
1) Scarborough attic with winter staining
A 1990s home showed black discoloration on roof sheathing above bathrooms. Moisture meter readings were high; bath fans terminated in the attic. We installed insulated ducting to outdoors, cleaned and encapsulated sheathing, air sealed the top floor, and re-insulated. Follow-up readings were normal the next season.
2) Toronto basement joists after a hidden leak
A slow plumbing leak darkened joists under a kitchen. After source repair, we contained the area, HEPA vacuumed, abraded surfaces, and applied antimicrobial. We rechecked moisture a week later before encapsulating. The homeowner received documentation for a pending real estate sale.
3) Crawl space with exposed soil
A bungalow’s crawl space had musty odors and darkened joists. We added a 6-mil vapor barrier, improved vents, cleaned and encapsulated framing, and set a dehumidifier on a humidistat. Odors resolved and wood moisture normalized.
Frequently Asked Questions
Homeowners ask how to identify mold, whether to clean or replace wood, and how to stop it from coming back. The short answers: confirm moisture, clean and encapsulate sound wood, replace only when structurally compromised, and fix sources so wood stays dry.
How can I tell if it’s black mold versus a wood stain?
Texture and transfer are clues. Mold has a matte, patchy look and may smear when damp-wiped; tannin stains are flat and don’t transfer. If in doubt, get a professional inspection and, if needed, surface or air sampling to confirm.
When should moldy wood be replaced?
Replace when wood is soft, crumbling, delaminated, or has lost structural section. If it dries to normal and remains solid after cleaning, encapsulation is typically sufficient. Persistent leaks or rot tip the decision toward replacement.
Is attic mold dangerous if I don’t go up there?
Even if you rarely enter the attic, air and odors can communicate with living spaces through gaps and ceiling penetrations. Mold also signals a moisture problem that can damage insulation and sheathing. Addressing it protects comfort, structure, and resale.
Can I just paint over black mold on wood?
No. Painting over active growth hides the symptom and can trap moisture. Proper steps are source control, drying, physical removal, antimicrobial application, and then an appropriate encapsulant on dry, sound wood.
Conclusion and Key Takeaways
Treat black mold on wood as a moisture problem first and a cleaning problem second. Fix sources, clean and encapsulate sound wood, replace only when structure is compromised, and document results. This sequence prevents repeat growth and protects your home’s value.
- Moisture drives growth: Control humidity, leaks, and drainage to keep wood dry.
- Sound wood can stay: Clean, treat, and encapsulate when integrity is intact.
- Replace when weak: Rot, delamination, or repeated wetting demand new material.
- Verify and document: Request readings, photos, and a warranty-backed close-out.
Ready to solve black mold on wood the right way? Start with a free inspection and clear plan. Visit our homepage or contact our team for Ontario-wide, same-day response.
For background on common bathroom moisture drivers that spark attic and ceiling issues, see this discussion from Everest Plumbing on bathroom mold causes. For a cleaning overview in another market, Shining Services describes mould cleaning basics. For outdoor wood susceptibility context, review HR Green Roots on deck wood selection.